Homemade Crabapple Jelly with No Added Pectin
This post may contain affiliate links, which means that I may receive a commission if you make a purchase using these links. As an Amazon Associate I earn from qualifying purchases.
Transform the tart flavor of crabapples into a delicious homemade crabapple jelly. Crabapples have enough natural pectin so no additional pectin is needed for this crabapple jelly recipe.
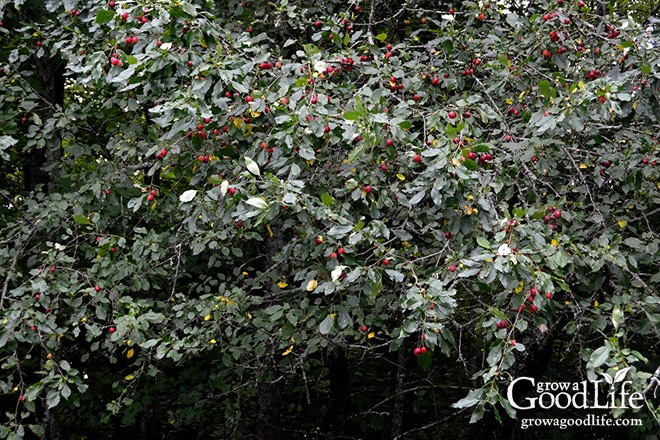
One of the fruit trees on the edge of our property is a crabapple tree. These are often planted along with traditional apple trees to help with pollination. They are hearty trees that don’t require much care.
Both crabapples and apples are in the Rosaceae family, and members of the Malus genus. Crabapples are small trees often reaching about 15-to 25-feet at maturity. The fruit is under two-inches in diameter and the flavor is very tart. My crabapples ripen before the rest of the apple trees, so I like to take advantage of their ruby goodness.
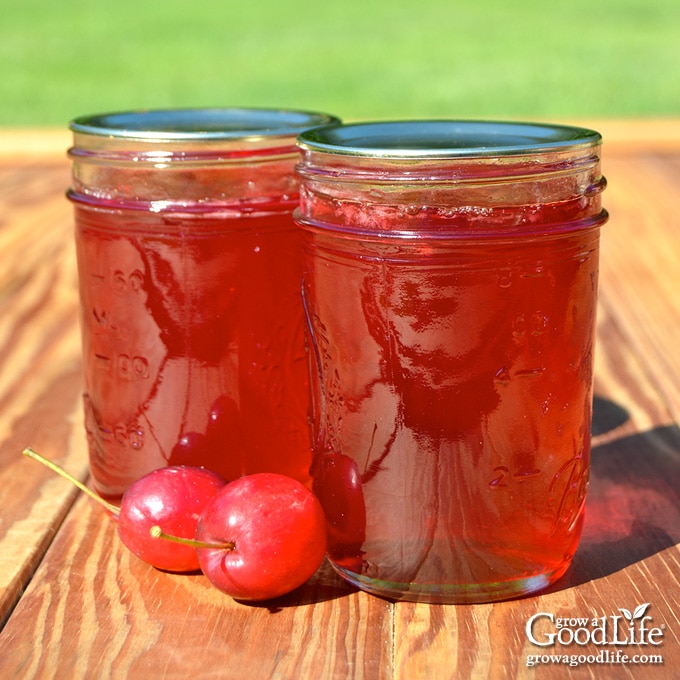
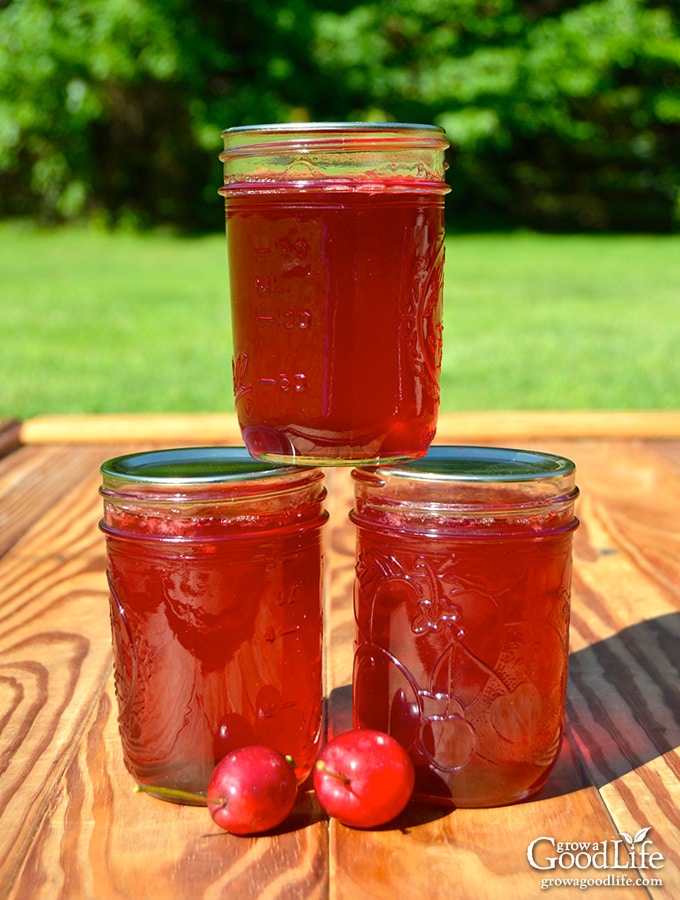
With a little sweetening, crabapples can be transformed into a delicious crabapple jelly that can be enjoyed on homemade bread, swirled into yogurt or paired with roast pork.
Tips for Making and Canning Homemade Crabapple Jelly
Jellies are made by heating juice with sugar, and need the right mixture of fruit, pectin, acid, and sugar for it to form a gel. Pectin is a naturally occurring complex carbohydrate in fruit that is concentrated in the fruit’s skin and the core. When pectin is cooked with sugar, it thickens to a gel.
Crabapples contain lots of natural pectin, so no additional pectin is needed for this recipe. Here are tips for making crabapple jelly:
Use good quality crabapples
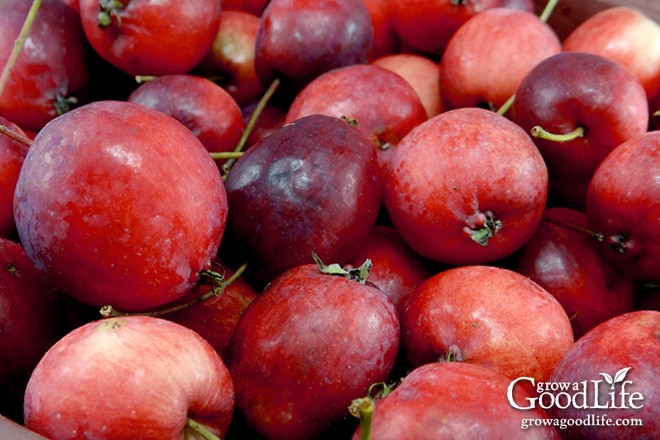
Select firm crabapples with no signs of insect or worm damage. Unripe fruit has more pectin than ripe fruit, but ripe fruit has more developed flavor. So try to mix about 75% ripe fruit with 25% under ripe fruit. You can tell if an apple is ripe by cutting it open and looking at the seeds. A mature crabapple will have brown seeds, and an under ripe apple will have light colored seeds.
Give yourself plenty of time
Allow time for the crabapple juice to strain. When making juice or jelly, I typically split the process over a few days to allow extra time for the juice to strain completely. This is even more important with crabapple jelly because you want to get as much of the natural pectin from the juice as you can so your jelly thickens up properly.
Don’t double the batch
Follow the recipe, and work in small batches when making crab apple jelly. Since you are counting on the natural pectin found in the fruit, you don’t want to overheat the mixture. If you double the recipe, it will take longer to heat to the proper temperature. Too much heat will destroy the pectin, and it will break down and fail to gel.
How to test for jelly stage
If you are new to making jelly, the NCHFP website has a nice description of how to tell when the jelly point has been reached: Testing Jelly without Added Pectin.
- Temperature Test: Use a candy thermometer to monitor the temperature of the jelly. Jelly stage is when the temperature of the boiled juice is 220˚F at altitudes of less than 1,000 feet (see notes for altitude adjustments).
- Spoon or Sheet Test: Plunge a cool metal spoon into the boiling jelly mixture, lift the spoon out, and turn it sideways so the liquid runs off the side. The jelly stage had been reached when the liquid forms two drops that flow together into a sheet that hangs off the edge of the spoon.
- Refrigerator/Freezer Test: Place several plates in the freezer before you begin making your jelly. To check for jelly stage, place a spoonful of hot jelly onto the cold plate and let it rest for 30 seconds. Tip the plate to one side. Jelly stage is reached when the mixture gels on the cool plate and doesn’t run down the plate when tipped.
Cooking time will vary with each batch because the natural pectin level is different in each individual apple. I use all three testing methods but rely on the freezer plate method for the final check.
Don’t have a water bath canner?
You can use a large pot with a lid as a water bath canner to process the jars. You will need a pot that will hold 6 half-pint sized jars in a single layer with some space in between the jars. The pot also needs to be tall enough to cover the tops of the jars with 2-inches of water, plus 2-inches of additional space to prevent boiling water from splashing out of the pot. Place a rack in the bottom to elevate the jars up away from direct heat, and allow the water to circulate around the jars as they are processed.
Steps for Making Crabapple Jelly
To make jelly, we are going to extract the juice and natural pectin from the crabapples, combine it with sugar, and cook it to evaporate moisture and form a thick spreadable jelly.
If you are new to canning or haven’t canned in a while, it may be helpful to review this article on water bath canning at the National Center for Home Food Preservation website.
A more detailed and printable recipe can be found at the bottom of this article, but these are the illustrated steps for making crabapple jelly.
Step 1: Gather Your Equipment
You will need:
- Water bath canner or large pot with a rack
- 6 half-pint canning jars
- Lids and bands (new lids for each jar, bands can be reused)
- Canning tools: jar lifter, canning ladle, funnel, and bubble popper
- Jelly strainer
- Candy thermometer
- Kitchen scale
- Plus basic kitchen supplies such as a large pot, large bowl, towels, potato masher, measuring cup, knife, and a cutting board.
Step 2: Prepare the Fruit and Extract the Juice
Wash the crabapples plain water, remove stems, cut out any bad spots, and trim the blossom ends. Cut the crabapples in half. Use a kitchen scale to weigh out 3 pounds for this recipe.
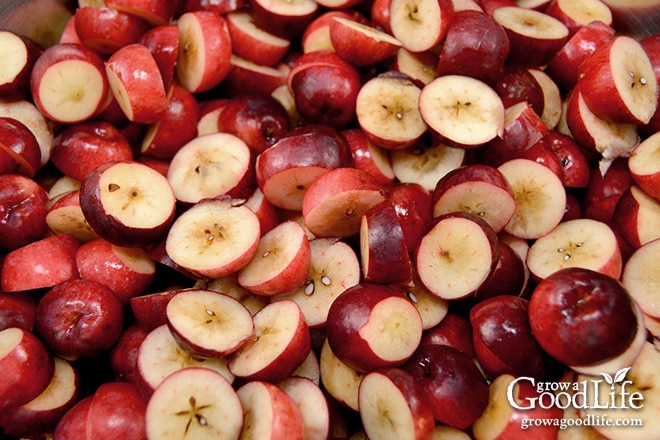
Extract the juice by combining the prepared crabapples in a large saucepan with enough water so that the fruit is barely covered, about 3 cups.
Bring the pot to a boil over medium-high heat, and then reduce to a simmer. Cook while stirring occasionally to prevent sticking. As the fruit softens and breaks down, gently mash with a potato masher, and continue simmering over low heat for about 20 minutes. Don’t be tempted to increase the temperature to speed things up, because too much heat will destroy the pectin.
Strain the juice through a damp jelly bag or double layers of cheesecloth. Allow the fruit to strain for several hours, or overnight in the refrigerator. If you want clear jelly, don’t squeeze the bag. When the jelly is finished straining, compost the solids.
Step 3: Prepare the Canning Equipment
When you are ready to make the jelly, gather your canning equipment, prepare the jars, set up the canner, and organize your work area.
Wash your jars, lids, bands, and canning tools in warm, soapy water. Rinse well, and set the lids, bands, and tools aside to air dry until you are ready to use them. As you wash the jars, look them over for nicks and cracks. Eliminate any jars that are damaged as these will break in the canner.
Jars must be heated before filling to prevent breakage due to thermal shock. Place the jar rack into the water bath canner, set the jars upright in the canner, and add water to cover the jars. Bring the canner to a simmer (180˚F) for 10 minutes, and keep the jars hot until you are ready to fill them.
Step 3: Make the Jelly
Place several plates in the freezer before you begin making your jelly. These will be used to test the jelly.
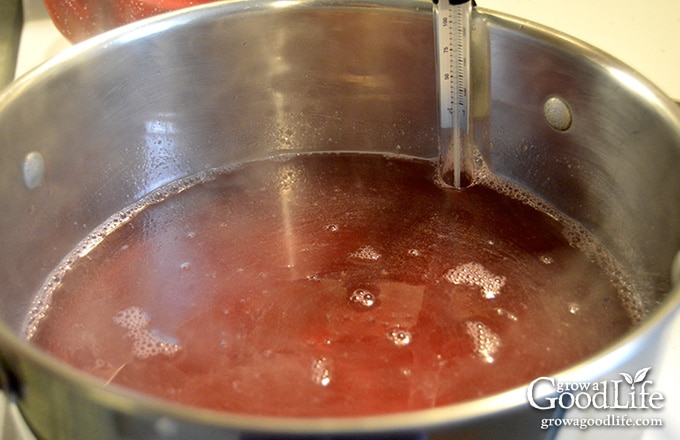
Attach the candy thermometer to a large saucepan, and pour 4 cups of crabapple juice into the pan. Add the sugar, and stir to dissolve. Bring the juice to a boil over medium-high heat, stirring constantly, until jelly stage. Skim off any foam that forms.
Jelly stage is achieved once the temperature reaches 220˚F at altitudes of less than 1,000 feet (see notes for altitude adjustments), when the liquid forms a sheet that hangs off the edge of the spoon, and when the mixture gels on a cool plate and doesn’t run when tipped.
Step 4: Can the Jelly
Spread a kitchen towel on the counter. Use the jar lifter to remove a hot jar from the canner, drain, and place on the towel. Keep the remaining jars in the canner, so they stay warm.
Place the canning funnel on the jar, and ladle hot jelly into the jar while leaving 1/4-inch headspace. Run the bubble popper through the jar to release any trapped air bubbles.
Wipe the rim with a damp towel to remove any residue. Center a lid on the jar, place the band over the lid, and screw it on until fingertip tight. Place the jar back into the canner, and repeat with the rest of the jars.
Adjust the water level so it is covering the jars by several inches, bring the pot to a boil, and process the jars for the times indicated in the recipe below. Let the jars cool, test the seals, label and date the jars, and store in a cool, dark location.
Homemade Crabapple Jelly with No Added Pectin
Instructions
Extract the Juice:
- Wash the crabapples well in plain water, remove the stems, cut out any bad spots, and trim the blossom ends. Cut the crabapples in half. Use a kitchen scale to weigh out 3 pounds.
- Extract the juice by combining the prepared crabapples in a large saucepan with enough water so that the fruit is barely covered, about 3 cups.
- Bring to a boil over medium-high heat, then reduce to a simmer, and cook the crabapples. Heat and simmer slowly until skins have softened, and the juices are released.
- Gently mash the crabapples with a potato masher and simmer over low heat for about 20 minutes, stirring occasionally. Do not overcook crabapples because excess heat will destroy the pectin and change the flavor and color.
- Strain the cooked fruit through a damp jelly bag or double layers of cheesecloth. Allow the crabapples to strain for at least 2 hours or overnight in the refrigerator.
- If you want clear jelly, do not squeeze the bag. I care more for flavor rather than appearance, so I often give the bag a squeeze to press out all the flavorful juice. Discard solids.
Prepare the Canning Equipment
- Wash your jars, lids, screw bands, and canning tools in hot soapy water. Rinse thoroughly to remove all suds. Set aside to air dry on a clean kitchen towel.
- Place the jar rack into water bath canner, place jars in the canner, and add water to cover.
- Bring the canner to a simmer (180˚F) for 10 minutes, and keep the jars hot until you are ready to fill them.
Make the Jelly
- Measure 4 cups of crabapple juice and pour it into a saucepan, add the sugar and stir to dissolve. Bring to a boil over medium-high heat, stirring constantly, until jelly stage.
- Jelly stage is achieved once the temperature reaches 220˚F at altitudes of less than 1,000 feet (see notes for altitude adjustments), when the liquid forms a sheet that hangs off the edge of the spoon, and when the mixture gels on a cool plate and doesn't run when tipped.
Can the Jelly
- Lay a kitchen towel on the counter. Use the jar lifter to remove a jar from the canner, drain the water back into the canner, and place it on the towel. Keep the remaining jars in the canner so they stay hot.
- Use your canning ladle and funnel and add the hot jelly to the warm jar leaving 1/4-inch headspace. Swirl your bubble popper through to release air bubbles, and wipe the rim of the jar with a damp towel to remove any sticky residue.
- Center a lid on the jar, and screw on the band until it is fingertip tight. Use the jar lifter to place the jar back into the canner, and repeat with the remaining jars. Try to leave some space in between the jars.
- Once all the jars are in canner, adjust the water level to two inches above the jar tops.
- Cover the canner and bring to boil over high heat. Once the water boils vigorously, continue boiling for 10 minutes at altitudes of less than 6,000 ft. (adjust processing time for your altitude if necessary – see notes below).
- When processing time is complete, turn off heat and allow the canner to cool down and settle for about 5 minutes.
- Spread a dry kitchen towel on the counter. Remove the cover by tilting lid away from you so that steam does not burn your face.
- Use the jar lifter to lift jars carefully from canner and place on the towel. Keep the jars upright, and don't tighten bands or check the seals yet. Let the jars sit undisturbed for 12 to 24-hours to cool.
- After the jars have cooled for at least 12 hours, check to be sure jar lids have sealed by pushing on the center of the lid. The lid should not pop up. If the lid flexes up and down, it did not seal. Refrigerate the jar and use up within a few weeks.
- Remove the screw on bands and wash the jars. Label and date the jars. Store your jars in a cool, dark place and use within 12 to 18 months. Yields about 4 to 6 half-pint jars depending on the natural pectin level in your crabapples. Refrigerate the jelly once opened and consume within 2 weeks.
Notes
- Temperature Test: Adjustments for altitude: 1,000 feet = 218˚F, 2,000 feet = 216˚F, 3,000 feet = 214˚F, 4,000 feet = 212˚F, 5,000 feet = 211˚F, 6,000 feet = 209˚F, 7,000 feet = 207˚F, 8,000 feet = 205˚F,
- Processing Time: Adjustments for altitude: 6,001 – 8,000 feet = 15 minutes, above 8,001 feet = 20 minutes.
Nutrition
This recipe was originally published September 4, 2015. It has been reviewed, updated with additional information, and new photos.
Additional Canning Information:
You May Also Like:
- Concord Grape Jelly
- Chokecherry Jelly
- Spiced Apple Jelly with No Added Pectin
- Other Ways to Preserve Apples
Good planning is key to a successful vegetable garden
Whether you are new to growing your own food or have been growing a vegetable garden for years, you will benefit from some planning each year. You will find everything you need to organize and plan your vegetable garden in my PDF eBook, Grow a Good Life Guide to Planning Your Vegetable Garden.


It says to remove the screw on lids after everything is done. Can you tell me why?
Kathy, I recommend removing the rings and thoroughly washing the jars to prevent food residue from molding during storage. This also prevents the rings from rusting and becoming difficult to remove due to trapped residue. Storing without the rings allows you to check if the jars have sealed properly, as a ring can hold a poorly sealed lid in place.
Should the jelly set overnight? Mine looks like it hasn’t set yet. It’s been 10-11 hours. What did I do wrong? Can I fix it if it doesn’t set? It’s more like a thin syrup fight now…
Carla, Let the jars sit undisturbed for 12 to 24 hours to cool. If your jelly reached the gel point (see tips above), it will likely set. Sometimes it takes a while, but you should not jiggle or tilt the jars as it could prevent the jars from sealing. Here are tips for remaking running jelly.
This year the crabapple tree in our garden produced more apples than ever, and they are big and beautiful! So we made jelly yesterday using this recipe, which is excellent — thank you! The jelly set perfectly and is a beautiful color. The only thing was, we started with more apples than specified here. We used 4.2 lbs rather than 3 lbs, and, following all directions exactly, we ended up with 2 cups of juice, which made two half-pint jars of jelly.
I wonder why we got much less juice than expected. Could it be that after a long summer of drought, our apples are less juicy than they would be otherwise? They look very healthy. The other thing is that the thermometer never got past about 150F, even when the juice was boiling. We just used the other two tests and it was perfectly jelled. We are making a new batch today.
Branda B, I am so happy you enjoyed the recipe. As you thought, the amount of juice will vary depending on how much moisture is in the apples. The drought affected our apples too this year, and they were much smaller and not as juicy. It sounds like your thermometer is inaccurate, especially since your mixture came to a boil. I am glad the alternative gel tests worked for you.
Can you prep all the Crabapple at once then follow the remaining steps
Brenda, Yes, you can juice the crabapples all at once and then refrigerate or freeze the juice until you are ready to make your jelly.
Thank you so much. I made my first batch yesterday and it turned out amazing. Although it was jellied at 220 not sure if that is what it’s suppose to do. I bottled it and had a bit left over.
I really love this recipe.
Totally awesome recipe. The directions are absolutely clear. This is my first time trying to can crab apples and I had 2 difficulties. Reading other comments, it may be an overcooking issue, but not sure.
1. To strain the juice I used a cotton pillow case. Used a lot of crab apples (177 – Certo recommended 59 per batch) and ended up with only 3 1/2 cups of juice after hanging it in the fridge overnight. In addition, the juice was pretty jelled already. Cooked too high temp? too little water? other?
2. To the 3 1/2 cups of jellied juice I added 3 cups of sugar and the cinnamon stick. I think I followed your directions, but at the end I tried to skim off “foam”, but it kept on forming, so I just left it in the liquid and poured it into the jars. Canning went well, but I didn’t quite fill one jar and it came apart during the boil.
24 hours later we have 4 small jars of totally awesome jelly with a white skim at the top. This batch won’t last long and I’d like to do better next time. Do you have some pointers re where I screwed up?
Dee, You did good! It isn’t easy to guess the amount of liquid you will get because it depends on how juicy your apples are. The fact that the liquid was thick after straining could be because your apples had a lot of natural pectin or from a little too much heat. Just be sure to simmer the apples over low heat while mashing to release the liquid.
The foam can be tricky, but do your best to skim it off. You may want to reduce the heat a little if it is difficult to manage. If I end up with a partial jar, I don’t even bother processing it in a water bath canner. Just let it cool, refrigerate, and use up within several weeks. I hope this helps!
One year instead of composting solids, I ran them through a kitchenaid attachment that separates seeds and peel from the fruit, added a little sweetening and spices, spread it thin on parchment paper and dehydrated it. Best hiking snacks!! I stored it in freezer.
Crystal, That is a great way to use up the skins. Next time, remove the seeds first, they can clog up the screen and damage your mixer, and they are not safe to eat in large amounts.
I tried my first batch of crab apple jelly and used the thermometer method. I opened a jar to try it and it is so thick it will not come off the spoon unless you eat it off. It took probably 15-20 minutes to reach 220 degrees. Did it cook too long is reason is so thick?
Debbie, I am sorry your jelly didn’t come out as expected. The most common reason jellies come out too thick is from overcooking. Next time, try to use the sheet testing method along with the temperature test. You can remake the jelly by reheating it with a cup of apple juice. Bring it back to a boil and start testing with the spoon test and freezer test right before it reaches 220˚F. Use new lids, and process again in a water bath canner.
I’ve made two batches but after boiling and straining the juice I only get about 2 & 1/2 cups. Is it just because of the level of juice in my crab apples?
Jerry, It may be the apples. However it may be because you are boiling the crabapples. You may be evaporating too much of juice at such a high heat. You should be simmering the apples, not boiling them: “Bring to a boil over medium-high heat, then reduce to a simmer, and cook the crabapples.”
I cannot see where you indicate how much sugar to use, excited to try this.
Judith, The amount is listed in the recipe.
I have been using your recipe for about 5 years now. Always works out great! I even use it to make crab apple pepper jelly. I have 3 different species of crab apple trees on my Great Grandmother’s homestead (1921) here in Canada. I combine all three into your recipe. Makes for a great tasting jelly!
Thanks much!
Bill
William, Thank you for your comment. I bet your Great Grandmother made good use of the crab apples in her time and now you are following in her footsteps. I am so glad you enjoy the recipe.