Sweet Zucchini Relish Canning Recipe
This post may contain affiliate links, which means that I may receive a commission if you make a purchase using these links. As an Amazon Associate I earn from qualifying purchases.
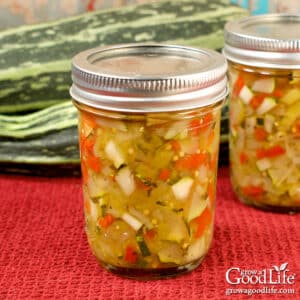
This classic zucchini relish is a great way to preserve extra garden zucchini. Sweet, tangy, and perfect for hot dogs, burgers, and sandwiches. Turn fresh zucchini into a delicious sweet relish with this safe water bath canning recipe.
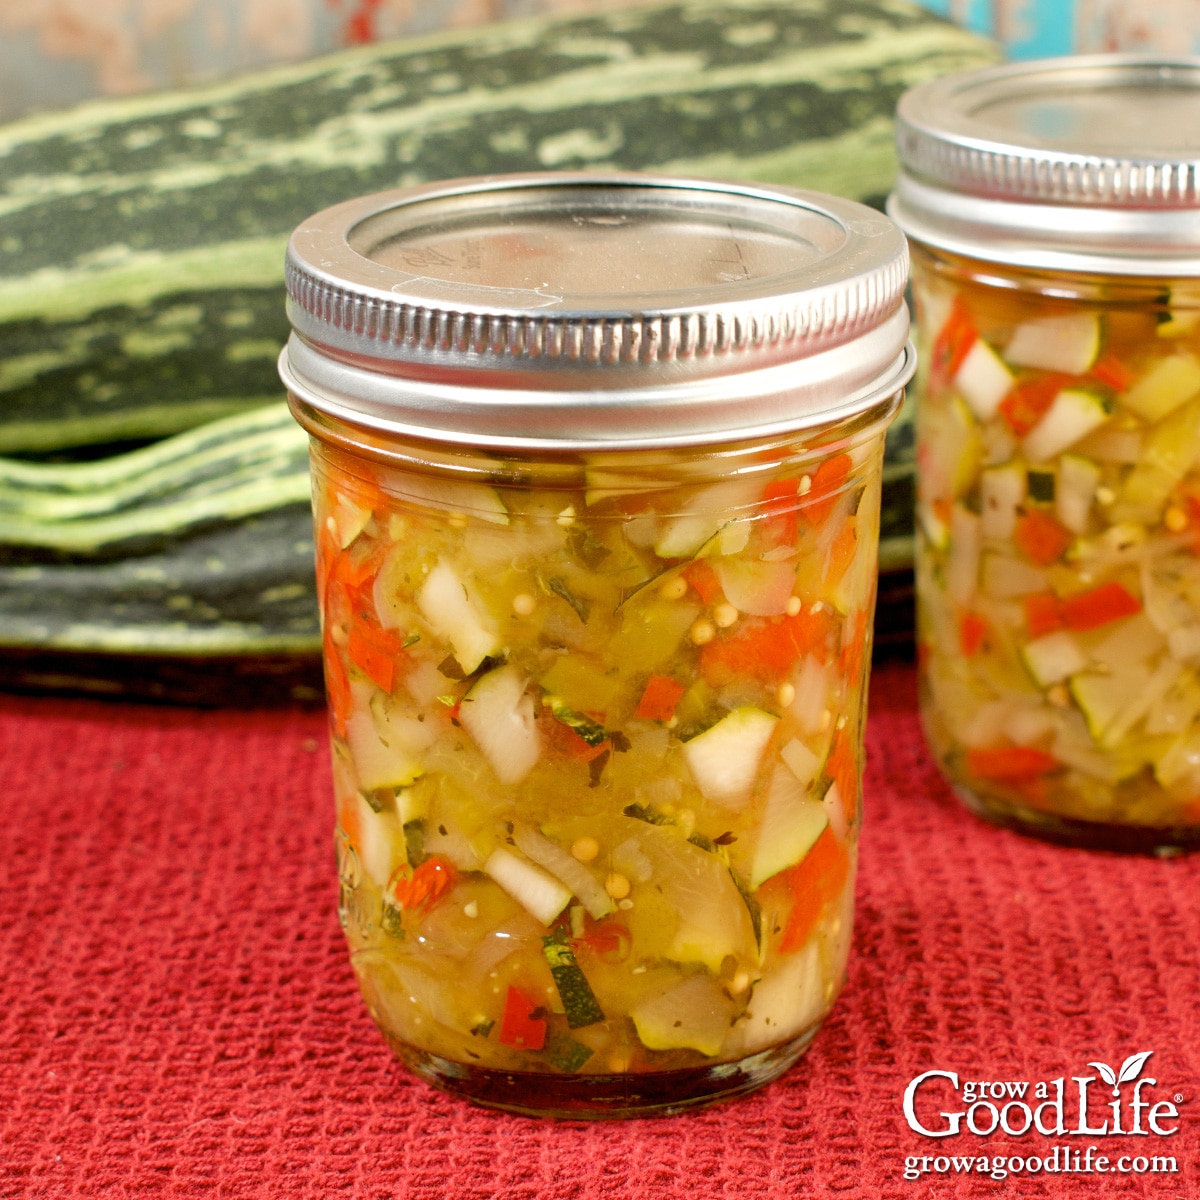
Zucchini relish is a great way to preserve an abundance of summer zucchini from your vegetable garden. This classic sweet relish is made with zucchini, onions, and bell peppers and has a slightly tangy flavor that goes perfectly with hamburgers, hot dogs, sandwiches, and picnic salads.
If you’re like most gardeners, once summer arrives, you probably have more zucchini than you know what to do with. Maybe a few large ones even appeared overnight! This zucchini relish recipe is the perfect way to use those oversized zucchini and enjoy them all year long.
I’ve been making this relish every summer for years, and it’s one of the easiest ways to turn extra zucchini into something useful and delicious. If you prefer a version with a little heat, try my Spicy Zucchini Relish with Horseradish, another tasty way to preserve your summer harvest.
Why You’ll Love This Zucchini Relish
- A great way to use up large or oversized zucchini
- Sweet, mild, and family-friendly flavor
- Simple water bath canning recipe
- Keeps up to 18 months in the pantry
- Versatile: delicious on sandwiches, burgers, sausages, and more
- Tested safe recipe based on the Ball Blue Book Guide to Preserving
About the Ingredients
Here is an overview of the ingredients you will need to make about 8 half-pints of this sweet zucchini relish canning recipe:
Zucchini or Summer Squash
You will need about 1 1/4 to 1 1/2 pounds (about 2 to 3 small zucchini or 1 medium-large) zucchini to yield 4 cups of chopped zucchini. Any type of summer squash can be used in this recipe, including green zucchini, yellow squash, crookneck, zephyr, or pattypan. Choose firm fruit without soft spots, insect damage, or wrinkled skin.
Bell Peppers
You will need about 3/4 pound of peppers for this recipe, or about 2 medium bell peppers. I like mixing a green bell pepper and a red bell pepper to add a pop of color. You can use any type of pepper in this recipe, sweet or hot. Feel free to spice up the relish by adding a few hot peppers to the mix (Wear gloves when handling hot peppers so you don’t burn your hands). But, keep the total amount the same for safe canning.
Onions
You will need about 3/4 pound of onions (2 medium onions) to yield 2 cups of chopped onions. Choose any variety of bulb onion. All work well and will slightly change the flavor of the relish:
- Red onions add a mild flavor and will tint the relish slightly pink after canning
- White onions have a sharper flavor that mellows during processing
- Yellow onions are a reliable all-purpose option
- Sweet onions add natural sweetness and balance the vinegar
Pickling Salt
Pickling or canning salt is pure salt without additives. Table salt contains anti-caking agents and iodine, which can cause cloudiness and off-flavors in home-canned foods. For best results, always use pickling salt in relish and pickle recipes.
Vinegar (5% Acidity)
When pickling, use commercial vinegar with at least 5% acidity. The most common types used for canning are apple cider and distilled white vinegar:
- Apple cider vinegar is made from fermented apples and adds a slightly sweet apple flavor to pickled foods, but it will slightly darken the vegetables.
- White vinegar is clear vinegar made by distilling corn and rye. The flavor is sharper than apple cider vinegar. Choose an organic brand to avoid genetically modified corn.
Sugar
Sugar balances the sharpness of the vinegar and gives this relish its classic sweet and tangy flavor.
Mustard Seed and Celery Seed
These spices give the relish its familiar old-fashioned taste. Celery seed adds savory depth, while mustard seed adds a mild pickled flavor without overpowering.
Safe Ingredient Adjustments
If you’d like to adjust the flavors slightly, you can safely swap some ingredients in this recipe as long as you keep the total amount of vegetables and vinegar the same.
For more details on what you can and can’t change in relish recipes, see this guide:
How to Modify Pickle and Relish Canning Recipes Safely.
Measure the Vegetables After Chopping
This recipe calls for chopped vegetables. This means you will prepare and chop your vegetables as described in the recipe and then measure using measuring cups. Prepare the vegetables one at a time. Pulse the vegetables in food processor to chop, and add to a measuring cup as you go until you reach the required amount for the recipe.
Steps for Making Zucchini Relish
This simple zucchini relish recipe is from the Ball Blue Book Guide to Preserving and is a reliable way to preserve zucchini using a water bath canner.
If you are new to canning or haven’t canned in a while, you may find it helpful to review the basics before getting started: Water Bath Canning for Beginners.
To make your canning day easier, I also have a free Home Canning Checklist you can print and use to stay organized. It includes safety reminders, prep steps, and space to track your batches. Get it here:
Grab your Free copy
Home Canning Checklists
You can find the complete printable recipe at the bottom of this article, but here are the general step-by-step instructions for making and canning zucchini relish:
Step 1: Gather Your Kitchen and Canning Equipment
You’ll need:
- Food Processor or knife and cutting board
- Measuring cups
- Water bath canner with canning rack
- 8 half pint canning jars
- Canning lids and bands (new lids, bands can be reused)
- Canning tools: canning ladle, funnel, and bubble popper
- Plus basic kitchen supplies such as large prep bowls, large pot, large spoon, large colander, and clean kitchen towels.
Step 2: Prepare the Vegetables
This recipe calls for chopped vegetables. This means you will prepare and chop your vegetables as described in the recipe, then measure them using measuring cups.
Wash, trim, and chop each vegetable one at a time, measuring after chopping to ensure the correct proportions for safe canning. The ratio of vegetables to vinegar is important in relish recipes to maintain proper acidity, so measure carefully.
You can finely chop the vegetables by hand using a sharp knife, or pulse them in a food processor for faster preparation. Just be sure to chop everything into uniform pieces for even texture in the finished relish.
Zucchini
You will need about 1 medium to large zucchini. Wash well to remove any residue and soil. Trim and discard a 1/4-inch slice from both ends of the zucchini. The blossoms contain an enzyme that can cause soft pickles, so it is important to remove this.
If you are using large, overgrown zucchini, cut the zucchini in half lengthwise and scoop out the spongy seed cavity before chopping. If the skin is tough, peel it to avoid adding a chewy texture to the relish.
Chop and measure using a measuring cup as you go, then add 4 cups of chopped zucchini to a large prep bowl.
Peppers
About 2 medium bell peppers will give you 2 cups of chopped peppers. Wash the peppers well, then cut them in half and remove the stems, ribs, and seeds. Chop, measure, and add 2 cups of chopped peppers to the bowl.
Onions
About 2 medium onions will yield 2 cups of chopped onions. Peel the onions, and chop, measure, and add to the bowl.
Step 3: Soak the Vegetables in Salted Ice Water
Soaking the vegetables in salted ice water for several hours helps the texture and flavor of your finished relish.
Sprinkle pickling salt over the vegetables and mix well. Cover with crushed ice or ice cubes and enough cold water to cover. Let it stand at room temperature for 2 hours, or refrigerate overnight.
Step 4: Prepare the Canning Equipment
When the vegetables are almost finished soaking, prepare the jars, set up the canner, and organize your work area.
Wash your canning jars, lids and bands, and canning tools with warm, soapy water and rinse well. Look the jars over carefully, and eliminate any with chips and cracks. Pay special attention to the rims of the jars. Minor chips can prevent the lids from sealing.
Place the canner on the stove and insert the canning rack. Set the jars in the canner, add water to cover, and simmer (180˚F) for 10 minutes. Keep warm until you are ready to fill them.
Step 5: Make the Sweet Relish Brine
Drain the vegetables in a colander and rinse well under cold water to remove excess salt. Then use your hands to press out as much liquid as you can.
In a large pot, combine the sugar, celery seed, mustard seed, and vinegar. Bring it to a simmer over medium heat. Add the drained zucchini mixture and stir to combine. Continue simmering for 10 minutes and keep hot as you fill your jars.
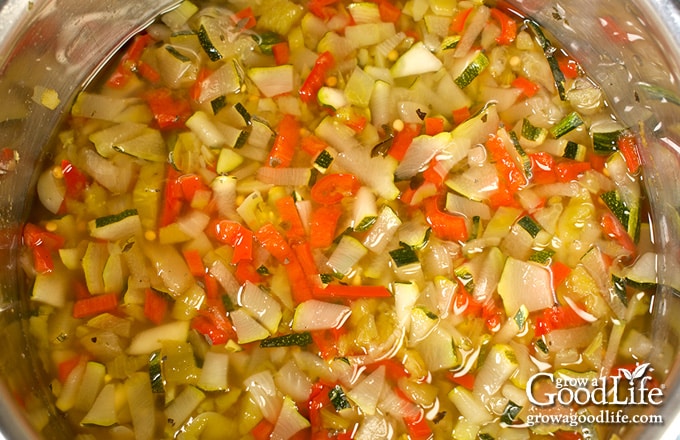
Step 6: Fill the Jars
Spread a dry kitchen towel on the counter. Use the jar lifter to remove a warm jar from the canner, drain it, and place it on the towel. Keep the remaining jars in the canner to keep them warm.
Place the canning funnel on the jar, and ladle the hot relish into the jar while leaving 1/2-inch headspace. Run the bubble popper through the jar to release any trapped air bubbles. Adjust the headspace again if needed.
Wipe the rim with a damp towel to remove residue. Center a lid on the jar, add the band, and screw it on until fingertip tight. Place the jar back into the canner, and repeat with the rest of the jars.
Step 7: Process in a Water Bath Canner
Adjust the water level so the jars are covered by two inches of water, cover the canner, and bring it to a rolling boil over medium-high heat. Once the water boils vigorously, set a timer and process the jars in a boiling-water canner for the times indicated in the recipe below.
Step 8: Cool and Store
Once the processing time is complete, turn off the heat and remove the canner lid. Let the jars rest in the hot water for about 5 minutes so the pressure inside the jars can stabilize.
Lay a clean towel on the counter. Using a jar lifter, carefully lift the hot jars straight up out of the canner and place them on the towel. Leave space between the jars to allow air to circulate as they cool. Do not tighten the bands or disturb the lids while the jars are sealing. Let them cool at room temperature for 12 to 24 hours.
After the jars have cooled, check the seals by pressing the center of each lid. A sealed lid will feel firm and will not flex up and down. Place any unsealed jars in the refrigerator and use them within a month. Remove the screw bands, wash the jars to remove any sticky residue, and label and date them.
Store sealed jars in a cool, dark place and use within 12 to 18 months for best quality. For the best flavor, allow the relish to develop flavor for 2 to 4 weeks before opening a jar. Once opened, store in the refrigerator, and use within a month.
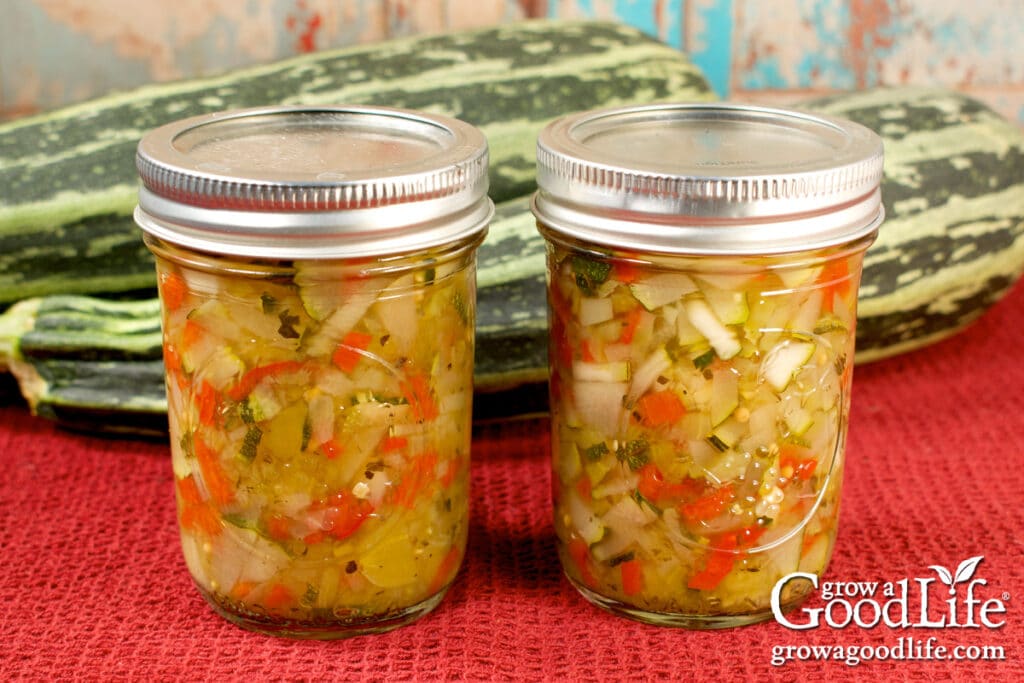
Ways to Use Sweet Zucchini Relish
Sweet zucchini relish is more than just a hot dog topper. Here are some easy and delicious ways to enjoy it:
- Spoon over burgers, hot dogs, sausages, or brats
- Stir into tuna salad, chicken salad, or egg salad for extra flavor
- Mix with mayonnaise for a homemade tartar sauce for fish sticks
- Add to potato or macaroni salad
- Serve with grilled meats or roasted vegetables
- Add to a charcuterie or snack board with cheese and crackers
Sweet Zucchini Relish Canning Recipe
Ingredients
- 4 cups chopped zucchini
- 2 cups chopped bell peppers
- 2 cups chopped onions
- 1/8 cup pickling salt
- 3 1/2 cups sugar
- 1 tablespoon celery seeds
- 2 teaspoons yellow mustard seeds
- 2 cups apple cider vinegar 5% acidity
Instructions
Prepare the Vegetables
- Add the chopped zucchini, peppers, and onions to a large bowl.
- Sprinkle salt over the vegetables and toss to combine. Cover with crushed ice or ice cubes and water and let stand for 2 hours.
Prepare the Canner and Jars
- Wash your jars, lids, screw bands, and canning tools in hot soapy water. Rinse thoroughly to remove all suds. Set aside to air dry on a clean kitchen towel.
- Place the jar rack in the water bath canner, add jars, and cover with water. Bring the canner to a simmer (180˚F) for 10 minutes, and keep the jars warm until you are ready to fill them.
Make the Relish
- Drain the vegetables and rinse them well with cool water to remove excess salt. Press to squeeze out as much moisture as you can.
- Add the sugar, celery seeds, mustard seeds, and vinegar to a large pot. Bring the pot to a simmer, then add the drained vegetables. Stir to combine, simmer for 10 minutes, and keep it hot as you fill your jars.
Fill the Jars with Relish
- Lay a dry kitchen towel on the counter.
- Use the jar lifter to remove a jar from the canner. Drain the water back into the canner, and place it on the towel. Keep the remaining jars in the canner so they stay warm.
- Use the canning funnel and ladle to fill the jar with hot relish, leaving 1/2-inch headspace.
- Wipe the rim to remove any residue, center a lid on the jar, and screw on a band until it is fingertip tight.
- Use the jar lifter to place the jar back into the canner, and repeat with the remaining jars.
Process in a Boiling Water Bath Canner
- Once all the filled jars are in the canner, adjust the water level so it is two inches above the jar tops.
- Cover the canner and bring to a boil over high heat. Once water boils vigorously, set a timer and process half-pint jars for 10 minutes at altitudes below 1,000 feet. Adjust processing time for your altitude if necessary (See notes below).
Cool and Store
- When processing time is complete, turn off the heat, remove the cover, and let the canner cool down and settle for about 5 minutes.
- Spread a dry kitchen towel on the counter.
- Use the jar lifter to remove the jars from the canner and place them on the towel. Space them 1 to 2 inches apart.
- Keep the jars upright, and don't tighten bands or check the seals yet. Let the jars sit undisturbed for 12 to 24-hours to cool.
- After 12 to 24 hours, check to be sure the jar lids have sealed by pressing in the center of each lid. If the lid flexes up and down, it did not seal. Refrigerate the jar and use it up within a month.
- Remove the screw on bands and wash the jars. Label, date, and store in a cool, dark place for 12 to 18 months. Allow at least 3 to 4 weeks for the relish to develop its flavor. Once the jar is open, refrigerate and use up within a month.
- Yield: About 8 half pint jars.
Notes
- 1,001–3,000 feet: 15 minutes
- 3,001–6,000 feet: 20 minutes
- 6,001-8,000 feet: 25 minutes
- 8,001-10,000 feet: 30 minutes
Nutrition
Homemade sweet zucchini relish is a simple and easy way to make the most of an abundant garden harvest. A few jars in the pantry add a burst of garden-fresh flavor to meals all year long.
If you enjoy making your own condiments and preserving vegetables, you might also like these canning recipes:
- Spicy Zucchini Relish with Horseradish – a zesty version with a little kick
- Dill Cucumber Pickle Relish – crisp and tangy with classic dill flavor
- Sweet Summer Squash Relish – another great way to use extra squash
- Sweet Cucumber Relish – a traditional and mild condiment, perfect for hot dogs
- Looking for more ways to preserve zucchini? Check out this posts: Ways to Preserve Zucchini
This recipe was originally published August 23, 2009. It has been updated with more details on October 28, 2025.

First time relish making. I grated zucchini and chopped onion & peppers. A double batch filled only 3 pints. I processed 15 minutes. I am now concerned that they were too dense. Should I toss what I made?
Kim, It sounds like you made a few small changes from this recipe, like grating the zucchini instead of chopping it, and canning in pints instead of half-pints. Grating can reduce the final volume quite a bit, especially after salting and draining, which likely explains why your double batch only yielded 3 pints (this recipe typically makes about 8 half-pints, so you’re not too far off).
As for canning in pint jars and processing for 15 minutes, that matches the guidance from the Ball Complete Book of Home Preserving for a similar spicy zucchini relish recipe, so you should be fine there.
Unless the relish turned out extremely thick or tightly packed, there’s likely no safety concern. Using vinegar with 5% acidity is key, and it sounds like you stayed in a safe range. That said, if you’re still unsure or just want extra peace of mind, you can always store the jars in the fridge and use them over the next few months.
For the safest and best results, it’s always a good idea to follow a tested canning recipe closely. Hope this helps—and welcome to the world of canning!
can I freeze the chopped zucchini until the rest of the garden is ready and defrost/drain for a day or so?
Roxie, Unfortunately, frozen zucchini cannot be used for any home canning recipes. Freezing affects the texture, and draining will alter the pH, making it unsafe for canning. Instead, you can freeze the zucchini and use it in other recipes like soup, pasta, or zucchini bread.
Can I use Himalayan pink rock salt ?
Erica, It’s generally recommended to use pure canning or pickling salt in canning recipes because it doesn’t contain additives that can potentially affect the taste or appearance of your preserved foods. Himalayan pink rock salt, while natural and flavorful, may have impurities that can lead to cloudiness or off flavors in your canned products. For the best results, it’s advisable to stick with canning or pickling salt in your canning recipes.
I keep coming back to this recipe year after year. I was confused with the updated photo but this is definitely it. I prefer the previous picture posted and make mine chopped finer like that one.
If I have too much liquid I will exclude it when filling the jars or just drain my spoonfuls when serving it out. Thanks for this recipe.
Hello! How would you modify this recipe to uae a pressure canner instead? Thisnmay be an ignorant question – I am still learning the world of canning and preserving. 😊
Rosie, Not an ignorant question at all! This relish recipe is designed for water bath canning. There are no pressure canner recipes for pickles or relishes. The heat would be too high to get a quality product.
It’s great that you’re eager to learn about canning and preserving. When it comes to modifying canning recipes, it’s important to remember that these recipes are scientifically developed tested to ensure safety. Modifying ingredients or techniques might compromise the safety and quality of the final product. Instead, I recommend following canning recipes as written from trusted sources like Ball Canning, and the National Center for Home Food Preservation. This way, you can enjoy the best results without any risks. As you continue your journey into canning, you’ll discover a wide range of recipes designed to meet different canning methods, including pressure canning. Happy learning and canning 😊
Is it supposed to be liquidy? I simmered for 20 minutes and there’s still a lot of liquid. I’m never made relish before so wondering if that’s normal. Thanks.
Nicole, it’s normal for this relish to have a runny texture. To help troubleshoot, did you soak the vegetables in salted water and drain and rinse them well before adding them to the brine? Squeezing out as much liquid as possible can also help. The recipe calls for a simmering time of 10 minutes – be careful not to overcook the vegetables, as this may cause them to break down further and release more liquid. If you prefer a thicker consistency, you can always drain the excess liquid when you open the jar for serving. Hope this helps!
Hi, am making with an abundance of zuchinni. Do I have to water bath these? How long would they last jarred in fridge? Thanks
Hi Carolynn, It’s great to hear that you’re making zucchini relish with all the abundance of zucchinis. To answer your question, I highly recommend water bath canning the relish for safety reasons. The heat processing involved in water bath canning eliminates bacteria and makes the jars shelf-stable, allowing the relish to be stored safely at room temperature for an extended period. If you choose not to water bath can the relish, it can still be stored in the refrigerator, but its shelf life will be significantly shorter compared to properly canned jars. Without the heat treatment, the relish might last for a few weeks to a couple of months in the refrigerator, depending on the ingredients and storage conditions. If you’re going to take the time to make the relish, I encourage you to go the extra step of water bath canning. This will not only ensure its long-term safety but also allow you to enjoy your delicious zucchini relish throughout the year.
Thank you for the step by step instructions and options. I should have squeezed out the water, but recipe turned out great! I used crookneck squash and zucchini from my garden, banana peppers, one jalapeno, and a tsp of crushed red peppers (pizza peppers). Yummy, sweet heat. Filled seven jelly pints.
Stacy, I’m glad the recipe turned out great for you, and your combination of garden-fresh vegetables sounds delicious. You can also drain out any extra liquid when you open a jar to adjust the consistency of the relish to your liking. Enjoy your flavorful homemade relish!
I don’t have cane sugar, just regular white sugar. Are the measurements the same?
Shaun, Yes, just use regular white sugar. White sugar can be derived from either sugarcane or sugar beets, and both variations are commonly available in granulated form. So feel free to use granulated white sugar, as it will work perfectly well for the recipe.
I am diabetic and have taken sugar or sweetners out of my diet. I have been looking for canning recipes that do not include sugars or sweetners. I am having trouble finding recipes without the sweet. Can you suggest where to look for these types of recipes without added sugar or sweetners? Thank you Nancy
Nancy, Unfortunately, there aren’t a lot of tested recipes for canning without sugar. Jams, jellies, and fruit spreads rely on sugar for gelling and preserving. However, in other recipes, such as sauces, salsas, pickles, and relish, sugar is used for flavor, not as a preservative. It can be left out, but you will find that omitting sugar affects the color, texture, and taste of pickled foods. I suggest trying small batches to see if you like them.