Pressure Canning for Beginners
This post may contain affiliate links, which means that I may receive a commission if you make a purchase using these links. As an Amazon Associate I earn from qualifying purchases.
Learn how to use a pressure canner with this step-by-step guide for beginners. Safely preserve low-acid foods, such as vegetables, beans, and meats, with confidence.
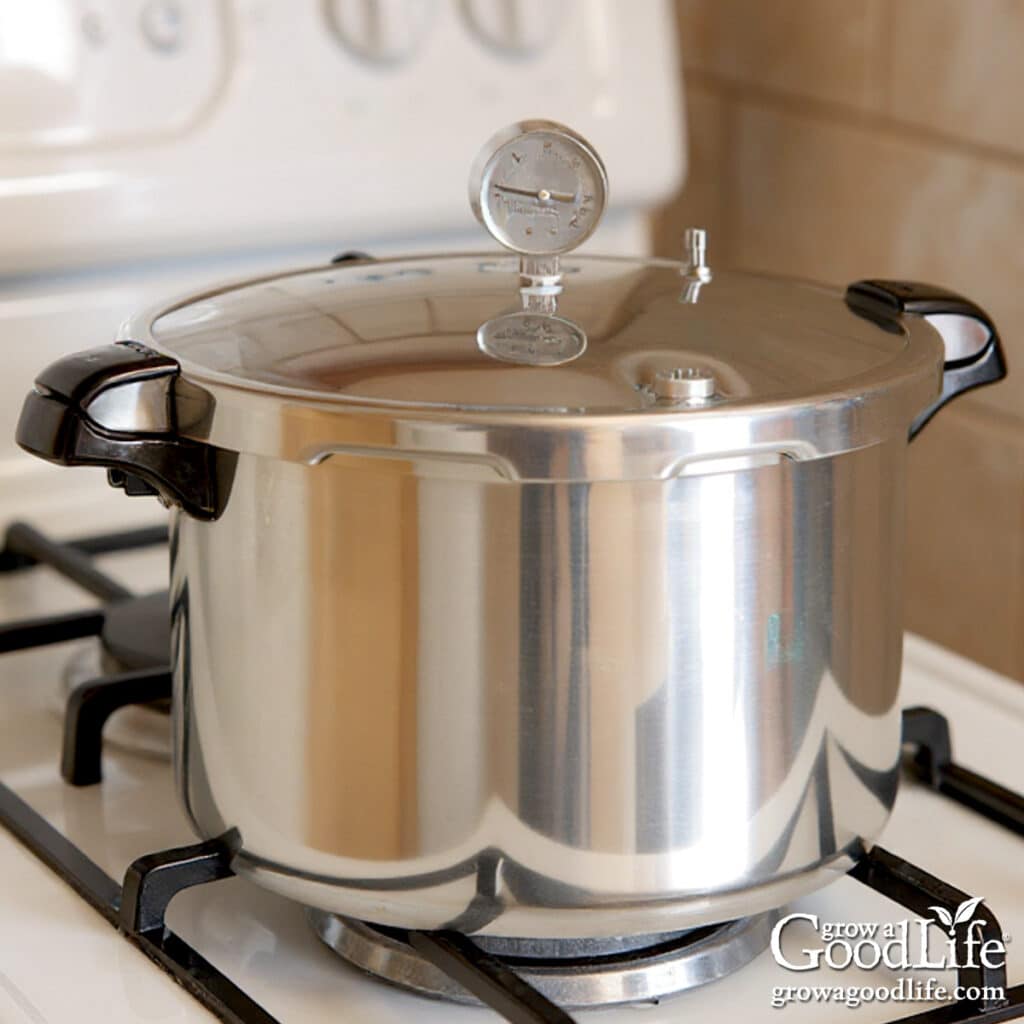
Pressure canning may sound intimidating at first, but once you understand how it works, it becomes a rewarding and empowering way to preserve your homegrown harvest. This method allows you to safely can low-acid foods, such as vegetables, beans, seafood, meats, and soups that cannot be processed using the water bath method.
When done correctly, pressure canning gives you shelf-stable jars of wholesome, ready-to-use meals and ingredients that can last for over a year on the shelf, eliminating the need for freezer space.
Whether you’re canning a batch of hearty chicken soup or jars of green beans, this guide walks you through the entire process step-by-step so you can learn how to use a pressure canner with confidence.
Understanding Pressure Canning
Pressure canning is the only safe method for preserving low-acid foods (those with a pH higher than 4.6) such as most vegetables, meats, poultry, and combination meals like stews, soups, and meals in a jar. These foods must be processed at a temperature higher than boiling water (212°F) to destroy Clostridium botulinum spores, the bacteria that cause botulism.
A pressure canner uses steam under pressure to reach temperatures between 240°F and 250°F, high enough to eliminate these botulism spores and make the food shelf-stable. A boiling water bath canner, in contrast, is only suitable for high-acid foods, such as fruits, pickles, and jams, because acid prevents bacterial growth.
There are two main types of stovetop pressure canners:
- Dial-gauge pressure canners display the pressure level on a dial that must be monitored during processing. Dials need to be tested annually for accuracy.
- Weighted-gauge pressure canners maintain pressure automatically by gently rocking or jiggling a weight once the correct pressure is reached.
Both types work equally well when used correctly. The key is to follow your manufacturer’s directions and tested, approved recipes from trusted sources such as the USDA Complete Guide to Home Canning, the National Center for Home Food Preservation, and university extension publications.
If you’re still choosing your first canner, explore my Pressure Canner Buying Guide for a closer look at popular models, features, and sizes to help you select the right one for your kitchen and budget.
Note: A pressure cooker or multicooker (like an Instant Pot) is not safe for pressure canning. These appliances do not maintain consistent, tested temperatures or pressures necessary for safe home canning.
Know Your Elevation
All tested canning recipes are developed for altitudes at or below 1,000 feet above sea level. If you live at a higher altitude, you’ll need to adjust the pressure to ensure your food reaches a high enough temperature for safe processing.
As elevation increases, atmospheric pressure decreases, which lowers the boiling point of water. That means the water and steam inside your canner won’t reach the necessary temperatures to destroy harmful microorganisms unless you increase the pressure.
For example, at sea level, water boils at 212°F, but at 5,000 feet, it boils closer to 203°F. That difference can make pressure canning unsafe if you don’t compensate. Increasing the pressure restores the correct temperature so your food is processed safely and evenly.
Before you begin canning, find your elevation so you can make the proper adjustments for your area. You can look it up quickly by zip code at What is My Elevation.
Altitude Adjustments
If you live above 1,000 feet, you’ll need to increase pressure to compensate for lower atmospheric pressure at higher elevations.
Dial-Gauge Canners:
- 1,001–2,000 ft. — 11 pounds
- 2,001–4,000 ft. — 12 pounds
- 4,001–6,000 ft. — 13 pounds
- 6,001–8,000 ft. — 14 pounds
Weighted-Gauge Canners:
- 1,001 ft. and above — 15 pounds
Check Your Canner Before Use and Do a Test Run
Before getting started, take time to read through your canner’s user manual and familiarize yourself with its parts and operation. Understanding how your specific model works will make the canning process smoother and safer.
If you no longer have your printed manual, many manufacturers provide digital versions online:
- All American Pressure Canner Manuals are found on the product page of each model.
- Presto Pressure Canner Manuals can be found by selecting your model number.
- Mirro Pressure Canner Manuals select the Pressure Canner Manual button.
Inspect Your Pressure Canner
Look over your pressure canner to make sure it’s in proper working condition. A quick check now can prevent problems later and ensures that your canner will reach and maintain the correct pressure for safe processing. Look over:
- Lid and Body: Make sure the canner lid and body are clean, smooth, and free from cracks or dents. Check that the bottom of the canner is flat. Overheating can cause warping, making it unsafe to use.
- Sealing Ring (Gasket Models): Check that the rubber gasket is flexible and free from cracks or signs of wear. Replace it if it feels hard or brittle.
- Vent Pipe and Safety Plug: Ensure these are clear of debris. Run a thin pipe cleaner through the steam vent if it is clogged.
- Pressure Gauge: If your canner uses a dial gauge, have it tested annually for accuracy. Many local Cooperative Extension offices offer free testing.
- Weight and Locking Mechanism: Confirm that the weight and lid lock operate smoothly and fit securely.
Do a Test Run with Water-Filled Jars
Before your first canning session of the season, or whenever you get a new canner, it’s a good idea to do a dry run using jars filled with water. This allows you to become familiar with your canner’s operation and confirms that everything is working properly. It will also help you understand the time required to build pressure, process the jar, and cool down naturally.
Here’s how:
- Place the canning rack in the bottom of your canner.
- Add the amount of water specified by your manufacturer.
- Fill several clean jars halfway with water and place them upright on the rack. You can keep the test jars open, there is no need to waste a lid here.
- Follow the instructions for your pressure canner model and lock the lid, bring the canner up to pressure, vent steam for 10 minutes, and process for a few minutes to observe how your canner performs.
- Allow the canner to cool and depressurize naturally.
This test helps you learn how long it takes for your canner to build pressure, maintain it, and cool down so you’ll be ready and confident when processing your first real batch of food.
Steps for Pressure Canning
Now that you’ve checked your equipment and completed a test run, it’s time to begin pressure canning for real. The process follows a series of simple but important steps designed to ensure your food is safe and shelf-stable.
Follow these directions carefully, along with your tested recipe, and you’ll soon have a pantry full of wholesome, home-canned meals ready to enjoy all year long.
Step 1: Review the Recipe
Before you begin, carefully read through the entire recipe from start to finish. Make sure it is a tested recipe from a trusted source. If you’re unsure where to find reliable, research-based canning instructions, explore my Safe Canning Resources guide for a list of trusted references and recommended books to help you can safely at home with confidence.
Use only the jar sizes specified in the recipe. It’s safe to use a smaller jar size if you prefer smaller portions, but maintain the processing time for the larger jar listed in the recipe. However, never go up in size. If a larger jar isn’t mentioned, it likely hasn’t been tested or may have failed testing, meaning the food may not heat thoroughly or safely.
Once you’ve reviewed the recipe, gather all your ingredients and verify that you have the necessary amount for the batch. Weigh or measure everything ahead of time to make your canning session easier.
Step 2: Gather Your Equipment
Having everything ready before you begin helps your canning session go smoothly and keeps the process safe and efficient. Here’s what you’ll need for pressure canning:
- Pressure Canner with Canning Rack: Choose a model designed for pressure canning. Make sure the canner is clean, the gasket is flexible, and the vent pipe is clear.
- Canning Jars: Use pint- or quart-sized mason jars manufactured for home canning. Half-pints can be used if you prefer smaller portions, but do not process recipes in larger jars unless the recipe specifically includes safe processing times for that size of jar.
- Lids and Bands: Use new lids each time to ensure a proper seal. Ring bands can be reused as long as they are not bent or rusted.
- Canning Tools: Jar lifter, canning funnel, bubble popper, and ladle.
- Food Prep Tools: A kitchen scale, knives, cutting boards, a food thermometer, prep bowls, a colander, measuring cups and spoons, and plenty of clean kitchen towels.
- Optional Tools: A food processor, food strainer, or immersion blender for sauces, and food-safe gloves for handling hot peppers or acidic foods.
Step 3: Prepare the Canning Equipment
Thoroughly wash your pressure canner, canning rack, jars, lids, rings, and canning tools in hot, soapy water. Rinse well and set aside on a clean towel to air dry.
The overall yield listed in your recipe is an estimate. It’s common to end up with slightly more or fewer jars than expected, so it’s best to include a few extra jars just in case.
Inspect the Jars
Examine each jar carefully before use, paying close attention to the rim. Discard any that have cracks, chips, or rough edges, since these imperfections can lead to breakage during processing or prevent the lids from sealing properly.
Warm the Jars
The jars must be warm when filled to prevent breakage caused by thermal shock, which can happen when a sudden change in temperature causes glass to crack or shatter. For example, pouring boiling hot food into a cool jar or placing a cool filled jar into hot water can cause it to break.
Warming the jars in simmering water reduces this risk by bringing them to a similar temperature as the food and the canner water.
How to Preheat Jars in a Pressure Canner:
- Place the jar rack inside the pressure canner and set the canner on a large burner of your stove.
- Measure and add the amount of water specified in your canner’s manual: All American: Fill to 3 inches of water, Presto: 3 quarts, and Mirro: 2 quarts.
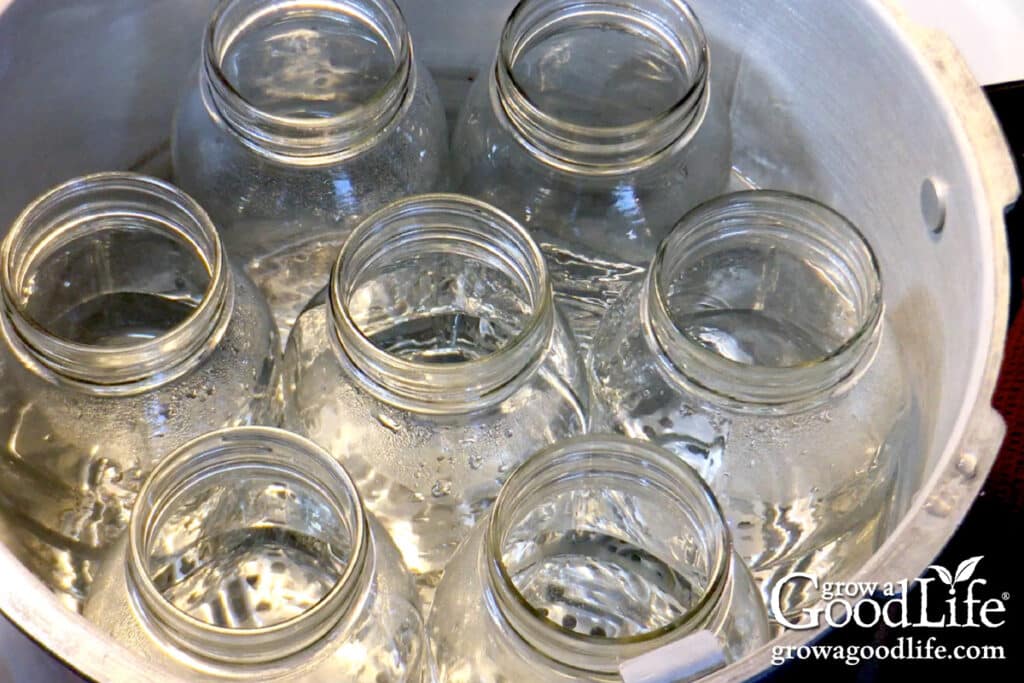
- Fill the clean jars halfway with water and set them upright on the rack inside the canner.
- Warm the canner to the temperature specified for your recipe (140°F for raw-packed foods or 180°F for hot-packed foods). Use a kitchen thermometer to check the temperature. Don’t boil the water, as this can cause excess water loss through evaporation.
- Maintain the temperature for at least 10 minutes, and keep the jars warm until you’re ready to fill them.
You can prepare your food while the jars are heating. However, if your recipe takes longer (such as simmering a soup or sauce), wait until the food is nearly ready before heating your jars, so everything is ready to process at the same time.
Step 4: Prepare the Food
Safe canning is about more than just using the right ingredients; it’s also about preparing them exactly as the recipe describes. Tested pressure canning recipes are designed with very specific guidelines for how ingredients are measured, prepared, cut, and cooked.
These detailed instructions are important to ensure that heat penetrates each jar evenly and destroys harmful microorganisms.
Follow the Recipe Exactly
- Follow ingredient preparation carefully: If a recipe instructs you to cut vegetables into cubes or slices, don’t chop them into smaller pieces. Smaller pieces create a denser pack, which can slow heat penetration and lead to unsafe results. The same applies to meats and combination foods such as soups or stews. Be sure to peel tomatoes and root vegetables as directed, since their skins can affect heat transfer and food safety.
- Maintain proportions: Don’t increase or decrease the amount of solids or liquids unless the recipe specifically allows substitutions. Tested recipes are balanced for safe processing times and heat transfer.
- Don’t add extra ingredients: Adding more vegetables, meat, thickeners, or other ingredients can alter the density and heat penetration of the food, potentially resulting in underprocessing and unsafe preservation. Always follow the tested ingredient list exactly as written.
- Cook as directed: Whether your recipe uses a raw pack (uncooked food placed directly into jars) or a hot pack (food heated or simmered before filling), follow the instructions carefully.
Keep Food at the Right Temperature
Once your food is prepared, keep it at the proper temperature until you are ready to fill jars.
- Hot-pack recipes: Keep the food hot (around simmering temperature) on the stove.
- Raw-pack recipes: Keep ingredients at room temperature while preparing jars.
Step 5: Set Up Your Workspace
Before you start filling jars, take a few minutes to organize your canning area. A well-prepared workspace makes the process smoother and helps prevent mistakes when working with hot jars and boiling liquids.
Prepare a Filling Station
- Clear the counter: Choose a heat-safe surface close to your stove. Clear away clutter and make room for your jars, tools, and ingredients.
- Lay out a clean towel: Spread a dry towel on the counter where you’ll fill jars. This surface helps absorb moisture and reduce thermal shock when moving the jars from the canner to the counter.
- Gather your canning tools: Keep your jar lifter, canning funnel, ladle, and bubble popper within easy reach. Having everything ready will help you move quickly and safely once you begin filling.
- Arrange lids and bands: Place them on a clean towel nearby so they are ready when it’s time to seal jars.
- Fill a small bowl with white vinegar: Place the bowl and a paper towel within reach to wipe the rims of the jars before adding the lids. This step is especially important since grease or bits of food can prevent a good seal.
Keep extra towels and pot holders nearby in case you need to use them.
Step 6: Fill the Jars
Now that your food, jars, and work area are ready, it’s time to fill the jars. Work carefully and methodically, this step sets the stage for proper sealing and safe preservation.
Remove a jar from the canner:
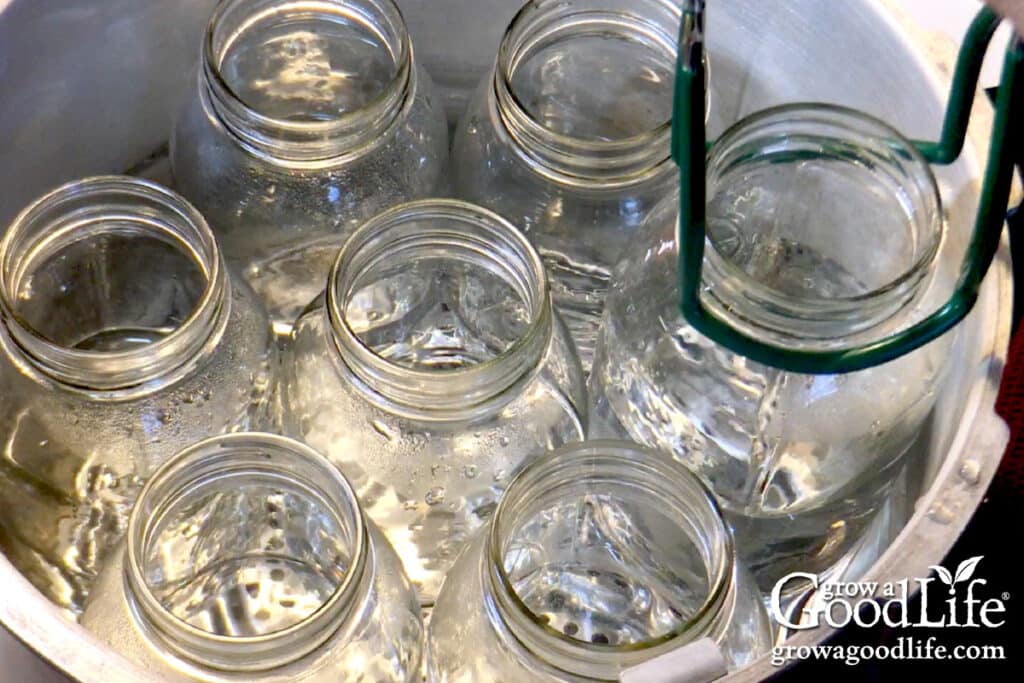
Use a jar lifter to remove one warm jar from the canner. Pour the water out into a separate, heat-proof container (you can save it for washing dishes), and place the empty jar on the towel. Keep the remaining jars in the canner to stay warm.
Fill the jar:
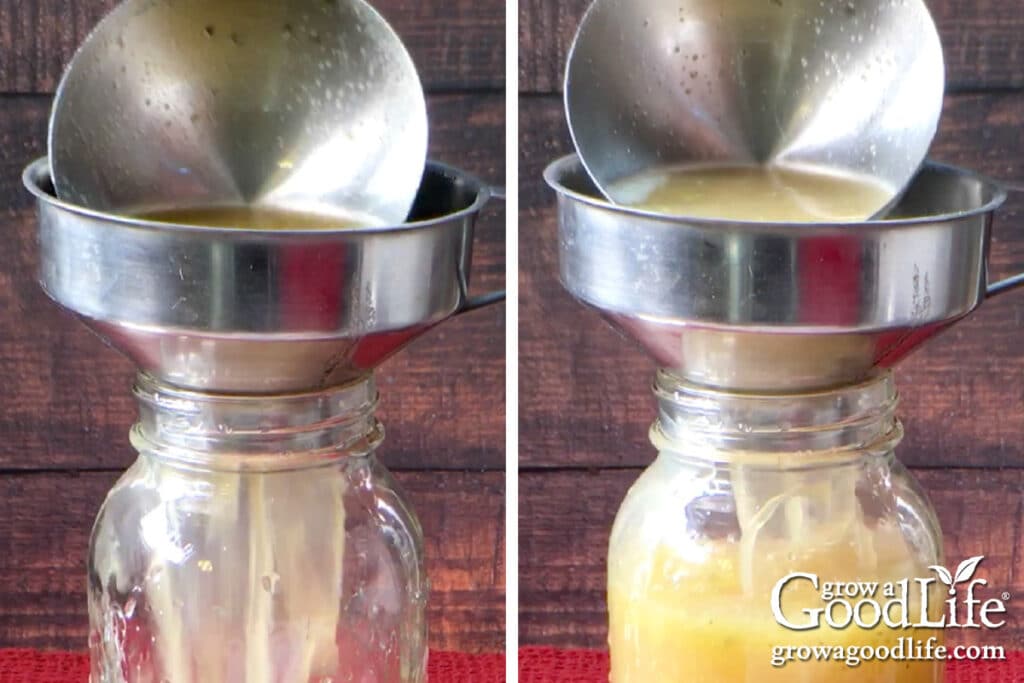
Position the canning funnel on the jar and fill it according to the instructions in your recipe for the packing method (raw or hot pack). Leave the recommended headspace, the space between the top of the food and the rim of the jar. Use a headspace tool to measure and adjust if needed. Proper headspace allows the food to expand during processing and helps the jar seal correctly as it cools.
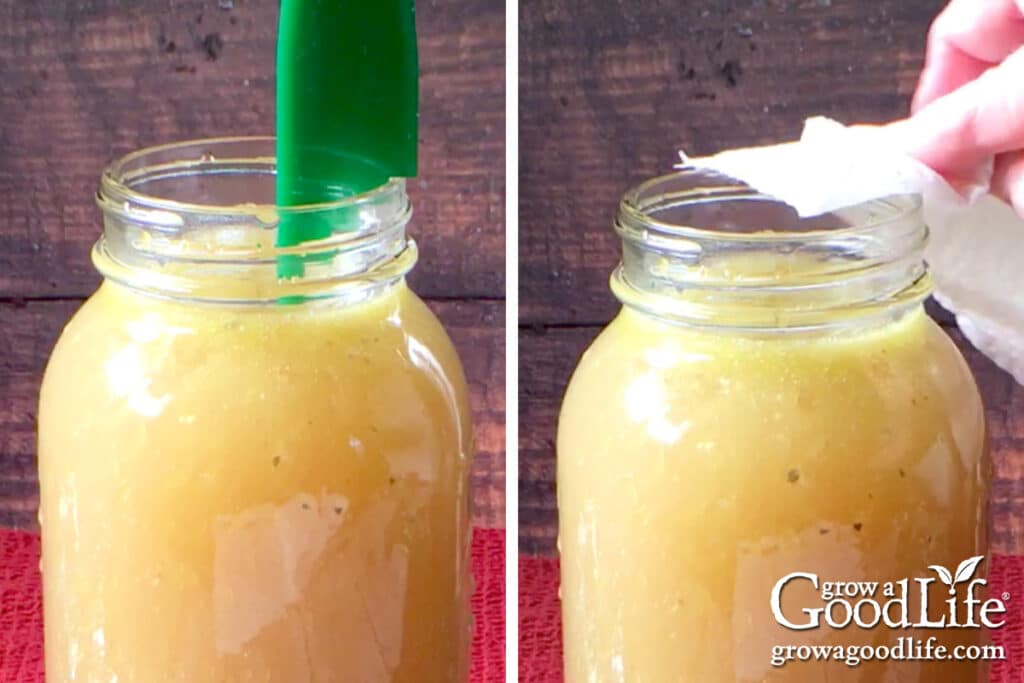
Release air bubbles:
Slide the bubble popper through the inside of the jar to release trapped air bubbles, and adjust if necessary to maintain the proper headspace.
Wipe the rim:
Dip a paper towel in the vinegar and wipe around the rim of the jar to remove any residue.
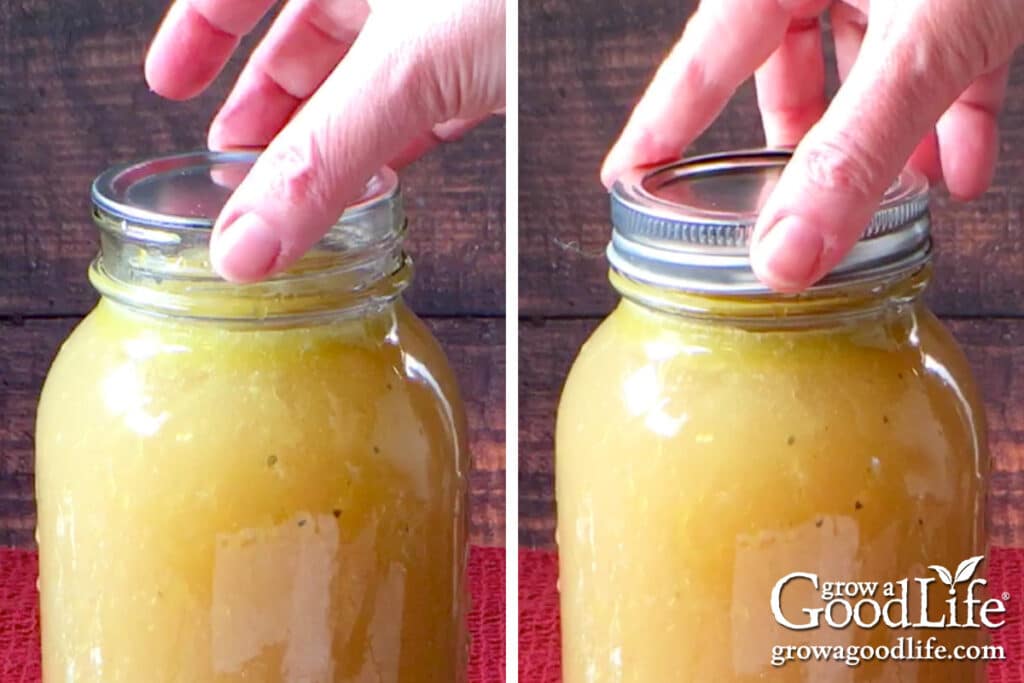
Apply the lid and band:
Center a lid on the jar and place a band over it. Screw the band on fingertip tight. This means turning it with just your fingertips until you feel resistance, then giving it about a quarter turn more. Do not overtighten. The air must be able to escape during processing for the seal to form properly. Overtightening can cause lids to buckle.
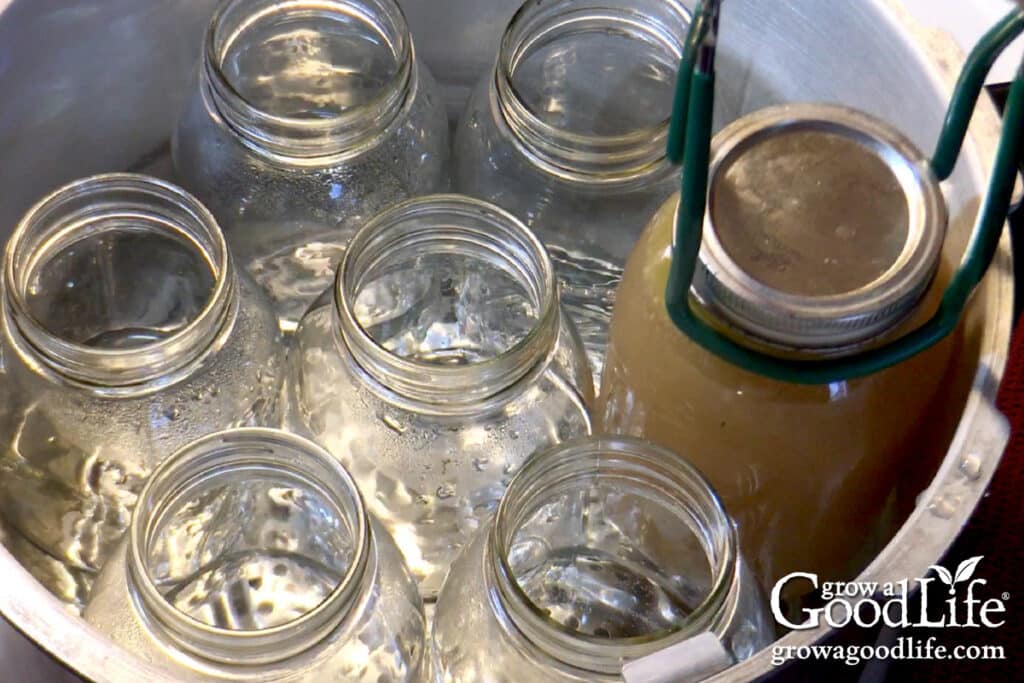
Return the jar to the canner:
Using the jar lifter, grip the neck of the jar firmly, keep the jar upright, and carefully lower it back into the canner. Tilting a jar can cause food to spill into the sealing area and prevent the lid from sealing.
Repeat with the remaining jars:
Continue filling jars one at a time until you run out of food or jars.
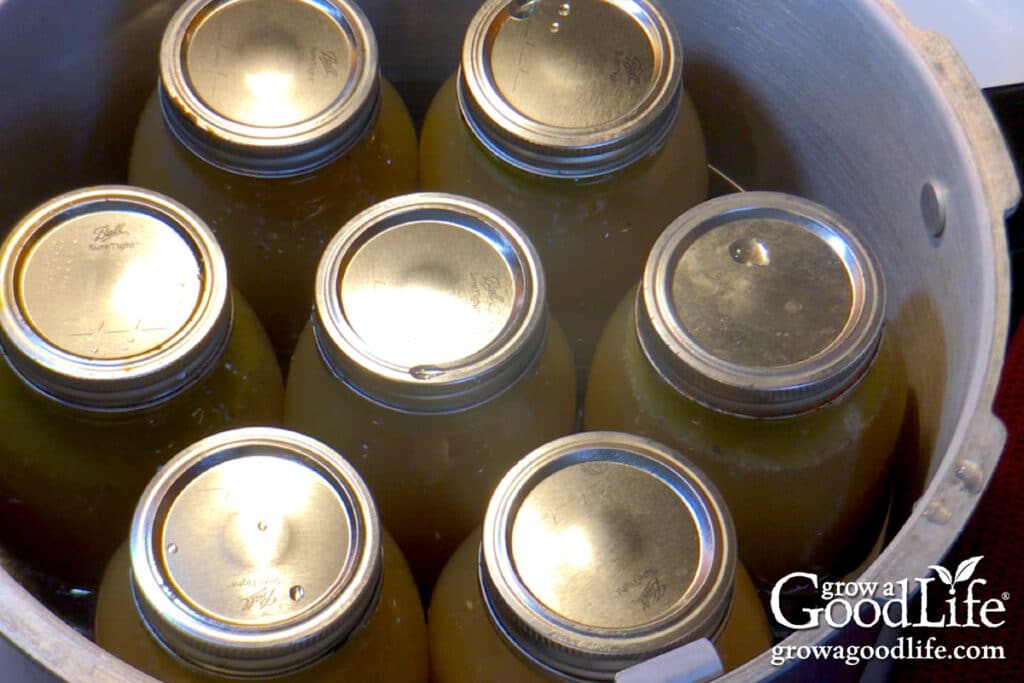
Step 7: Process in the Pressure Canner
Follow your canner’s instruction manual closely, and always stick to the processing times and pressures given in your tested recipe.
Seal the Canner and Vent Steam:
Place the lid on the canner and lock it into position, leaving the vent port open.
Turn the burner to the high heat setting and wait for steam to vent from the open pipe steadily.
Allow the canner to exhaust for 10 minutes to push out air and create a pure steam environment. This step is crucial for accurate temperature and safe processing.
Build and Maintain Pressure:
After venting for 10 minutes, place the pressure regulator or counterweight on the vent pipe or close the petcock if you have a dial-gauge canner. Use a pot holder to protect your hands. The canner will now begin to pressurize.
Continue heating until the canner reaches the correct pressure for your model and elevation:
- Weighted-gauge canners: Set the burner to the highest position and heat the canner until the gauge begins to jiggle and rock. When the weight starts to move or make noise, as described in your manufacturer’s instructions, reduce the heat slightly to maintain a gentle, steady rocking motion. This indicates the canner has reached 10 pounds of pressure at sea level (adjust the weight for elevation as needed).
- Dial-gauge canners: Allow the pressure to rise quickly to about 8 pounds, then gradually reduce the heat so the pressure increases slowly until the needle reaches the correct level: 10 pounds at sea level (adjust for elevation as needed).
Once the target pressure is reached, set a timer for the processing period as directed in your recipe.
Adjust the stove heat as needed to keep a steady pressure at the correct gauge pressure for your elevation. Fluctuating pressure can lead to underprocessing or siphoning (loss of liquid from jars).
Do not leave the canner unattended. Keep a close eye on the gauge or listen for the gentle rocking motion of the weight to ensure consistent pressure.
Step 8: Cooling the Jars
Once the processing time is complete, it’s time to let the canner and jars cool down gradually. Proper cooling is part of the canning process.
Let the Canner Cool Naturally:
When the processing time is finished, turn off the heat and let the canner cool and depressurize naturally. It can take anywhere from 30 to 60 minutes for a full canner to cool, depending on its size and contents.
Do not remove the weight or open the vent yet. Wait until the canner is fully depressurized or when the gauge, vent lock, and steam indicators all indicate it’s safe to open. The signs differ slightly between dial-gauge and weighted-gauge models:
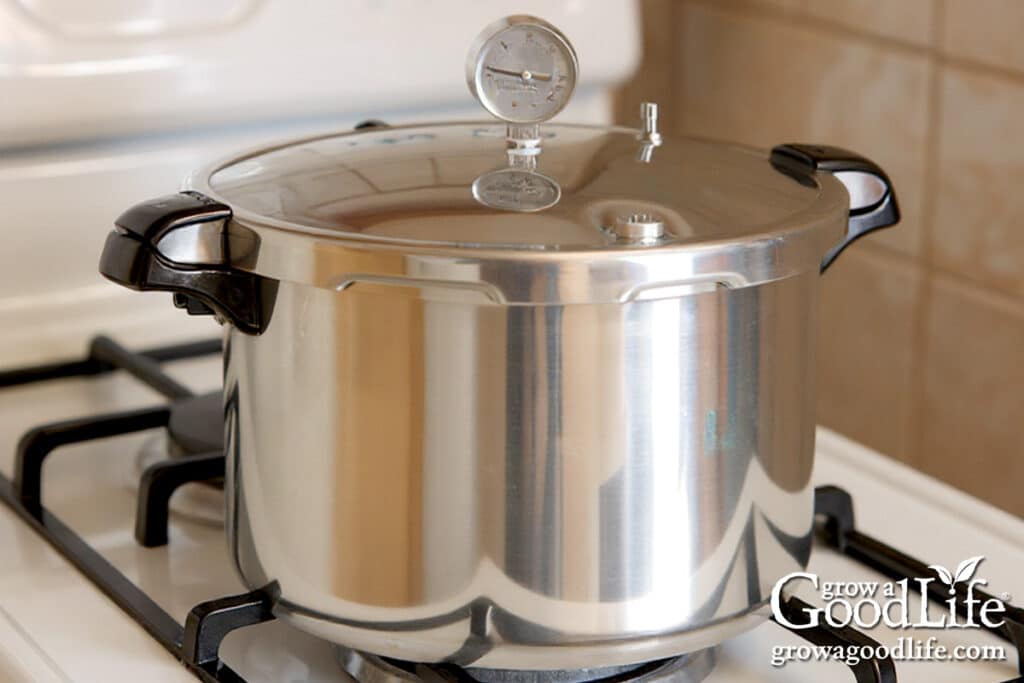
- For canners with a dial gauge: The pressure is at zero when the needle on the dial gauge points to zero, the air vent lock (a small metal pin or knob) falls into its open position, and no steam escapes when the pressure regulator weight is gently nudged with a spoon.
- For canners with a weighted gauge: The pressure is at zero when the weighted gauge is no longer jiggling or rocking, the air vent has dropped, and no steam escapes when the pressure regulator is nudged with a spoon.
Once the canner is fully depressurized, use tongs to remove the weight or open the petcock, and wait an additional 10 minutes before unlocking the lid.
When opening the canner, use pot holders to protect your hands from burns. Unlock the lid and tilt it away from you to avoid steam burns.
Let the Jars Rest in the Canner:
After removing the lid, let the jars sit inside the open canner for an additional 10 minutes to adjust to the pressure and temperature changes. If the jars are still boiling vigorously after that time, wait a few more minutes until the bubbling slows.
Prepare a Cooling Area:
Meanwhile, choose a draft-free area where your jars can rest undisturbed for 12 to 24 hours, away from your regular cooking and food prep.
Lay a clean, dry kitchen towel on the counter to absorb moisture and protect the jars from thermal shock, which can cause glass to crack or break. Avoid placing hot jars directly on a cold surface, as the sudden temperature change can cause them to shatter.
Remove and Cool the Jars:
Using the jar lifter, carefully lift each jar straight out of the canner and set it on the towel, leaving 1 to 2 inches of space between them for air circulation. Keep jars upright. Tipping them can cause food or liquid to spill onto the rim and interfere with a proper seal.
It’s normal for condensation to appear on the lids. The moisture will evaporate as the jars cool. Avoid touching or adjusting the lids or bands at this stage. They’re still sealing as the temperature equalizes.
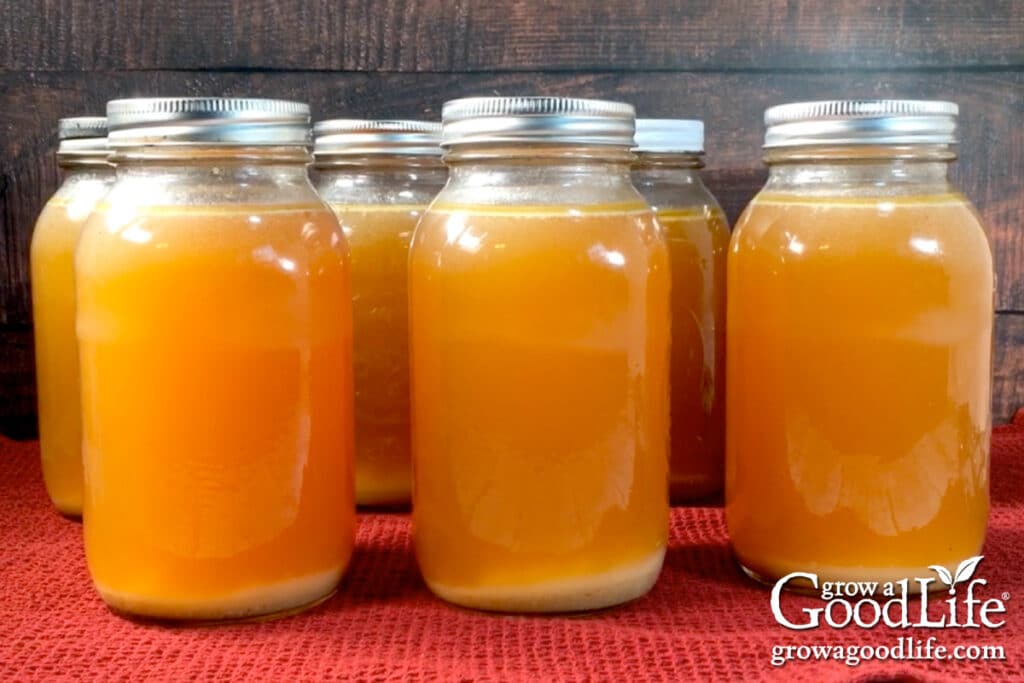
Cooling is a key part of the canning process. Allow the jars to sit undisturbed for 12 to 24 hours at room temperature, allowing them to seal completely before storage.
Step 9: Jar Labeling and Storage
Once your jars have cooled completely, it’s time to check the seals and prepare them for storage. This final step ensures that your food stays safe and delicious for months to come.
Check the Seals:
After the jars have rested for 12 to 24 hours, test each seal by pressing down on the center of the lid. The lid should be slightly concave and firm to the touch.
- If the lid does not flex up or down, the jar is sealed properly.
- If the lid pops up and down, it didn’t seal correctly. Place the unsealed jars in the refrigerator immediately and use the contents within a few days. Alternatively, transfer the contents to a freezer-safe container and freeze for up to six months.
Remove Bands and Clean the Jars:
Once you’ve confirmed that the jars are sealed, remove the screw bands and wash the jars in warm, soapy water to remove any residue from processing.
- Cleaning prevents mold or rust from forming under the bands during storage.
- You can reuse the bands for future canning projects.
Allow the jars to dry completely before labeling and storing.
Label Your Jars:
Use a permanent marker or adhesive label to note the contents and date of processing. Clear labeling helps you rotate your stock and enjoy the oldest jars first.
Store in a Cool, Dark Place:
Store your sealed jars in a cool, dark, and dry location, ideally between 50°F and 70°F. A pantry, cupboard, or basement shelf works well. Avoid places that experience high heat, freezing temperatures, or direct sunlight, as these conditions can weaken seals and shorten shelf life.
For the best flavor and quality, use your pressure-canned foods within 18 months. While jars remain safe as long as the seals are intact, the taste and texture begin to decline over time.
Preserve Low-Acid Foods Safely with Confidence
Pressure canning opens up a world of possibilities for preserving your homegrown harvest. Once you understand the process and get comfortable with your canner, it becomes a straightforward and satisfying way to stock your pantry with nourishing meals and ingredients that are ready whenever you need them.
Remember, safe canning starts with tested recipes, proper equipment, and patience through every step. Each time you use your pressure canner, you’ll gain confidence and efficiency, and before long, it will feel like second nature.
If you’re ready to put your new skills into practice, try one of these beginner-friendly pressure canning recipes:
For more guidance on safe canning, explore these helpful resources:
With the right knowledge and tools, you can safely preserve vegetables, meats, beans, and soups to enjoy all year long. Take your time, follow tested recipes, and enjoy the satisfaction of filling your shelves with jars of home-canned goodness.
References & Further Reading:
- Using Pressure Canners – University of Georgia Cooperative Extension
- Pressure Canning for Low Acid Foods – Ball Mason Jars & Home Canning
Grab your Free copy
