Canning Green Tomatoes (Sliced for Frying)
This post may contain affiliate links, which means that I may receive a commission if you make a purchase using these links. As an Amazon Associate I earn from qualifying purchases.
If you love fried green tomatoes, you’re in for a treat! Canning green tomatoes slices for frying is a great way to enjoy this Southern classic all year. Learn how to can sliced green tomatoes with this water bath canning recipe.
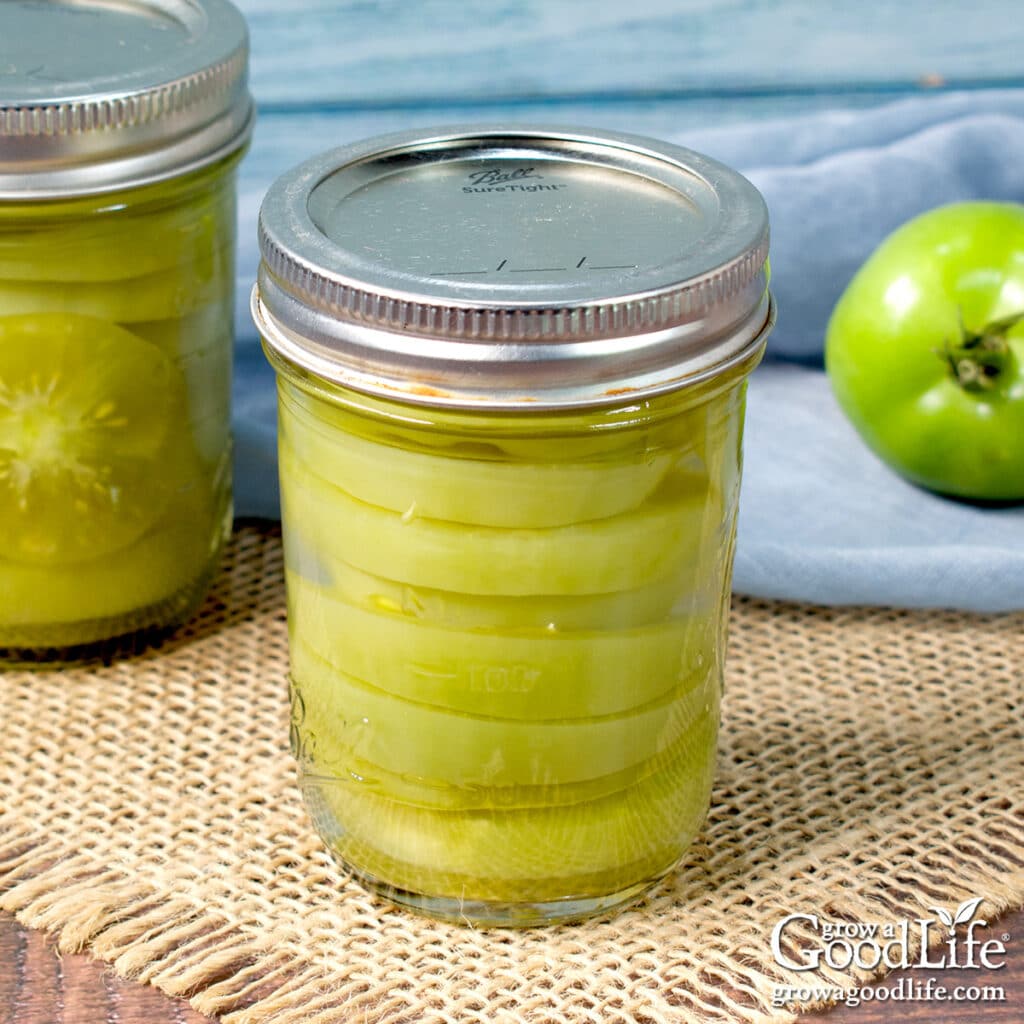
As the gardening season winds down, green tomatoes often linger on the vines, unripe but full of potential. With this simple canning recipe, you can capture their tangy flavor by preserving green tomato slices, ready for frying any time of year.
In this guide, you’ll learn how to safely home-can sliced green tomatoes using a water bath canner, so you can enjoy fried green tomatoes whenever you like. I’ll walk through all the steps—from choosing the best unripe tomatoes, tips for filling the jars, and the detailed steps to preparing and canning green tomatoes using a water bath canner.
Tips for Canning Sliced Green Tomatoes
Canning green tomato slices is simple and requires just a few ingredients: unripe tomatoes, boiling water, and bottled lemon juice or citric acid to ensure safe pH levels for long-term storage. Here are some tips to help you plan a smooth canning session:
Deciding on Jar Size
Stacking green tomato slices in the jar is ideal for preserving their shape during canning and making them easy to remove intact for frying. I highly recommend using wide-mouth jars, as they make it easier to stack the slices without causing damage when filling the jar. Whether you are using quarts, pints, or half-pint jars, the size of the green tomatoes affects how many slices you’ll fit in each jar:
- Wide-Mouth Quart Jars: Use large green tomatoes, about 3 1/4 inches in diameter, for wide-mouth quarts.
- Wide-Mouth Pint Jars: Opt for tomatoes around 3 inches in diameter for pint jars.
- Half-Pint Jars: For half-pints, choose smaller tomatoes, about 2 3/4 inches wide, for a snug fit and space for the liquid.
Consider your serving size when choosing jar sizes. In our household, small half-pint jars are ideal for a side of air-fried green tomatoes.
Choosing Green Tomatoes for Canning Slices
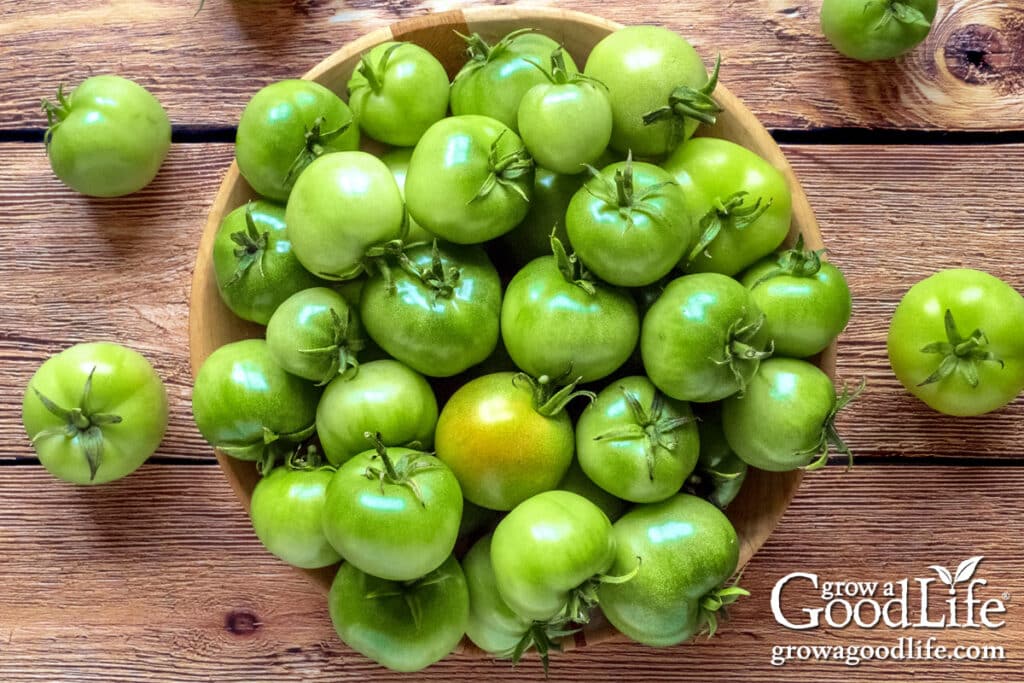
Choosing the right green tomatoes is key to ensuring the best results. While you can use any variety of unripe tomatoes, smooth, round, globe varieties are the easiest to slice and stack neatly. Here’s what to look for:
Firm, Unripe Tomatoes: Choose healthy, solid, unripe green tomatoes with no signs of ripening, blushing, or red spots. They should feel solid to the touch and lack the softer texture of ripening tomatoes. Firm green tomatoes will hold their shape well after canning and are ideal for frying.
Avoid Frost-Damaged Tomatoes: Never use tomatoes from frost-killed vines for canning, as the pH changes after frost exposure, making them unsafe for preservation.
Estimating Quantity: The quantity of green tomato slices that fit in a jar depends on tomato size and jar size. Here’s a rough guide for planning:
- Quarts: Plan for about 2 to 2 1/2 pounds of green tomatoes per quart.
- Pints: You’ll need around 1 to 1 1/4 pounds for pint jars.
- Half-Pints: Smaller portions like half-pints typically require 1/2 to 3/4 pound of tomatoes.
Acidifying Tomatoes
Additional acid is necessary when canning tomatoes to ensure safe acidity levels. You can add either citric acid or bottled lemon juice:
- Citric Acid: This is a preferred choice, as it doesn’t affect the flavor.
- Bottled Lemon Juice: Consistently acidified bottled lemon juice ensures safe pH levels. Avoid fresh-squeezed lemon juice, as its acidity can vary.
With these tips, you’ll be well-prepared to start canning your green tomato slices. By following each step outlined below, you can ensure that your slices remain intact and are ready for use in different recipes. Now, let’s go through the step-by-step process of canning sliced green tomatoes.
Steps for Canning Sliced Green Tomatoes
This recipe for safely canning green tomato slices is adapted from the UMaine Extension website, which is based on the “Canning Tomatoes Packed in Water” methods recommended by the National Center for Home Food Preservation (NCHFP) and Ball canning publications.
Before starting, you may find it helpful to review the NCHFP’s guide to water bath canning for essential tips on safe and effective home canning.
The printable recipe can be found at the bottom of this post, but the detailed instructions below will walk you through each step for successfully canning green tomato slices.
Step 1: Prepare the Canning Equipment
Begin by gathering and setting up all necessary canning equipment. Here’s what you’ll need:
- Water bath canner with a canning rack
- Canning Jars: Choose 4 wide-mouth quart jars, 8 wide-mouth pint jars, or 16 half-pint jars, depending on your preferred portion size. It’s a good idea to prepare a couple of extra jars, just in case.
- Canning lids and bands to match the jars (new lids for each jar, rings can be reused)
- Canning tools: jar lifter, canning funnel, bubble popper
- Kitchen scale to weigh tomatoes
- Kitchen timer
- Basic kitchen supplies: a large stainless steel saucepot, prep bowl, cutting board, knife, large ladle, measuring spoons, and plenty of clean kitchen towels
Thoroughly wash everything in hot, soapy water and rinse well. Inspect and eliminate jars with cracks or chips, which can lead to breakage or sealing issues during the canning process.
Step 2: Preheat the Jars and Canner
Place the jar rack inside the water bath canner, then place the canner on the stove. Set the clean jars upright in the canner and fill it with enough water to cover the jars fully. Bring the water to a simmer (180°F) and allow the jars to warm for at least 10 minutes. Keep the jars warm in the simmering water until you are ready to fill them.
Step 3: Prepare the Tomatoes
Remove the stems and wash the green tomatoes under clean, running water. Set them aside on clean kitchen towels. Next, core each tomato and slice into 1/2-inch thick slices, discarding the ends.
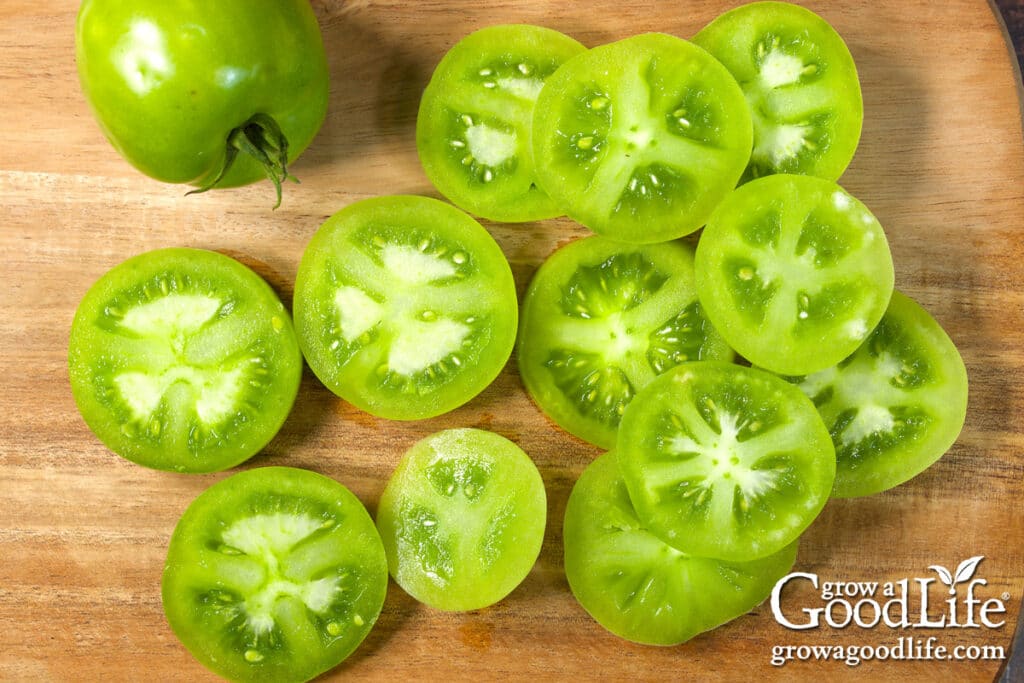
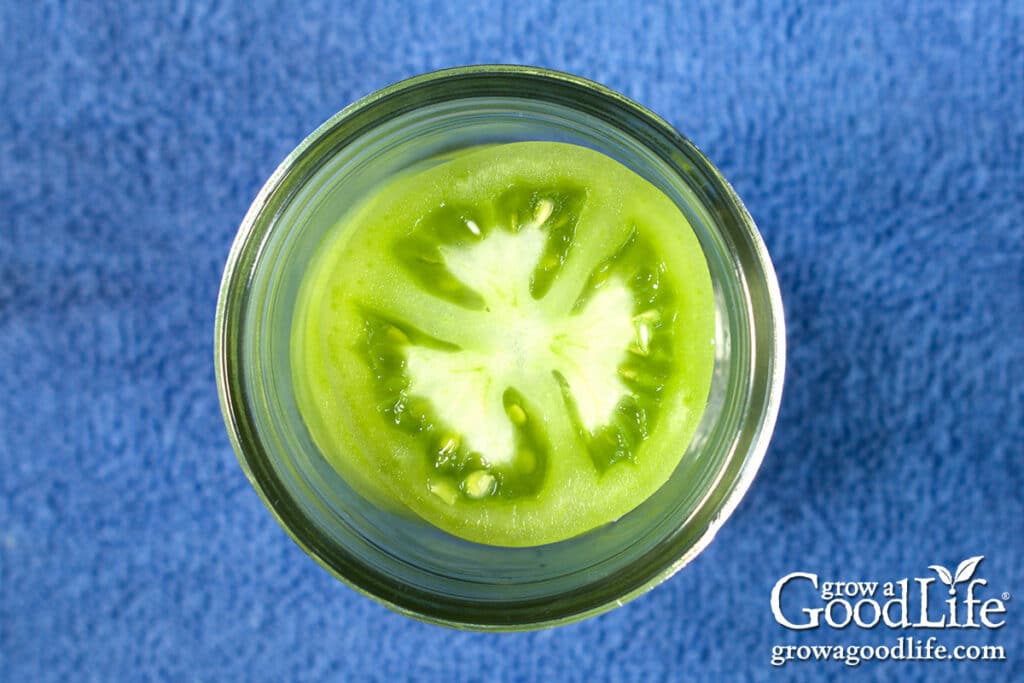
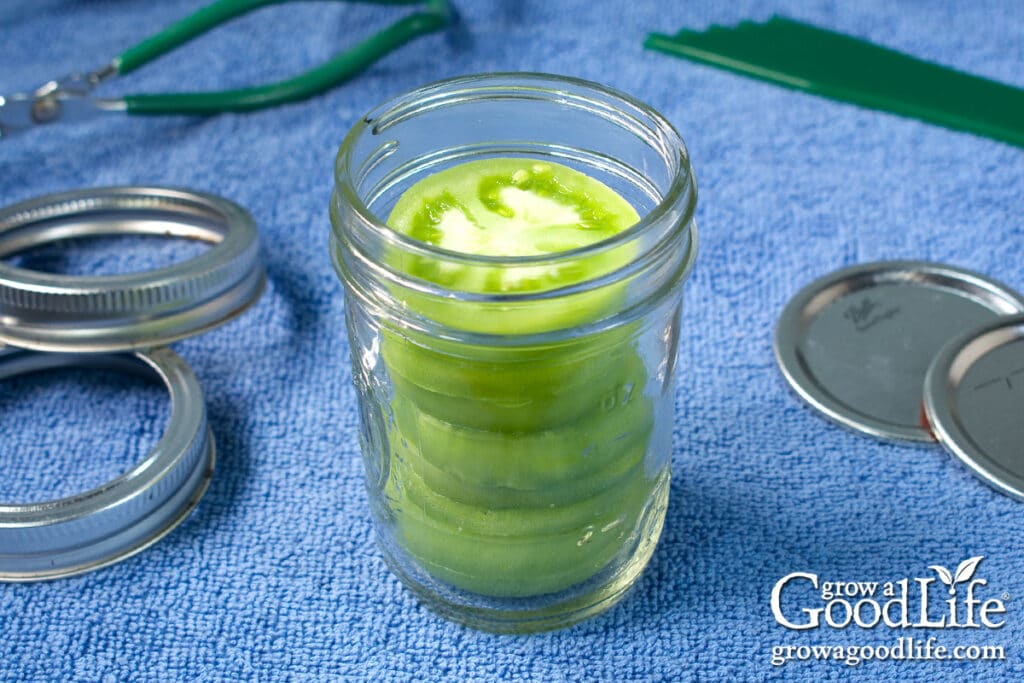
To make filling the jars easier, use an extra jar to assemble stacks of sliced green tomatoes so you will know how many slices will fit in a jar. Organize the slices by size, then dry stack the slices in the jar, leaving a little less than a 1/2-inch headspace. Tip the jar over on a plate so you will have a stack of prepared tomatoes ready to fill a warm jar. Continue with the rest of the slices.
Step 4: Fill the Jars
Once your tomatoes are sliced, stacked, and ready to go, fill a large pot with water, set it on the stove, and bring it to a boil. This is the water you will use to fill you jars.
As the water heats, set up your work area. Lay a dry kitchen towel on the counter and arrange your jar lifter, canning lids, rings, funnel, ladle, bubble popper, citric acid or bottled lemon juice, measuring spoons, and a damp paper towel within easy reach.
Once the water is boiling, use the jar lifter to remove one jar from the canner. Pour the water back into the canner, and place it on the towel. Keeping the remaining jars in the canner to stay warm. Measure and add the following to the jar:
- Half-pint jars: Add 1/2 tablespoon of bottled lemon juice or 1/8 teaspoon of citric acid to the jar.
- Pint jars: Add 1 tablespoon of bottled lemon juice or 1/4 teaspoon of citric acid to the jar.
- Quart jars: Add 2 tablespoons of bottled lemon juice or 1/2 teaspoon of citric acid.
Next, carefully drop a stack of sliced green tomatoes into the jar. Then, use your canning funnel and ladle to fill the jar with boiling water, covering the tomatoes and leaving a 1/2-inch headspace.
Carefully run a bubble popper around the jar, nudging the tomatoes gently to release any trapped air bubbles. Adjust the headspace if needed to maintain 1/2-inch headspace. Then, wipe the rim of the jar with a clean damp towel, place a lid on the jar, and screw the band on until it’s fingertip tight.
Return the filled jar to the canner, then repeat the process for the remaining jars.
Step 5: Process the Jars in a Water Bath Canner
Once the filled jars are in the canner, adjust the water level the so the jars are covered by at least 2 inches. Cover the canner with the lid and bring the water to a boil. Once the water reaches a vigorous boil, set your timer and process the jars for the time specified in the recipe below.
Step 6: Cool and Store
When the processing time is complete, turn off the heat and carefully remove the canner’s lid. Let the jars settle for about 5 minutes to adjust to the temperature change.
Spread a dry kitchen towel on the counter, then use the jar lifter to remove the jars from the canner and place them on the towel. Keep the jars upright, and space them several inches apart. Do not tilt the jars, tighten the bands, or press on the lids to check the seals yet. Cooling is part of the sealing process. Let the jars cool undisturbed for 12 to 24 hours.
After the jars have cooled for at least 12 hours, check the seals by pressing down on the center of each lid. If the lid doesn’t pop back, the jar is sealed properly. For any jars that didn’t seal, refrigerate and consume within a week.
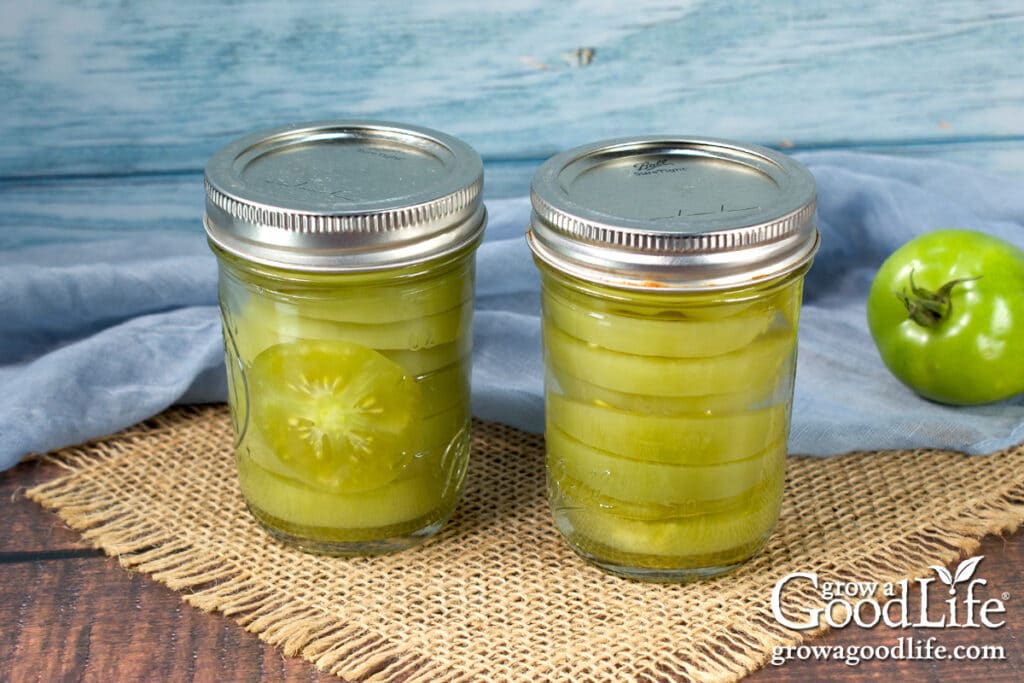
Before storing, remove the ring bands and wash the jars well in warm, soapy water to remove any residue. Dry thoroughly, label, date, and store the jars of sliced green tomatoes in a cool, dark place, ideally between 50 and 70°F. Use within a year for the best results.
Ways to Use Green Tomato Slices
- Fried Green Tomatoes: Unripe green tomatoes remain slightly firm even after the canning process, making them ideal for making fried green tomatoes. Open the jar, drain the water, then pat the tomato slices dry. Proceed with this recipe to make fried green tomatoes in an air fryer, oven, or skillet: Fried Green Tomatoes Recipe.
- Green Tomato Casserole: Layer the slices in a baking dish with breadcrumbs, cheese, and seasonings for a comforting green tomato casserole. It’s a delicious side dish with a unique tangy flavor.
- Green Tomato Relish or Chutney: Chop and use canned green tomato slices to make a quick relish or chutney. Simply add onions, vinegar, sugar, and spices for a tangy condiment that complements grilled meats, sandwiches, or cheese boards.
- Green Tomato Salad: Add drained green tomato slices to a fresh salad for a tangy twist. They pair well with leafy greens, onions, olives, and a sprinkle of feta cheese.
- Savory Breakfast Topping: Top biscuits, toast, or scrambled eggs with fried or heated green tomato slices for a savory breakfast with a bit of southern flair.
- Grilled Green Tomato Sandwiches: Add drained and dried green tomato slices to grilled cheese or deli sandwiches. The tangy flavor complements rich cheeses and cured meats well.
Canning Green Tomatoes (Slices for Frying)
Ingredients
- 10 pounds unripe green tomatoes
- Bottled lemon juice or citric acid
Instructions
Prepare the Canning Equipment:
- Wash the jars, lids, bands, and canning tools in warm, soapy water.
- Place the water bath canner on the stove. Place the jar rack into the pot, set the jars in the canner, and fill with enough water to cover the jars.
- Bring the canner to a simmer (180˚F) for 10 minutes, and keep the jars warm until you are ready to fill them.
Prepare the Tomatoes:
- Rinse the tomatoes well under clean running water, remove the cores, then cut them into 1/2-inch slices, discarding the ends.
- To make filling the jars easier, dry fit the sliced green tomatoes into an extra jar, leaving just under a 1/2-inch headspace. Then, empty the jar upside down on a plate so you have a stack ready to fill a warmed jar. Continue this process with the remaining slices.
Fill the Jars:
- Fill a large pot with water, set it on the stove, and bring it to a boil. This is the water you will use to fill your jars.
- Spread a kitchen towel on the counter. Use the jar lifter to remove ONE jar from the canner. Drain the water back into the canner and place it on the towel. Keep the remaining jars in the canner so they stay warm.
- Measure and add either lemon juice or citric acid to the jar:Half-pint jars: Add 1/2 tablespoon of bottled lemon juice or 1/8 teaspoon of citric acid to the jar.Pint jars: Add 1 tablespoon of bottled lemon juice or 1/4 teaspoon of citric acid to the jar.Quart jars: Add 2 tablespoons of bottled lemon juice or 1/2 teaspoon of citric acid.
- Carefully place the stack of green tomato slices into the jar. Then, ladle boiling water to cover the tomatoes and fill the jar, leaving a 1/2-inch headspace.
- Run the bubble popper around the jar to release any air bubbles, and adjust the headspace if needed with additional boiling water.
- Wipe the rim with a clean, damp towel. Add the lid and secure it with a screw band until it’s fingertip tight. Return the jar to the canner. Then, repeat with the rest of the jars.
Process in a Boiling Water Bath Canner:
- Once the filled jars are all in the canner, adjust the water level so it is at least 2 inches above the tops of the jars.
- Cover your canner and bring it to a boil over medium-high heat. Once the water boils vigorously, set a timer and process half-pints and pints for 40 minutes and quarts for 45 minutes at altitudes of less than 1,000 ft. Adjust processing time for your altitude if necessary. (See notes.)
- When the processing time is complete, turn off the heat, remove the lid, and let the canner cool and settle for about 5 minutes.
Cool and Store:
- Spread a dry kitchen towel on the counter. Then, use the jar lifter to remove the hot jars from the canner and place them on the towel. Keep the jars upright, and don’t tighten bands or check the seals yet. Let the jars sit undisturbed for 12 to 24 hours to cool.
- After 12 to 24 hours, check to be sure the lids are sealed by pressing on the center of each cover. Refrigerate any jars that fail to seal and consume them within a week. Yields about 16 half-pints, 8 pints, or 4 quarts.
Notes
- Half-Pints and Pints: For altitudes of 1,001–3,000 feet = 45 minutes, 3,001-6,000 feet = 50 minutes, and 6,001-8,000 = 55 minutes.
- Quarts: For altitudes of 1,001–3,000 feet = 50 minutes, 3,001-6,000 feet = 55 minutes, and 6,001-8,000 = 60 minutes.
Nutrition
Got a lot of unripe tomatoes? Here are more green tomato canning recipes:
If you love salsa, consider adding our eBook, Grow a Good Life Guide to 50 Salsa Canning Recipes, to your resource library. This 72-page eBook is packed with a variety of delicious salsa recipes, including classic tomato salsas to roasted and grilled salsas to tomatillo and delicious fruit blends, all safe for water bath canning. It’s the perfect guide to help you preserve your garden harvests.

