Boston Baked Beans Canning Recipe
This post may contain affiliate links, which means that I may receive a commission if you make a purchase using these links. As an Amazon Associate I earn from qualifying purchases.
This Boston baked beans recipe infuses white beans with a savory sweet broth made from molasses, brown sugar, salt pork, and onions. It is baked in the oven and then pressure canned for shelf-stable jars.

Having a variety of home canned soups, chiles, beans, and ready to eat meals is a great way to stock your pantry shelves. When things get too busy to cook, or the refrigerator is bare, it is handy to grab a jar and heat it up for a quick and delicious meal.
I learned a hard lesson when attempting to stockpile food when grocery store runs were limited. I purchased canned soups and baked beans online thinking that it would be great to have on hand just in case. We opened a few of these cans to taste them before deciding to purchase more. I am so glad we did. They were terrible.
I often make large batches of soups, stews, chilis, beans, and freeze the extras, but freezer space is limited right now. So this year, I decided to pressure can more convenience meals in a jar to store on the shelf instead of the freezer.
First on my list is this baked beans canning recipe since I had a lot of dried beans in storage. Unfortunately, dried beans don’t last forever. They have about a year before they begin to get tough and need longer cooking times to soften. Canning dried beans can double their shelf life. If you want to can plain dried beans, check out this recipe: How to Can Dried Beans.
Turning the dried beans into ready to heat and eat jars of Boston-style baked beans is another way to add variety to your pantry shelves.
Tips for Canning Baked Beans
Pressure canning homemade baked beans is a great way to meal prep. You can control the quality of the ingredients and eliminate the chemicals, preservatives, and amount of sodium found in commercially processed cans.
When home canning beans, salt is optional as a flavoring and is not required for safe canning. I like to can without salt, and then add it to taste when preparing the meal. Here are more tips for canning baked beans:
Allow Plenty of Time
This recipe is an all day process, or if you soak your beans overnight, a two-day project. Plan your time carefully so you don’t end up canning late into the night. Yes, I am speaking from experience 🙂
You need to rehydrate the beans, combine the ingredients, bake the beans in the oven, and process in a pressure canner. If you are quick soaking the beans, count on about 2 hours to soak and partially cook the beans, 3 to 4 hours for baking, and at least 2 hours for pressure canning to allow the canner to come up to pressure, process, and cool down before opening.
Most of the time spent on this recipe is hands-off time, so you can do other things while the beans are soaking, baking, and processing. You should be available to check about halfway through baking to add liquid if needed to prevent the beans from drying out.
Do you have to soak dry beans before canning?
Yes, you need to soak to rehydrate the beans before canning. You may find other options around the web, but these are not tested and may be unsafe. Beans need to be rehydrated in order to reach the proper temperature. If the texture is different, the heat may not penetrate properly and fail to kill all the bacteria that can cause food borne illness. There is no tested safe option for raw pack or canning dried beans without soaking and pre-cooking first.
Types of Dried Beans
This recipe uses small navy beans, also called pea beans, but any type of dried white bean can be used to make baked beans.
Use a Pressure Canner
Dried beans are low acid foods and need to be canned with a pressure canner. I use a Presto 16-quart pressure canner. It fits under my stove hood, and is light enough for me to lift off the stove without help.
A pressure canner heats the contents at a high temperature required to kill bacteria that can cause food borne illness. There are no safe options for canning beans in a boiling water canner. If you don’t have a pressure canner, you can freeze the baked beans instead. If you are looking for a smaller batch for freezing, try this Slow Cooker New England Baked Beans recipe.
Steps to Home Can Boston Baked Beans
If you’re new to pressure canning, review my step-by-step guide: Pressure Canning for Beginners, along with the instruction manual that came with your canner. Make sure everything is clean and working properly. Double check that the air vent and steam vent pipe is clear.
To make your canning project easier, I also created a free Home Canning Checklist you can print and keep nearby while you work. Get your copy here:
Grab your Free copy
Home Canning Checklists
This Boston Baked Beans canning recipe is from The Ball Blue Book of Preserving, “Beans – Boston Baked.” A more detailed and printable recipe can be found at the bottom of this article, but these are the general steps for pressure canning baked beans:
Step 1: Prepare the Beans
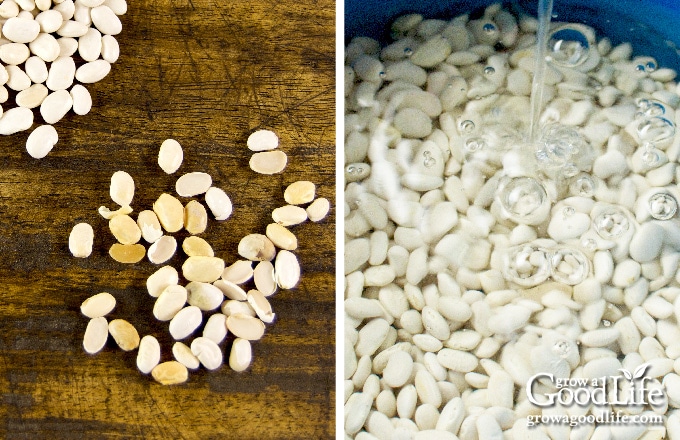
Sort through the dry beans and pick out stones or damaged beans. Rinse the beans well with cold water and rehydrate using one of the following methods:
- Quick Soak: Place the beans in a large pot, and add enough water to cover about 2-inches, about 3 cups of water for each cup of dried beans. Bring the pot to a boil over high heat, and boil beans for 2 minutes. Remove the pot from the heat and let the beans soak for 1 hour.
- Overnight Soak: Add the beans to a large sauce pan and fill with enough water to cover the beans by about 2-inches. Cover the pot and soak the beans in a cool place for at least 12-hours or overnight. Go ahead and place the pot into the refrigerator if the weather is warm.
With either method, once the beans are rehydrated, drain the beans in a large colander, rinse the pot, and return the beans to the pot. Cover with fresh water, place the pot on the stove, and bring the beans to a boil over high heat. Reduce the heat to low and let the beans simmer (180˚F) until the skins begin to crack.
Step 2: Bake the Beans
Preheat the oven to 350˚F. Drain the beans saving the cooking liquid. You can scoop out the beans with a slotted spoon or small mesh strainer, or drain through a colander into a prep bowl or large pot.
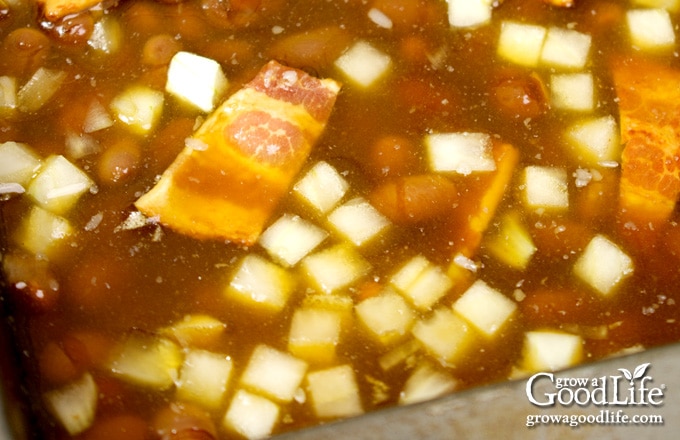
Add the drained beans to an 8-quart Dutch oven, or divide into two large 13 x 9 x 2 inch-baking pans, or large casserole pan. Spread the salt pork or bacon, onions, and bay leaves over the beans.
In a large bowl, combine 4 cups of the bean water (add water if needed), molasses, brown sugar, dry mustard, and salt. Pour over the beans. Cover and bake in a preheated oven for 3 1/2 hours. Stir every hour or so, and add several cups of water as needed to keep the beans mixture soupy.
Step 3: Prepare the Canning Equipment
When the beans are finished baking, gather your canning equipment, set up the canner, prepare the jars, and organize your work area.
You will need the following equipment:
- Pressure canner with canning rack
- 6 pint jars, or 3 quart sized canning jars
- Canning lids and bands (new lids for each jar, bands can be reused)
- Canning tools: jar lifter, canning ladle, funnel, and bubble popper
- Plus basic kitchen supplies such as kitchen towels, slotted spoon
Wash the canning jars, lids, bands, and canning tools in hot soapy water, and rinse well. Check the jars over carefully for nicks and cracks. Eliminate any that show damage as these will break in the canner. Set the lids and bands aside until you are ready to use them.
Place the pressure canner on the stove, and insert the canning rack. Add water per your pressure canner manufacturer’s instructions: Presto is 3 quarts, Mirro is 2 quarts, and All American is 2 to 3 inches. Fill the clean jars halfway with hot water, and then place them on the rack in the canner. Bring the canner to a simmer for 10 minutes (180˚F). Don’t boil, but keep warm until you are ready to fill them.
Step 4: Can the Baked Beans
Once the beans are finished baking, remove the pans from the oven and spread a dry kitchen towel on the counter. Use the jar lifter to remove a jar from the canner. Pour out the water (save it for washing dishes), and place the jar on the towel. Keep the remaining jars in the canner, so they stay hot.
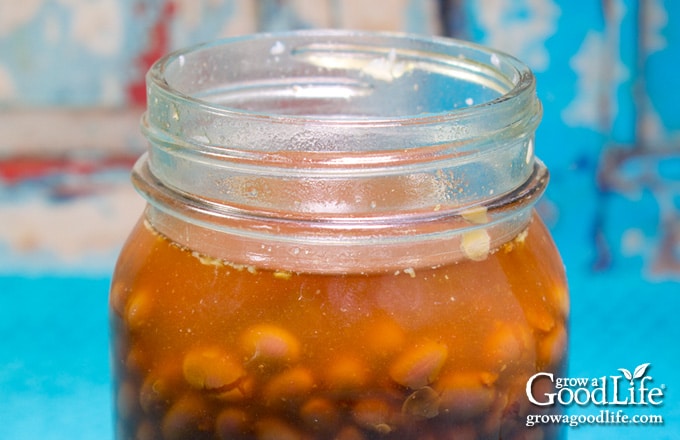
Place the canning funnel on the jar. Use a slotted spoon to remove the beans from the pan and fill the jar with beans to about 3/4 full. The beans will continue to absorb liquid as they are processed and this will give them room to expand.
Use the canning ladle and cover the beans with enough molasses sauce to fill up to a 1-inch headspace. Run your bubble popper through to remove air bubbles, check and adjust the headspace if needed, and clean the rim.
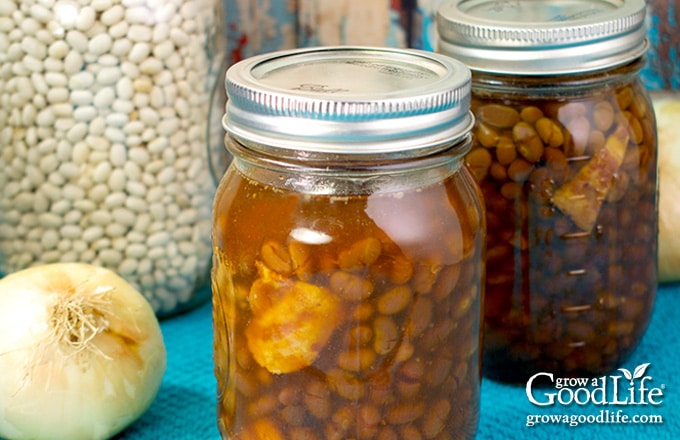
Center a lid on the jar, place the band over the lid, and screw it on until fingertip tight. Immediately place the jar back into the rack in the canner, and repeat with the rest of the jars until you run out of beans, or the canner is full. If you have beans, refrigerate and enjoy in a later meal.
Place the lid on the canner and lock it. Bring to a boil over medium-high heat. Follow the directions for your pressure canner and process for the times indicated in the recipe below.
When the processing time is complete, turn off the heat and let the canner depressurize naturally, remove the jars, and let them cool completely. Date, label, and store in a cool location for 12 to 18 months.
To use, empty the jar into a saucepan and heat on the stove. Adjust seasonings to taste and serve as a side dish or main meal.
Boston Baked Beans Canning Recipe
Ingredients
- 4 cups dried navy beans about 2 pounds
- 8 ounces salt pork or bacon cut into 3/4-inch pieces (optional for flavor)
- 3 large onions sliced
- 2 dried bay leaves
- 2/3 cup brown sugar
- 2/3 cup molasses
- 3 teaspoons dry mustard powder
- 2 teaspoons salt (optional for flavor)
Instructions
Prepare the Beans
- Sort through the dry beans and pick out stones or damaged beans. Rinse the beans well and rehydrate the beans using one of the following methods:
- Quick Soak: Bring a large pot of water to boil over high heat, add the dried beans, and boil for 2 minutes. Remove the pot from the heat and let the beans soak for 1 hour.
- Overnight Soak: Add the beans to a large pot and fill with enough water to cover the beans by about 2-inches. Cover the pot, place it in the refrigerator, and soak the beans in a cool area for 12 to 18 hours.
- After soaking, drain the beans and rinse well. Rinse the pot and add the beans back into the pot. Fill the pot with fresh water to cover about 2-inches above the soaked beans.
- Place the pot on the stove, and bring the beans to a boil over high heat. Reduce the heat to low and let the beans simmer until the skins begin to crack, about 30 minutes. Stir the beans occasionally to prevent sticking and add warm water if needed to keep the beans covered.
Bake the Beans
- Preheat the oven to 350˚F.
- Drain the beans saving the cooking liquid. Add the drained beans to an 8-quart Dutch oven, or divide into two large 13 x 9 x 2 inch-baking pans.
- Spread the salt pork or bacon, onions, and bay leaves over the beans.
- In a large bowl, combine 4 cups of the bean water (add water if needed), molasses, brown sugar, dry mustard, and up to 2 teaspoons salt, if using. Pour over the beans.
- Cover and bake in a preheated oven for 3 1/2 hours. Stir every hour or so, and add water if needed to keep the beans soupy.
Prepare the Canning Equipment
- Wash the jars, lids, and rings in hot soapy water and rinse thoroughly. Set the lids and rings aside until you are ready to use them.
- Place the jar rack into the pressure canner, and fill with water per your pressure canner manufacturer's instructions: Presto is 3 quarts, Mirro is 2 quarts, and All American is 2 to 3 inches.
- Fill the jars halfway with hot water, and then place them on the rack in the canner. Bring the canner to a simmer for 10 minutes (180˚F). Keep hot until you are ready to fill them.
Can the Baked Beans
- Remove the baked beans from the oven and give everything a good stir to combine. Pluck out and discard the bay leaves. The beans should be soupy in order for the heat to penetrate evenly though the jar. If you need to add water, use the hot water from the canner.
- Spread a kitchen towel on the counter. Use your jar lifter to remove a jar from the canner. Pour out the water (save it for washing dishes), and place the jar on the towel. Keep the remaining jars in the canner, so they stay hot.
- Place the canning funnel on the jar. Use a slotted spoon to remove the beans from the pan and fill the jar with beans to about 3/4 full. Ladle hot cooking liquid over the beans while maintain a 1-inch headspace. Remove air bubbles with the bubble popper, and wipe the rim with a damp towel.
- Center a lid on the jar, place the band over the lid, and screw it on until fingertip tight. Use the jar lifter, and place the jar back on the rack in the canner. Repeat with the rest of the jars until the canner is filled, or you run out of beans.
- Close the pressure canner and secure the lid. Leave the vent open, adjust the heat to medium-high, and bring the canner to a boil. Allow the pressure canner to vent for 10 minutes, then place weight on the vent.
- Once the canner has reached the correct pressure (10 pounds for weighted gauge canner, and 11 pounds for dial gauge canners.), set a timer, and process pints for 80 minutes (1 hour and 20 minutes), and quarts for 95 minutes (1 hour and 35 minutes) at altitudes of less than 1,000 ft. Adjust for your altitude if necessary (see table below).
- Adjust the heat as needed to maintain a steady pressure. When the processing time is complete, turn off the heat and allow pressure canner to de-pressure on its own (approximately 1 hour).
- Once the canner is at zero pressure, wait 5 minutes, unlock, and remove the cover by tilting the lid away from you so that steam does not burn your face. Let the canner set for another 10 minutes to adjust to the change in pressure.
- Spread a dry kitchen towel on the counter, and use the jar lifter to lift jars from canner and place on the towel. Keep upright, and don't tighten bands or check the seals yet. Let sit undisturbed for 12 to 24-hours to cool.
- After 12 to 24-hours, check to be sure jar lids have sealed by pushing on the center. The lid should not pop up. If the lid flexes up and down when the center is pressed, it did not seal. Refrigerate the jar and use up within a few days.
- Remove the ring bands, wash, label, date, and store in a cool, dark location (50 to 70 degrees F). Use within a year for the best quality. Yields 6 pints, or 3 quarts.
Notes
- 1,001–2,000 ft. — 11 pounds
- 2,001–4,000 ft. — 12 pounds
- 4,001–6,000 ft. — 13 pounds
- 6,001–8,000 ft. — 14 pounds
- 1,001 ft. and above — 15 pounds
Nutrition
Resources and further learning:
- Safe Changes for Pressure Canning Meat and Poultry
- Safe Canning Resources: Trusted Guides for Home Food Preservation
- Evaluating Canning Recipes: How to Tell if a Canning Recipe is Safe
40+ Meals in a Jar Pressure Canning Recipes
In this eBook, you will find 50 pressure canning recipes, including 44 meals, along with homemade stocks and bone broths. Recipes include soups, stews, chilis, beans, beef, pork, and poultry. Explore the world of preserving delicious home-cooked meals for all seasons.

Are canned beans already cooked able to be used instead of doing the soaking and cooking with dry beans? Thanks
Ashley, Canned beans are already cooked. They’re quite soft and could become mushy during the baking and canning process. That mushiness might also interfere with proper heat penetration in the jars, which is important for safe canning. For best (and safest) results, it’s important to start with dried beans and follow tested canning procedures as written. It’s a little extra effort, but definitely worth it for both flavor and safety!
I don’t have any dry mustard, can I substitute regular mustard? If so, how much do you suggest?
Janice, You can skip the dry mustard. The canning recipe was tested using dry mustard, so I wouldn’t substitute it.