Homemade Blueberry Syrup with Honey
This post may contain affiliate links, which means that I may receive a commission if you make a purchase using these links. As an Amazon Associate I earn from qualifying purchases.
This homemade blueberry syrup sweetened with honey lets the true fruit flavor stand out. You can use fresh or frozen berries in this blueberry syrup recipe. Enjoy in tea, in yogurt, as an ice cream topping, or try a fruity twist on pancakes this weekend.
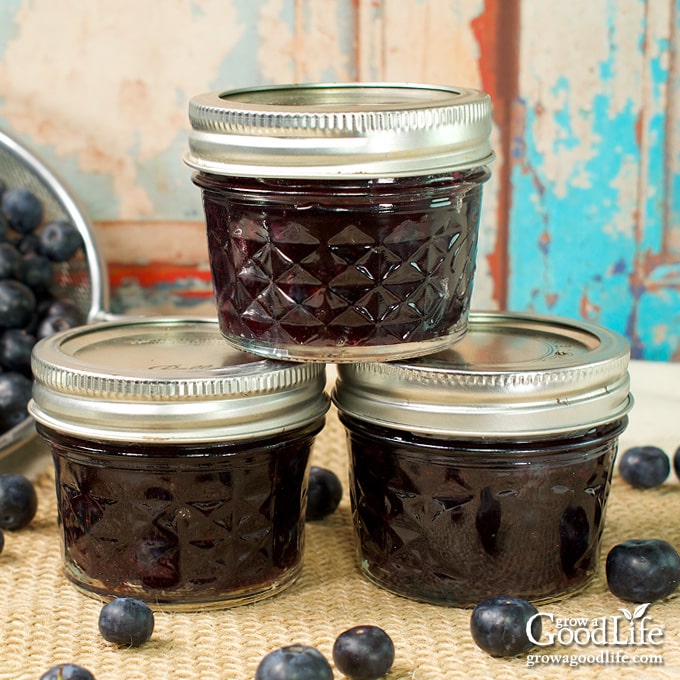
Capture the essence of summer with our irresistible homemade blueberry syrup. This recipe allows you to preserve an abundance of foraged blueberries to enjoy all year round. By using the water bath canning method, this syrup becomes shelf-stable, making it a pantry staple that brings a taste of sunshine to any season.
Picture yourself cracking open a jar on a chilly winter morning and instantly being transported back to the warm summer days of blueberry picking. But this homemade blueberry syrup recipe offers more than just a delightful treat. It also makes a perfect gift that expresses the warmth and labor of your kitchen.
In this article, you will learn how to make and preserve homemade blueberry syrup. So get ready to enjoy the taste of summer any time of the year with this delightful creation.
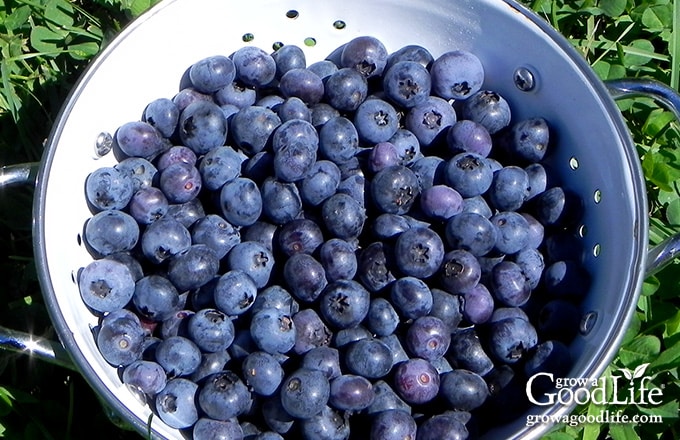
We’re big fans of blueberries here in New England. Our acidic soil is the perfect environment for both wild and cultivated blueberries. Wild, lowbush blueberries grow in a dense carpet from underground runners or rhizomes. They tend to be found in dry, open ground, sunny meadows, down dirt roads, and along hiking trails.
While I was growing up, it was an annual family ritual to visit our favorite spots each year in late July through August and pick as many wild blueberries as we could in an afternoon. Many of these were eaten fresh or in a cup with a little milk and sugar. The majority of the bounty was frozen to enjoy all year. It was always a treat when my Auntie delivered freshly baked blueberry goodies.
Our local picking grounds were along railroad tracks that cut into a granite hillside. Summer cottage vacations always seemed to have a patch of wild blueberries growing nearby. I have warm memories of eating fresh blueberry muffins every morning during our vacations at the lake.
Blueberries are considered a “Superfood” packed with nutrition, antioxidants, and a great fiber source. Just one cup of raw blueberries provides 114 milligrams of potassium, 24% of the suggested daily intake of Vitamin C, and 14% of the recommended daily fiber. Antioxidants in blueberries include anthocyanin, which might help fight cancer, and flavonoids that may improve learning and cognition.
We didn’t know much about the health benefits of blueberries when I was young. We just knew they tasted good and were a free source of fruit for our family to enjoy. It was also fun to forage for the ripe fruit and discover bushes heavy with berries as we scrabbled along the trails and brush.
Eight mature high-bush blueberry plants lined the driveway when we purchased our property. Like their wild counterparts, these plants require very little care and continue producing pounds of berries yearly.
Each year, the harvest begins the last week of July, and we pick every day for almost a month, eat our fill, stash some in the freezer, and turn some into home-canned blueberry syrup.
How to Make Blueberry Syrup
Now, let’s get into the details for making and home canning your delicious homemade blueberry syrup!
If you are new to canning or in need of a refresher, I recommend reviewing the water bath canning tutorial available at the National Center for Home Food Preservation website. This resource offers valuable guidance in the canning process.
While a complete, printable recipe with step-by-step instructions is provided below, here’s an illustrated overview of the steps in creating a honey-sweetened blueberry syrup.
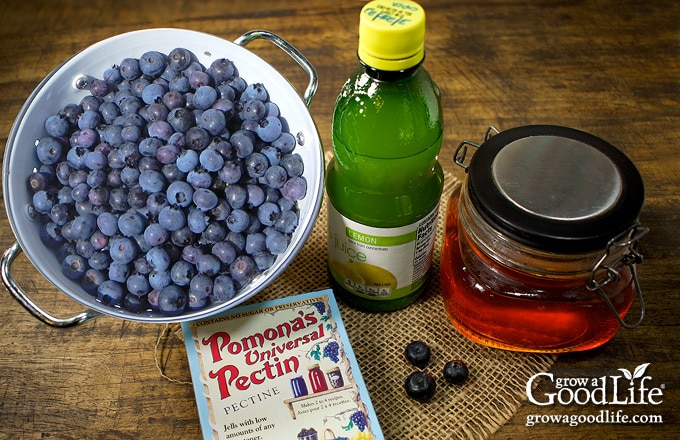
Step 1: Ingredients for Making Blueberry Syrup
Let’s start by going over the simple ingredients for making blueberry syrup:
- Blueberries: This recipe requires about 8 cups of fresh blueberries. It’s important to select high-quality fruit that is ripe and flavorful. The quality of the blueberries directly affects the taste and texture of the syrup. Avoid blueberries that appear shriveled, mushy, or have any signs of mold. You can use frozen blueberries too. Just measure before thawing.
- Pomona’s Universal Pectin: Although it’s possible to make blueberry syrup without pectin, a small amount helps achieve a thicker consistency that clings to your pancakes and waffles. Pomona’s Universal Pectin is a citrus pectin that allows flexibility with sweeteners and heat required to achieve a gel.
- Honey: This recipe features honey as the sweetener, but you also have the option to use sugar. Use mild-flavored honey to balance the tartness of the blueberries without overwhelming the flavor.
- Bottled Lemon Juice: Required for this recipe to adjust the acidity for safe preservation through water bath canning. Lemon juice also enhances flavor and preserves the vibrant fruit color. Use bottled lemon juice to ensure a reliable acidity level.
Step 2: Gather Your Kitchen and Canning Essentials
Before beginning, gather all the necessary equipment and tools to ensure a seamless and efficient canning session. Here’s a list of what you’ll need:
- A water bath canner with a canning rack
- 4 half-pint (8 ounce) or 8 quarter-pint (4 ounce) canning jars
- Canning lids and bands (remember to use new lids for each jar, while bands can be reused)
- Canning tools: a jar lifter, canning ladle, funnel, and a bubble popper
- Jelly strainer or cheesecloth
- Candy thermometer
- Kitchen scale
- A small clear jar with a lid for the calcium water mixture
- Basic kitchen supplies: a large saucepot, preparation bowls, measuring cups and spoons, a stirring spoon, a potato masher, and an ample supply of clean kitchen towels that you don’t mind staining a little.
Step 3: Extract the Blueberry Juice
Start by removing any stems from the blueberries and giving them a thorough rinse under clean running water.
Then combine the blueberries and water in a large saucepan. Place the pan over medium-high heat and bring the mixture to a boil. As the pan heats up, use a potato masher to mash the blueberries gently to release their juice. Reduce the heat to a gentle boil, and continue cooking for 5 minutes. Stir occasionally to prevent sticking.
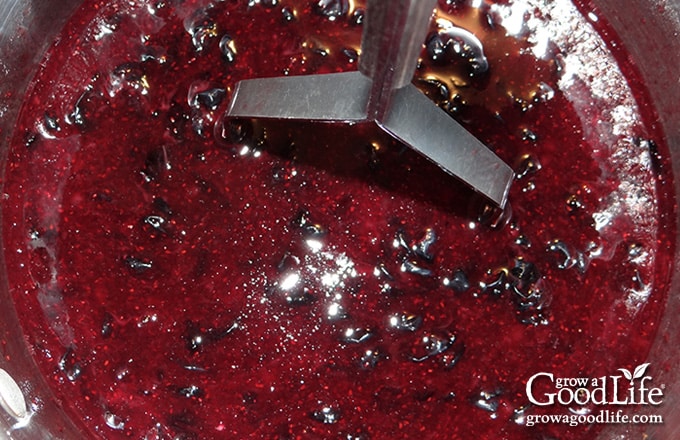
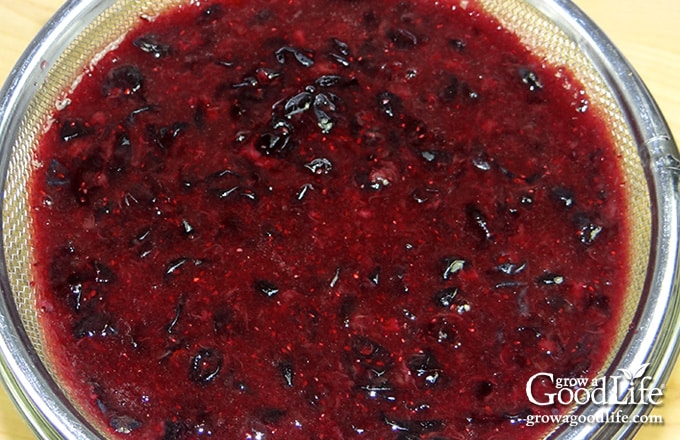
Set up a damp jelly bag or create a double layer of cheesecloth in a strainer. Then carefully pour in the blueberry mixture, and let the juice strain for 2 hours. Once the juice is extracted, compost the solids, or use them to flavor oatmeal, top yogurt, or blend in a smoothie.
Step 4: Prepare Your Canning Equipment
Begin by thoroughly washing your jars, lids, bands, and canning tools in warm, soapy water. Rinse them well and set them aside to air dry.
Warm the jars before filling them to prevent thermal shock and potential breakage. Place the jar rack inside the water bath canner or large sauce pot. Position the clean jars upright on the rack, and fill the pot with enough water to cover them.
Bring the canner to a gentle simmer, maintaining a temperature of around 180°F. Allow the jars to heat for approximately 10 minutes. This step effectively warms the glass, ensuring it can handle the hot blueberry syrup mixture. Keep the jars in the canner, maintaining their warmth until you are ready to fill them.
Step 5: Make the Blueberry Syrup
First, prepare the calcium water mixture by combining 1/2 cup of water with 1/2 teaspoon of calcium powder from the small packet found in the Pomona’s pectin box in a jar with a secure lid. Then, vigorously shake the jar to ensure thorough mixing. You only need 4 teaspoons for this recipe, but you can store the jar in the refrigerator for future jam or jelly recipes.
Combine the pectin powder with the honey (or sugar) in a small bowl. Stir well to achieve a uniform mixture.
Measure and pour 4 cups of the extracted blueberry juice into a saucepan. If needed, you can add water to reach the desired amount. Next, add the lemon juice and 4 teaspoons of the prepared calcium water to the saucepan.
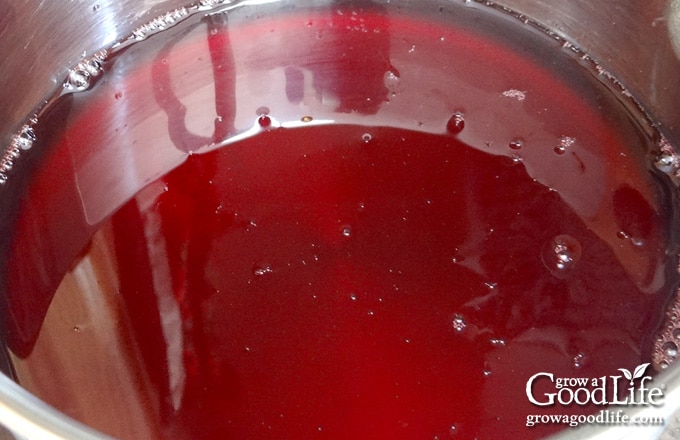
Set the saucepan over medium-high heat and bring the mixture to a boil. Once boiling, add the pectin-honey mixture to the saucepan. Stir or whisk well to dissolve the pectin. Continue stirring until the syrup returns to a boil.
As soon as the syrup reaches a boil, turn off the heat and prepare to fill your jars.
Step 6: Fill the Jars
Lay a dry kitchen towel on the counter. Then, using the jar lifter, carefully remove a warm jar from the canner and tilt it to let the hot water drain back into the pot. Place the warm jar on the towel. Keep the remaining jars in the canner to maintain their warmth.
Use the canning funnel and ladle to pour the prepared blueberry syrup into the jar. Leave approximately 1/4-inch of headspace at the top of the jar, allowing room for expansion during the canning process.
Run a bubble popper gently through the syrup to release any trapped air bubbles. Next, take a damp towel and wipe the rim of the jar, removing any residue or stickiness caused by the syrup.
Center a lid on top of the jar, ensuring it sits flat and aligned with the rim. Place a band over the cover and tighten it until it reaches a fingertip-tight position. Take care not to over-tighten the band, as it should allow air to escape during the canning process, resulting in a proper seal.
Return the filled jar to the canner, and continue the same filling process with the remaining jars, filling them one at a time to prevent them from cooling prematurely.
Step 7: Boil the Jars in the Water Bath Canner
Once all the filled jars are returned to the canner, adjust the water level so it is 2 inches above the tops of the jars.
Cover the canner and bring the water to a full rolling boil over medium-high heat. Once the water reaches a vigorous boil, start your timer and boil the jars for the time recommended in the recipe below. Maintain a steady boil throughout processing time.
After the processing time is complete, turn off the heat and allow the jars to settle undisturbed for 5 minutes. Then, using a jar lifter, carefully lift the jars from the canner and place them on a kitchen towel. Ensure the jars remain upright, and refrain from touching the lids or tightening the bands at this stage. The sealing process requires time and uninterrupted cooling.
Allow the jars to cool completely and undisturbed for 12 to 24 hours. During this time, you may hear the satisfying “ping” sound as the lids seal securely. Resist any temptation to touch or test the seals while the jars are cooling. Patience is key to ensuring a successful seal and optimal shelf stability.
Once fully cooled and sealed, the jars are ready to be stored in a cool, dark place, eagerly waiting for the moment to be opened and enjoyed.
Ways to Enjoy Homemade Blueberry Syrup
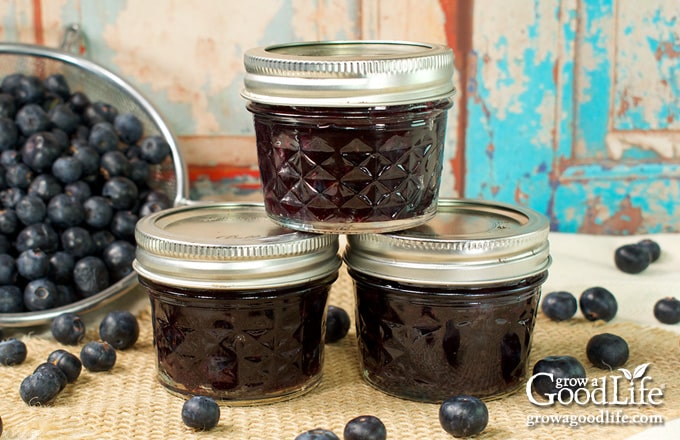
With the final step completed, you have successfully processed your homemade blueberry syrup jars. Here are some ways to enjoy it:
- Pancakes and Waffles: Drizzle a generous amount of blueberry syrup over a stack of fluffy pancakes or crispy waffles for a burst of fruity sweetness.
- French Toast: Transform a simple slice of French toast into a gourmet treat by generously pouring blueberry syrup over the top.
- Ice Cream Topping: Create a delectable sundae by pouring warm blueberry syrup over a scoop (or two!) of vanilla ice cream.
- Yogurt Parfait: Layer blueberry syrup with creamy yogurt and crunchy granola to create a refreshing and nutritious breakfast or snack.
- Dessert Sauce: Elevate your desserts by drizzling blueberry syrup over cheesecakes, pound cakes, or angel food cakes.
- Mixed Drinks and Cocktails: Add a splash of blueberry syrup to lemonade, iced tea, or sparkling water for a refreshing and fruity beverage. You can also get creative by incorporating it into cocktails like blueberry mojitos or spritzers.
- Gift Idea: Decorate the jars, and share them as thoughtful and delicious gifts for family and friends.
Remember, the possibilities are endless when it comes to enjoying blueberry syrup. Get creative, experiment, and let your taste buds guide you to new and exciting ways to indulge in this delightful homemade treat.
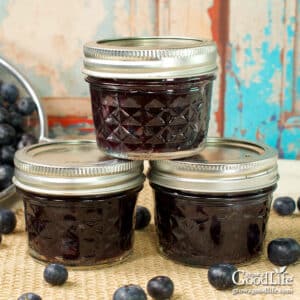
Homemade Blueberry Syrup with Honey
Ingredients
- 3.5 pounds blueberries (about 8 cups whole berries)
- 1 cup water (divided)
- 1 package Pomona’s pectin powder
- 1/4 cup bottled lemon juice
- 1/2 cup honey (or 1 cup sugar)
Instructions
Extract the Blueberry Juice:
- Remove any stems and wash the blueberries well under clean running water.
- Extract the juice by combining the fruit and 1/2 cup of water in a saucepan. Bring the mixture to a boil over medium-high heat.
- As the pan is heating, gently mash the blueberries with a potato masher to extract the juice.
- Once the mixture begins to boil, reduce the heat to a gentle boil for 5 minutes. Stir occasionally to prevent sticking.
- Strain the fruit through a damp jelly bag or double layers of cheesecloth. Let the juice strain for 2 hours or overnight in the refrigerator. Discard the solids.
Prepare the Canning Equipment:
- Wash your jars, lids, and canning tools using hot soapy water. Thoroughly rinse to eliminate any soap residue. Allow them to dry on a clean kitchen towel.
- Set up the water bath canner and position the jar rack inside. Arrange the jars on the rack. Fill the canner with enough water to cover the jars.
- Heat the canner over medium heat until it reaches a simmer at approximately 180˚F. Let the jars warm up in the canner for about 10 minutes, ensuring they remain warm until it's time to fill them.
Make the Syrup:
- Open the Pomona's Universal Pectin box and make the calcium water mixture by combining 1/2 cup of water and 1/2 teaspoon of calcium powder (from the small packet found in the Pomona's pectin box) in a jar with a secure lid. Shake the jar vigorously to mix thoroughly.
- In a small bowl, combine 1 teaspoon of the Pomona's pectin powder with the honey (or sugar). Stir to mix it well and set aside.
- Measure 4 cups of the blueberry juice (add water if needed) and pour into a saucepan. Add the lemon juice and 4 teaspoons of the prepared calcium water.
- Bring the mixture to a boil over medium-high heat. Then add the pectin-honey mixture and stir to dissolve the pectin. Continue stirring until the syrup comes back to a boil. Once it boils, turn off the heat and fill your jars.
Fill the Jars:
- Place a kitchen towel on the counter surface. Using the jar lifter, carefully remove a jar from the canner and tilt it to empty the water back into the canner. Then set the jar on the towel.
- Use the canning ladle and funnel to fill the jar with the blueberry syrup. Leave a 1/4-inch headspace at the top.
- Wipe the rim of the jar with a clean, damp towel.
- Center a lid on top of the jar, and screw on a band until it is fingertip tight. Then, using the jar lifter, return the filled jar to the canner. Repeat the process with the remaining jars.
Process the Jars in a Boiling Water Bath Canner:
- Once all the filled jars are in the canner, adjust the water level so the jars are submerged and covered with two inches above the tops of the jars.
- Cover the canner and set the heat to high. Allow the water to reach a vigorous boil, and then continue boiling for 10 minutes if you are at an altitude of less than 1,000 feet. Adjust the processing time according to your altitude if needed (Refer to Notes).
- Once the processing time is complete, turn off the heat, and let the canner cool down and settle for approximately 5 minutes.
- Prepare the counter by spreading a dry kitchen towel. Then remove the cover by tilting it away from you to avoid any potential steam burns.
- Use the jar lifter to take the jars out of the canner and place them on the towel. Keep the jars upright and avoid tightening the bands or checking the seals at this stage. Allow the jars to sit undisturbed for 12 to 24 hours to cool.
- After 12 to 24 hours, check if the jar lids have sealed properly by pressing on the center of each cover. The lids should not pop up; they should remain firmly sealed. If the top flexes up and down, it indicates an improper seal. In this case, pop the lid, refrigerate the jar, and use the syrup within 2 weeks.
- Remove the screw-on bands, wash the jars, and label them with the date and contents. Then store the jars in a cool, dark place. For the best flavor, use the syrup within 12 to 18 months. Once opened, refrigerate and consume it within 2 weeks. This recipe yields approximately 4 half-pint jars or 8 quarter-pint jars.
Notes
Nutrition
This recipe was originally published on September 10, 2014. By popular request, it has been modified and updated to a recipe that is safe for home canning. However, I have included the original small-batch recipe is below. Store it in the fridge and consume it within a week:
Small Batch Blueberry Syrup with Honey (not safe for canning)
Ingredients:
- 4 cups blueberries
- 1/2 cup honey
- 1/2 cup water
- 1 lemon
Instructions:
- Using a paring knife or vegetable peeler, peel five 1-inch strips of zest from the lemon, then juice the lemon reserving 2 tablespoons of lemon juice. Set aside.
- Extract the blueberry juice by combining blueberries and water in a saucepan over low heat. Gently mash the blueberries with a potato masher and simmer over low heat for 15 minutes, stirring occasionally.
- Strain the juice into a heatproof bowl, pressing hard on the solids. Discard the solids.
- Return the blueberry juice to the saucepan. Add the lemon zest and honey. Mix to combine.
- Bring the saucepan to a boil over medium-high heat until the mixture thickens enough to coat the back of your spoon or registers 225°F on a candy thermometer. This should take about 10 minutes.
- Add 2 tablespoons of lemon juice. Continue stirring and boil over medium-high heat for 1 minute.
- Remove from heat, discard lemon zest, and allow the blueberry syrup to cool.
- Pour into just-cleaned bottles. Cover and refrigerate. Use within a week.

I have an abundance of chokecherries~could I use these in place of the BB?
Denise, Yes, you can make chokecherry syrup with this recipe, but you will need to add more sweetener to balance the tartness of the fruit. Also, check out this Chokecherry Jelly canning recipe.
is it possible to use this as a syrup for club soda drinks?
Sylvie, Absolutely! That is a delicious way to use blueberry syrup.
Great syrup! But… is it still good if I forgot to store my syrup in the fridge and left it on the counter for more then 24 hours?
Diane, Unfortunately, keeping the syrup at room temperature for 24 hours can provide the ideal environment for pathogens to grow. I would toss the syrup.
This looks delicious!! I’m gonna try & make bread with the solids left over from cooking the fruit.
What a good idea! I also found that I could roll the pulp into balls and my goat likes to eat them.