How to Grow Beans
This post may contain affiliate links, which means that I may receive a commission if you make a purchase using these links. As an Amazon Associate I earn from qualifying purchases.
Growing beans in your own home garden has never been easier. Read on for our tips and tricks that will have you growing an abundance of fresh green beans this season.

Nothing says summer like crisp string beans straight from the garden. Green beans can be eaten raw in salads, sautéed in a little olive oil as a side dish, and tossed in stir-fries. Beans are one of the easiest vegetables to grow in the vegetable garden, and if you happen to have a surplus harvest, they preserve well too.
Whether you’re just starting your first vegetable garden, or are expanding your growing area and want to add more diversity, no garden is complete without at least a few bean plants. Read on for some tips and tricks to help you choose which bean varieties are best suited for your space, and how to keep your plants healthy and thriving so that you maximize your harvest.
About Beans
Beans, also referred to as common beans are a variety of legumes that are grown worldwide for their edible seedpods and seeds. They are one of the earliest domesticated plants, and archaeologists have found evidence of their widespread use in the Mediterranean and Americas from as early as 9,000 B.C.
There are numerous types of beans that come in a wide range of sizes, shapes, pod texture, colors, and tastes. Beans are grown for their pods, seeds, while others for dried beans. Some varieties can be harvested at different stages for all three uses.
Beans provide a number of essential nutrients, including protein, fiber, vitamins, and minerals, and they are a popular ingredient in many cuisines.
Bush Beans vs. Pole Beans
Beans come in a wide range of sizes, colors and tastes, but for growing purposes, they are primarily categorized in one of two ways: bush beans or pole beans:
Bush Beans
Bush beans grow rapidly into compact plants that flower and produce bean pods that are ready for harvesting within 45 to 50 days. The pods usually mature around the same time, making them a perfect choice for preserving.
Bush beans grow particularly well in hotter climates. Because of their short size, they require less maintenance than pole beans, and rarely need support. Bush beans are a very good choice for small spaces and container gardens.
If you succession plant bush beans every four weeks, you will have plenty for fresh eating and preserving throughout the growing season.
Some common types of bush beans include Royal Burgundy Bush Beans, Provider Bush Beans, and Gold Rush Yellow Wax Beans.

Pole Beans
Pole beans are large, indeterminate growers, with long vines that can grow up to 12 feet. Pole beans grow slower, but you will get more yields per plant than bush beans.
Provide pole beans with a trellis support and they will wrap themselves around and up the support as they grow. Only when the vines are established will pole beans begin to blossom and produce beans. Pole beans are ready to harvest 60 to 65 days after planting, and continue to produce pods until your first fall frost.
Pole beans are easier to harvest, generally more prolific producers, and have better resistance to common pests and pathogens. For added interest or privacy in your garden, consider planting pole beans along a trellis to form a natural screen.
Types of pole beans include Blue Lake, Kentucky Wonder, Purple Podded Pole, and Scarlet Runner Beans.

Types of Beans
There are many varieties of beans to choose from to grow in your vegetable garden. Beyond pole and bush, beans can also be categorized as green beans, dry beans, and shelling beans.
Green Beans
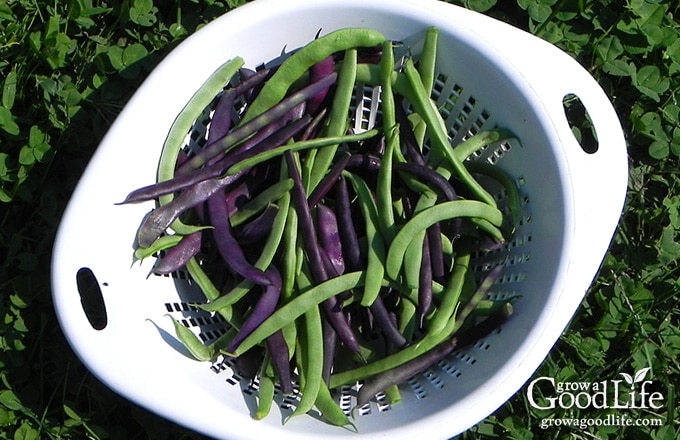
Did you know that green beans are named for the immature bean pod, and not for the color? Green beans are harvested before they are fully matured while the seeds are tender. They are eaten whole, seedpod and all. They come in all sorts of colors, including yellow, purple, green, and streaked colors.
Green beans are also referred to as string beans because some have a fibrous string that runs along the seam that is removed when prepared for meals. You may also hear green beans called snap beans because they make a crisp, snapping sound when broken into pieces.
Within the green beans category, some seed catalogs break down the bush beans and pole beans further into sections such as:
- Roma Beans: Italian green beans that have broad, flat pods usually around 5-inches long, and can get much larger and still remains tender. Romas are known for their crisp, sweet flavor, and prolific production. They come in green, yellow, and purple colors, and both bush and pole varieties: Roma II Bush Beans, Helda Pole Beans, Yellow Romano Pole Beans, Romano Gold Bush Beans, and Romano Purpiat Bush Beans.
- Haricots Verts: French filet beans that have thin, slender, straight pods 4 to 6 inches long depending on the variety. Haricots verts are tender pods that cook up quickly with good flavor and texture. Varieties include French Filet Bush Beans, Tavera Filet Bush Beans, and Emerite French Filet Pole Beans.
- Green Beans: Green colored bean varieties are numerous. I have enjoyed growing Blue Lake, Jade, and Provider bush beans, and Fortex, Kentucky Wonder, and Northeaster pole beans.
- Purple Beans: Their violet color pops making them easy to find among the vines for harvesting. If you choose to grow purple beans, be advised that they don’t keep their purple color. Sadly, they turn green when cooked. Varieties include Purple Podded Pole, Trionfo Violetto Pole, Celine Bush, Royal Burgandy Bush, and Purple Queen Bush.
- Wax Beans: Yellow or gold colored beans with a sweet, mild, and buttery flavor. The yellow color remains even after cooking. Varieties include Gold Rush, Golden Butterwax, and Pencil Pod bush beans, and Gold Marie, Monte Gusto, Sunshine, and Kentucky Wonder Wax Pole Beans.

Dried Beans
As the name suggests, dry beans, like black, kidney, and great northern, and navy beans, are allowed to mature fully and dry on the plant before harvesting. Then the seeds are removed from the pods, stored, and rehydrated to cook in dishes like baked beans and chili.
Some common types of dried beans include Black Valentine, Eclipse black beans, Jacobs Cattle, Quincy Pinto, Silver Cloud Cannellini, Calypso, and Light Red Kidney Beans.
Shelling Beans
Shelling beans, also called horticultural beans are harvested for their immature seeds. The soft seeds are shelled, or removed from their pods and cooked fresh in dishes like succotash, or dried for longer storing. Types of shelling beans include Fava, Lima, Edamame, Garbanzo, Cowpeas, and Mung Beans.
Tips for Growing Beans
Beans are surprisingly simple crops to grow. By understanding their basic requirements and by following a few easy steps, you’ll be growing an abundance of fresh beans in your own backyard in no time.
When to Grow Beans
Beans are a warm season crop that is killed easily by frost. The time to start your seeds will depend on your last expected frost date for your area. You can find your last frost date by contacting your local extension office or enter your zip code here at PlantMaps.com.
Plant beans several weeks after all danger of frost has passed, and the soil has dried, and warmed to at least 50˚F. The fastest rate of germination occurs when the soil temps are between 70˚ to 90˚F. Avoid planting your beans in a soil temperature that is below 50˚F. This can slow germination times and result in seed rot.
How to Prepare the Garden Bed
Beans grow best in full sun and well-draining soil with a pH of between 6.0 and 7.0. Before planting your beans, prep garden beds by removing weeds and debris.
While normal soil fertility is generally all bean plants need to grow, poor soil should be amended with compost or aged manure prior to planting by mixing several inches of finished compost into the top of the soil. If the weather has been dry, give the beds a good soak the day before you sow your seeds.
Because of their sensitive roots systems, beans do not like to be disturbed after they are planted. For this reason, if you are trellising your beans, particularly pole beans, you should establish your trellis support system before planting.
There are two main ways that gardeners generally trellis their pole beans: teepees and trellises. Pole bean teepees have a more natural, rustic look and can easily be constructed by lashing four bamboo poles or sticks together at the top and allowing the poles or sticks to splay outwards as they reach the ground, creating a teepee form that bean vines can climb.

I use permanent trellis structures attached securely to the north end of several raised beds. These are strung with a nylon trellis netting or wire fencing. An alternate option is to erect a trellis, such as a cattle panel secured with t-posts, for your climbing beans.
Although both trellising options have their advantages, trellises can support more beans than the teepee, and are well suited for larger gardens.

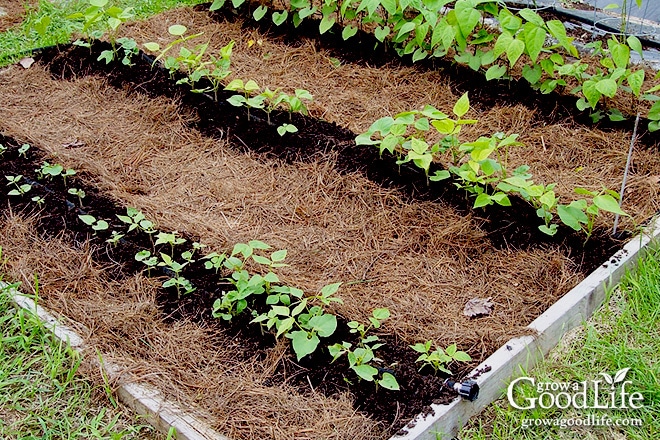
How to Plant Beans
Beans are fast-growing plants with sensitive roots systems that do not do well when transplanted. Instead, beans should always be directly sown outdoors in a full-sun location after all danger of frost is past. This article covers different ways of direct sowing seeds: How to Direct sow Seeds
Bush beans should be sowed 1-inch deep and 2 to 3-inches apart in rows spaced 18-inches from each other. If you are planting in square foot gardens, sow 9 bush beans per square.
Pole beans should also be planted 1-inch deep and 2 to 3-inches apart along trellises or teepees. Each teepee pole can support 3 or 4 bean vines. You may need to help young plants by directing them to climb the supports, but once they cling on, they should intertwine themselves as they grow.
Cover your seeds with soil, firm in gently, and water well. Keep them watered so the soil stays evenly moist until they germinate, in approximately 8 to 10 days.

Due to their large size, birds, rodents, and other garden pests often target bean seeds after being planted. To discourage curious critters, consider covering your seeds with a light layer of mulch until they germinate, and then pull the mulch several inches away from the stems.
As bush beans tend to produce fruit all at once, succession plant bush varieties every two weeks through mid-summer to ensure you have a continuous harvest of fresh beans.
To encourage a more abundant harvest, pinch the tops of pole beans once they reach the top of the trellis or teepee they are growing on. This allows the plant to concentrate energy on producing beans instead of growing more vines and foliage.
How to Care for Beans
Beans are an easy crop to grow, and once they are established, there aren’t many requirements for care. However, there are a few things you need to know in order to keep the plants healthy and help them thrive.
Watering
The most important step to growing healthy beans is to ensure adequate and consistent moisture levels throughout the growing season. Beans should be watered regularly when the top few inches of soil feels dry to the touch. Water until the soil is moist to 6-inches deep to help the plants develop a deep root system.
Watering should always be done in the morning, so that excess water evaporates throughout the day, and does not create the humid conditions that encourage mildew. Avoid wetting the foliage by watering at the soil level.
Weeding and Mulching
Beds should also be regularly weeded, especially in the early stage. Once the plants grow, their leafy canopy will shade the soil and stop most of the weeds from sprouting.
I also recommended that you mulch around your beans once they have germinated with a natural mulch, such as straw or shredded leaves, in order to prevent weeds, keep plant roots cool, and retain moisture.
Fertilizing
Beans and other legumes are nitrogen-fixing plants that generally do not need fertilizing throughout the growing season. However, to boost your bean harvest, it can be helpful to side dress your plants with finished compost or aged manure halfway through the growing season.
Nutrients release slowly if the soil is cool and wet. Chilly weather can tie up nutrients and make them unavailable to bean plants. If you see your young plants struggling with limited growth, yellowing or purple leaves, give them a boost with a good watering of an organic liquid fertilizer, such as fish emulsion or seaweed fertilizer.
Troubleshooting Pests and Diseases
When growing beans, be on the lookout for pests and diseases. Here are some tips to help troubleshoot some you may encounter:
Common Pests
When selecting which beans to plant, look for varieties that are naturally pest resistant. It is also helpful to know the signs and symptoms of the most common pests you’ll likely encounter when growing beans and how to solve them.
- Aphids: Aphids feed on the sap from plants and leave behind misshapen or yellow leaves and a sticky residue. Combat aphid populations with a blast from the hose, or by encouraging beneficial insects, like ladybugs, to take up residence in your garden with the use of companion planting.
- Beetles: There are many beetles that feed on bean plants and pods, including bean leaf beetles and Mexican bean beetles. Use row covers to prevent the beetles from reaching the plants. The beetle larvae can feed on roots killing the plants from beneath the soil. Practice crop rotation to eliminate an early infestation.
- Cutworms: Signs of cutworms include wilted or completely missing seedlings or seedlings that appear to be cut just above the soil line. Manage cutworm populations by performing crop rotation, handpicking and using plant collars made from paper towel tubes or milk jug tops around the base of new plants.
- Leafhoppers: Leafhoppers are small insects that suck the sap from beans and other plants, causing brown, yellow or curled leaves, stippling on leaves and reduced yields. Leafhoppers can be managed by using floating row covers, crop rotation or floating row covers, while a blast from the hose or a spray of an organic insecticidal soap can repel an existing infestation.
Common Diseases
There are many root-rotting pathogens, viruses, and bacterial leaf spot diseases that can infect beans. The best way to prevent these diseases from reoccurring is to remove the affected plants, practice good soil hygiene, and to use crop rotation. If you discover persistent infections in your garden, try growing disease resistant bean varieties.
- Powdery Mildew: A powdery, white dust on plant leaves can signify you’re dealing with powdery mildew, which occurs in humid conditions. To prevent issues with mildew, ensure plants are properly spaced, always perform plant rotation, and destroy any diseased plant material at season’s end. For an existing issue, mildew can be treated with a natural spray made by mixing two parts milk with three parts water.
When to Harvest
Mature beans should be well-formed and easily snap in two in your fingers. For greater yields, beans should be harvested daily throughout the growing season as the more they are harvested, the more fruit they will produce. Harvest all edible pods before frost.
Care should be taken when picking beans to ensure that tender vines aren’t torn or otherwise damaged. For the sweetest beans, harvest in the early morning when sugar contents are highest. Beans with visibly bulging seeds are considered passed their prime and may be a bit tough when eaten.
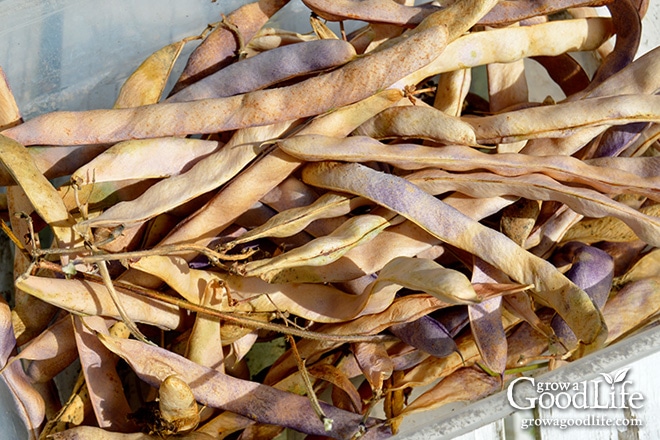
For dried beans, allow pods to fully dry on the plants until you can hear the beans rattling in their pods. After harvesting, let your beans completely dry by hanging the plants from your rafters, or by placing pods on screens to cure.
Growing Beans in Pots
Since the roots are shallow, both bush and pole beans are well suited to growing in containers. The key is to choose the right container to match the type of plant.
Medium sized pots that are at least 12-inches deep and hold about 10 gallons of potting mix are sufficient for bush beans, as these won’t need supports.
Pole beans can be planted in larger planters that are at least 24-inches deep and hold 25 gallons of soil. The plants can get top heavy, so you want a large container to help anchor the plants and keep them upright. Be sure to add a trellis or a teepee support for the vines to grow vertically.
Choose a good quality potting mix suitable for growing vegetables in containers. Mix in a balanced slow release organic fertilizer, and then hydrate the soil by letting it soak for several hours. Fill the pot once the soil is evenly damp.
Sow the seeds, cover with soil, firm in gently, and water in well. Keep the soil evenly moist until the seeds sprout, and the beans become established. Then let the soil dry out a bit in between, watering only when the top inch of soil is dry.
Saving Bean Seeds
If you grow open-pollinated or heirloom bean varieties, you can save seeds to plant next year. This is a great way to ensure a continuous supply of seeds for your garden. Bean seeds can be stored in a cool, dry place for up to two years.
Saving seeds from open-pollinated beans will grow plants with the same characteristics as the parent plant. Open-pollinated plants are those that have not been genetically altered in any way.
All heirloom plants are open-pollinated, and have developed certain characteristics over the years through natural crossbreeding, including unique flavors, shapes, colors, and can adapt to specific growing conditions. They can also be less susceptible to pests and diseases, making them a valuable for the home gardener.
Plants grown from seeds saved from hybrid plants don’t usually breed true. Plant breeders create hybrids by cross-pollinating closely related varieties for desired traits such as disease resistance, larger yield, or color. However, hybrids typically do not breed true, because the parental genes do not mix evenly in the seed.
Ways to Preserve Green Beans
While green beans are delicious eaten fresh, they also preserve surprisingly well by freezing, canning, and pickling.
Freezing Green Beans
If you need a quick and easy way to preserve your green beans during their peak season, freezing is a great option. Simply wash and snap the ends off of the beans, blanch, and then freeze. You can use frozen green beans anytime you need a quick side dish, or add them to soups or stir-frys. Learn how to freeze beans with this easy step-by-step guide: How to Freeze Green Beans
Canning String Beans
Pressure canning green beans is a great way to fill your pantry shelves. Canned beans can be prepared quickly for an easy side dish for meals. This step-by-step pressure canning tutorial will show you how to safely can string beans: How to Can Green Beans
Pickling Beans
Dilly beans are zesty pickled green beans flavored with dill, garlic, and spicy pepper flakes. Because we are using vinegar to adjust the acidity, pickled beans can be preserved into shelf-stable jars using a boiling-water bath canner, or a large saucepot. Learn how to preserve pickled dilly beans with this canning recipe: Pickled Dilly Beans Canning Recipe
Storing Dried Beans
Dried beans are a handy food to keep stocked in your pantry. They are great way to add protein and fiber to your diet, they last for a long time, and they can be used in a variety of recipes, including soups, chili, baked beans, and dips.
After harvesting, spread the dried pods out in a single layer and allow them to dry completely before shelling. To test the beans, remove the seeds from the shell, and hit them with a hammer. The bean should shatter if it is completely dry.
Once fully dried, the beans should be briefly frozen to prevent bean weevils from hatching and gaining access to your pantry. Place the dried beans in a freezer bag, seal, and freeze for about a week to kill any critters.
Remove the bag, spread out the beans and let them come to room temperature and evaporate any moisture. Then store dried beans in jars in a dark and cool area. Dried beans will easily last up to a year in storage.
While dried beans do last a long time in storage, they should be used within a year. If the beans are too old, they may remain hard after soaking and take much longer to cook.
Canning dried beans can double their shelf life. If after storing you need your dried beans to last longer, you can pressure can them into shelf stable jars with these home canning recipes:
—
Beans are easy to grow and incredibly versatile vegetables that are tasty when eaten fresh, cooked, or preserved. Growing and harvesting your own beans in your backyard is a very rewarding experience and, by following a few simple steps, even beginning gardeners are sure to find success when growing these summertime favorites.
You May Also Like:
- 10 Vegetable Gardening Tips for Beginners
- Tips to Help You Decide What to Grow
- 8 Easy Vegetables to Grow
- 9 Crops to Grow for Food Storage
Good planning is key to a successful vegetable garden
Whether you are new to growing your own food or have been growing a vegetable garden for years, you will benefit from some planning each year. You will find everything you need to organize and plan your vegetable garden in my PDF eBook, Grow a Good Life Guide to Planning Your Vegetable Garden.

Great tips! I’m definitely going to try growing beans in my garden this year. Thanks for the advice!