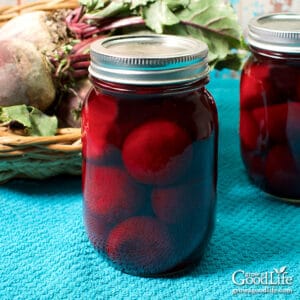
How to Can Beets (Step-by-Step Pressure Canning Guide)
Canning beets is a simple way to preserve your harvest for long-term storage. Learn how to pressure can beets so they are ready to use in meals all year long.
Ingredients
- 13 pounds small beets
- canning salt optional
Instructions
Prepare the Canning Equipment:
- Wash jars, lids, and bands in hot soapy water and rinse well. Set aside to air dry.
- Place the canning rack into the pressure canner and add water according to your manufacturer’s instructions (typically 2–3 quarts or as directed).
- Fill jars halfway with hot water and place them in the canner. Bring to a simmer (about 180°F / 82°C) for 10 minutes. Keep jars hot until ready to use.
Prepare the Beets:
- Scrub the beets under running water and trim the greens, leaving about 1 inch of the stem to help prevent bleeding.
- Place the beets in a large pot, cover with water, and bring to a boil. Cook until the skins slip off easily, about 15 to 25 minutes depending on size.
- Drain and discard the cooking water. Let the beets cool slightly.
- While the beets cool, wash out the pot, refill it with fresh water, and bring it to a boil. This water will be used to fill the jars.
- Once the beets are cool enough to handle, put on gloves, and remove the skins, trim off stems, roots. Slice, cube, or leave the smaller beets whole, and cut larger beets into 2-inch pieces, 1/2 inch cubes or slices.
Fill the Jars:
- Spread a kitchen towel on the counter. Remove a jar from the canner using a jar lifter. Pour the water into the sink (do not pour it back into the canner) and place the jar on the towel. Keep the remaining jars in the canner, so they stay hot.
- Pack the hot beets into the jar, leaving 1 inch of headspace.
- If you are using canning salt, add up to 1/2 teaspoon per pint jar, and up to 1 teaspoon per quart jar.
- Ladle boiling water over the beets, and fill the jar while maintaining a 1-inch headspace.
- Remove air bubbles, adjust headspace if needed, and wipe the rim clean. Make sure all the beets are submerged, and adjust the headspace again if needed.
- Center a lid on the jar, apply the band, and tighten to fingertip tight. Return the jar to the canner.
- Repeat with the remaining jars, filling one at a time so the others stay warm.
Process in a Pressure Canner:
- Place the lid on the canner and lock it. Leave the vent open and bring to a boil over medium-high heat.
- Allow steam to vent for 10 minutes. Then place the pressure regulator on the vent and let the pressure rise. Bring the canner to pressure: 10 pounds (weighted gauge) or 11 pounds (dial gauge).
- Once the canner has reached the correct pressure, set a timer, and process pint jars for 30 minutes and quart jars for 35 minutes at altitudes of less than 1,000 ft. (See notes).
- Maintain steady pressure throughout processing.
Cool and Store:
- When processing time is complete, turn off the heat and allow the canner to cool naturally to zero pressure. Do not force cool.
- Once depressurized, wait 10 minutes, then open the lid carefully, tilting it away from your face.
- Let the jars sit in the canner for another 10 minutes to adapt to the change. If the jars are still boiling, let them sit in the canner for another 5 minutes, or until the boiling stops.
- Remove jars with a jar lifter and place on a towel, leaving space between jars. Keep upright and do not tighten bands.
- Let the jars cool undisturbed for 12 to 24 hours.
- After cooling for at least 12 hours, check the seals by pressing the center of each lid. The lids should not flex when pressed. Refrigerate any unsealed jars and use them within a few days.
- Remove bands, wash jars, label, and store in a cool, dark place (50–70°F).
- Use within 12 to 18 months for the best quality.
- Yield: About 8 pints or 4 quarts.
Notes
This is a tested safe canning recipe from the USDA Complete Guide to Home Canning and the Ball Blue Book Guide to Preserving. Changing the recipe may make the product unsafe for canning.
All times are at altitudes of less than 1,000 feet. Make the following adjustments must be made for altitudes greater than 1,000 feet:
Dial-Gauge Canners:
- 1,001–2,000 ft. — 11 pounds
- 2,001–4,000 ft. — 12 pounds
- 4,001–6,000 ft. — 13 pounds
- 6,001–8,000 ft. — 14 pounds
- 1,001 ft. and above — 15 pounds
Nutrition
Serving: 8ouncesCalories: 50kcalCarbohydrates: 11gProtein: 1.5gFat: 0.2gSodium: 240mgPotassium: 220mgFiber: 2.8gSugar: 9g
Tried this recipe?Let us know how it was!