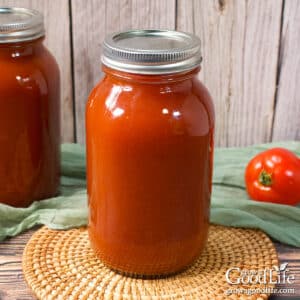
Canning Tomato Juice
Preserve the taste of summer with our easy guide to canning tomato juice! Get tips on preventing separation, safe recipe adjustments, and how to use your canned tomato juice in soups, stews, and more.
Ingredients
- 13 pounds fresh tomatoes
- bottled lemon juice or citric acid
Instructions
Prepare the Canning Equipment:
- Wash the jars, lids, bands, and canning tools in warm, soapy water.
- Place the water bath canner on the stove. Place the jar rack into the pot, set the jars in the canner, and fill with enough water to cover the jars.
- Bring the canner to a simmer (180˚F) for 10 minutes, and keep the jars warm until you are ready to fill them.
Juice the Tomatoes:
- Rinse the tomatoes well under clean running water. Then heat the tomatoes as you prepare them to help prevent the juice from separating.
- Start with about a dozen tomatoes. Remove the cores, cut them into quarters, and add them into a large saucepot. Bring the pot to a boil over medium-high heat, and crush the tomatoes with the back of a spoon as they soften.
- Continue to core and quarter the remaining tomatoes, adding them to the pot as you work. Stir frequently to prevent sticking as they soften. Then, reduce the heat and simmer until the tomatoes are soft and juicy, about 5 to 10 minutes.
- Turn off the heat and let the tomatoes cool slightly, then juice the tomatoes using a food strainer or sieve to remove the peels and seeds.
- Return the juice to the pot, bring it to a boil, then reduce the heat and keep warm as you fill your jars.
Fill the Jars:
- Spread a kitchen towel on the counter. Use the jar lifter to remove ONE jar from the canner. Drain the water back into the canner, and place it on the towel. Keep the remaining jars in the canner so they stay hot.
- Measure and add either lemon juice or citric acid to the jar. For pints, add 1 tablespoon of bottled lemon juice or 1/4 teaspoon of citric acid to the jar. For quarts, add 2 tablespoons of bottled lemon juice or 1/2 teaspoon of citric acid to the jar.
- Use the canning funnel and ladle to fill the warm jar with hot tomato juice, leaving a 1/2-inch headspace.
- Run the bubble popper through to release any air bubbles. Wipe the rim with a clean, damp towel to remove any residue.
- Add the lid and secure it with a screw band until it's fingertip tight. Return the jar to the canner. Then, repeat with the rest of the jars.
Process in a Boiling Water Bath Canner:
- Once the filled jars are all in the canner, adjust the water level so it is at least 2 inches above the tops of the jars.
- Cover your canner and bring it to a boil over medium-high heat. Once the water boils vigorously, set a timer and process pints for 35 minutes and quarts for 40 minutes at altitudes of less than 1,000 ft. Adjust processing time for your altitude if necessary. (See notes.)
- When the processing time is complete, turn off the heat, remove the lid, and let the canner cool and settle for about 5 minutes.
Cool and Store:
- Spread a dry kitchen towel on the counter. Then, use the jar lifter to remove the hot jars from the canner and place them on the towel. Keep the jars upright, and don't tighten bands or check the seals yet. Let the jars sit undisturbed for 12 to 24 hours to cool.
- After 12 to 24 hours, check to be sure the lids are sealed by pressing on the center of each cover. Refrigerate any jars that fail to seal and consume them within a week. Yields about 8 pints or 4 quarts.
Notes
This safe canning recipe is from the Ball Complete Book of Home Preserving. Altering the recipe may make it unsafe for canning.
All times are at altitudes of less than 1,000 ft. Make the following adjustments for altitudes greater than 1,000 ft:
- Pints: For altitudes of 1,001–3,000 feet = 40 minutes, 3,001-6,000 feet = 45 minutes, and 6,001-8,000 = 50 minutes.
- Quarts: For altitudes of 1,001–3,000 feet = 45 minutes, 3,001-6,000 feet = 50 minutes, and 6,001-8,000 = 55 minutes.
Nutrition
Serving: 1cupCalories: 15kcalCarbohydrates: 3.2gProtein: 0.8gFat: 0.2gSodium: 5mgPotassium: 196mgFiber: 1gSugar: 2.2gCalcium: 8mg
Tried this recipe?Let us know how it was!