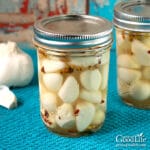
Pickled Garlic Canning Recipe
Pickled garlic is perfect for adding a kick of flavor to dishes and a great way to preserve garlic cloves for long-term food storage. Learn how to pickle garlic and can it using a water bath canner.
Servings: 16 servings
Calories: 25kcal
Ingredients
- 4 cups peeled garlic cloves
- 2 cups white vinegar 5% acidity
- 1/2 cup cane sugar
- 1/2 teaspoon canning salt
- 1 teaspoon pickling spices optional for flavor
- 1/2 teaspoon red pepper flakes optional for flavor
Instructions
Prepare the Canning Equipment:
- Wash your jars, lids, screw bands, and canning tools in hot soapy water. Rinse thoroughly to remove all suds. Set aside to air dry on a clean kitchen towel.
- Place the canning rack into the water bath canner, place the jars in the canner, and add water to cover. Bring the canner to a simmer (180˚F) for 10 minutes, and keep the jars warm until you are ready to fill them.
Prepare the Garlic:
- Remove the garlic cloves from the bulb, trim off the root end, peel, and measure 4 cups of peeled garlic.
Make the Pickling Brine:
- Add the vinegar, sugar, salt, and spices to a medium pot. While stirring, bring to a boil over medium-high heat, and boil for 1 minute.
- Add the prepared garlic and boil for an additional 1 minute. Keep hot as you fill the jars.
Can the Pickled Garlic:
- Spread a dry towel on the counter. Use the jar lifter to remove a jar from the canner, drain it, and place it on the towel. Keep the remaining jars in the canner so they stay warm.
- Use a slotted spoon to pack the garlic into the jar. Ladle the hot brine over the garlic, leaving 1/2 inch of headspace.
- Run the bubble popper through the jar to release any trapped air. Add more brine to adjust the headspace again if needed to maintain a 1/2 inch. You want to be sure all the cloves are beneath the brine.
- Wipe the rim with a damp towel, center a lid on the jar, place the band over it, and screw it on until fingertip tight.
- Place the jar back into your canner, and repeat with the rest of the jars.
- Once the jars are in the canner, adjust the water level to be 2-inches above the tops of the jars.
- Cover the canner, and bring it to a boil over high heat. Once the water boils vigorously, set a timer, and continue boiling for 10 minutes at altitudes of less than 6,000 feet. Adjust processing time for your altitude if necessary (See Notes).
- When the processing time is complete, turn off the heat, remove the cover, and let the canner cool down and settle for about 5 minutes.
- Spread a dry kitchen towel on the counter, and use the jar lifter to remove the jars from the canner and place them on the towel. Keep upright, and don't tighten bands or check the seals yet. Let the jars sit undisturbed for 12 to 24-hours to cool.
- After 12 to 24-hours, check that the lids have sealed by pushing on the center. The cover should not pop up. If the lid flexes up and down, it did not seal. Refrigerate and use up within 3 months.
- Remove the screw-on bands and wash the jars. Label, date, and store your jars in a cool, dark place for 12 to 18 months. Allow 4 weeks for the pickled garlic to develop flavor. Once the jar is open, store in the refrigerator for up to 3 months. The recipe makes about 4 half-pints or 2 pints.
Notes
This is a tested safe canning recipe from the OSU Extension website. Changing the recipe may make the product unsafe for canning.
All times are at altitudes of less than 1,000 ft. Adjustments must be made for altitudes greater than 1,000 ft. Processing time at altitudes of 1,001 - 6,000 ft. is 15 minutes, and above 6,000 feet is 20 minutes.
I am happy to answer any questions, but please contact your local extension office if you need immediate canning help or answers.
Nutrition
Serving: 1ounce | Calories: 25kcal | Carbohydrates: 5g | Protein: 1g | Sodium: 240mg | Sugar: 9g