How to Grow Onions
This post may contain affiliate links, which means that I may receive a commission if you make a purchase using these links. As an Amazon Associate I earn from qualifying purchases.
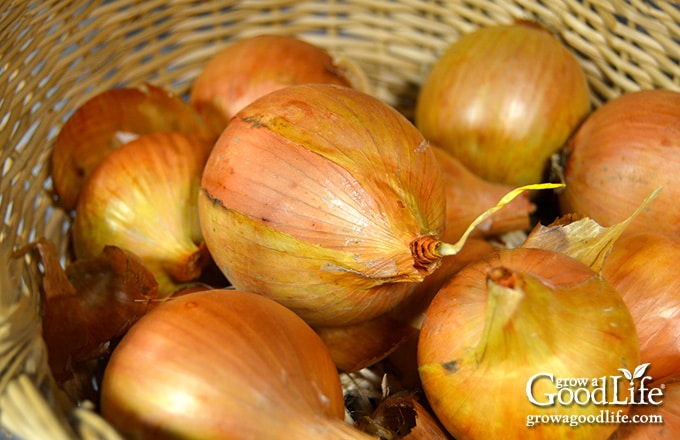
No backyard garden is complete without a crop of tasty onions. Read on for our favorite growing tips, and learn how to grow onions in your garden this season.

A little bit sweet and a little bit pungent, no pantry is complete without onions. But did you know that onions are surprisingly easy to grow in your own backyard garden?
Onions are an undemanding crop well suited to beginner and seasoned gardeners alike. With these tips, you can also grow a bountiful harvest of delicious onions this year.
From starting onions from seeds, sets, or transplants to harvesting and curing mature onions for storage, we have the growing tips sure to have you harvesting a successful onion crop this year.
About Onions
Onions (Allium cepa) are members of the allium family and are closely related to garlic, scallions, shallots, leeks, and chives. They are one of the first vegetables to be cultivated by humans to add flavor to foods.
While most people think of large onion bulbs in the grocery store, onions can be harvested at any size, with smaller, immature onions (known as spring onions) being ready for harvest after just a few weeks of growing. While onions are grown for their tasty bulbs, the onion leaves are also edible and can be used as a garnish on various dishes.
A highly versatile vegetable that is a staple in most kitchens, onions can be eaten raw in salads and sandwiches or sautéed, roasted, or cooked any which way you choose. Delicious in fajitas and used as a base in many soups, onions can be canned in salsas, frozen for convenience, or even dehydrated to make onion powder.
How Do Onions Grow?
When onions are planted, they sprout and begin to grow long, hollow leaves. Each leaf represents a ring in the onion. The plants are triggered to form bulbs once a specific combination of development, daylight length, and temperature is reached for the variety.
The trick to growing large onion bulbs is to plant the right type of onions for your area and start them early, so the plants have time to form healthy roots and green foliage before the increasing day length triggers the bulb to swell.

Onion Varieties for Your Garden
There are so many types of onions in various colors, shapes, and flavors. It can be difficult deciding which varieties to grow.
Think about how you will use your onions. Are you hoping to grow enough to store through winter? Do you need a good supply for home canning tomato sauce, salsa, or pickles? Do you just want to have a few fresh onions ready to harvest as needed for meals?
Onions range in size from large to small pearl onions. They can be red, yellow, brown, and white in color, shaped like round globes, elongated torpedos, or flattened. Some varieties, called green onions or scallions, are grown mostly for their green onion tops and won’t form large bulbs. While this guide covers bulb onions, you can learn more about growing scallions in this article: How to Grow Green Onions.
The first way to narrow down your choice of onions depends on your location. Onions are divided into categories based on how they grow and classified as long-day, short-day, or day-neutral. In addition to growing location, if you are growing onions for winter food storage, select varieties known to last a long time when stored in a cool place.
Long-Day Onions
Choose long-day onions if you live in northern latitudes in plant hardiness Zones 6 and cooler. Long-day onions are triggered to bulb when day length increases to 14 to 16 hours. Therefore, you will need to start seeds early under lights and transplant them to the garden in spring, so they have plenty of time to grow before forming bulbs.
Some common long-day onions include the following: Ailsa Craig, Bridger, New York Early, and Walla Walla Sweet.
Long-day onion storage onion varieties that last up to 6 months when stored in a cool location include Cortland, Patterson, Powell, Red Carpet, Redwing, Rossa di Milano, and Yankee.
Short-Day Onions
Short-day onions are ideal for the plant hardiness Zone 7 and warmer where the mild weather allows them to grow quickly. Short-day onions are triggered to bulb when the day length increases to 10 to 12 hours. Therefore, if your climate is mild, you can plant short-day onions in the fall, and they will grow through the winter months.
Some common short-day onions are Gabriella, Red Burgundy, Red Creole, and Vidalia. Most short-day onions will last up to 3 months when cured and stored in a cool location.
Day-Neutral Onions
Intermediate-day onions can grow in almost all climates and are prompted to bulb when the day length increases to 12 to 14 hours. Common day-neutral onions for fresh eating are Candy, Red Long of Tropea, and Monastrell. While day-neutral Cabernet, Calibra, and Red Long of Florance are good for storing too!
Tips for Growing Onions
The first step to growing your own onions is to decide whether you want to plant onions from seeds, transplant purchased seedlings, or from onion sets, which are immature onion bulbs.
- Onion Seeds: If you intend to grow your onions from seed, you will have a wider variety to choose from than sets and transplants. You will need to start seeds early indoors, so the seedlings have plenty of time to grow before transplanting them to the garden. Onions grown from seed reach maturity in 100 to 120 days. Onion seeds are only viable for 1 or 2 years. So be sure to start with fresh seeds each season.
- Onion Transplants can be purchased online or in your local garden centers. If you buy seedlings in garden centers, they may be sold in bundles or seedling flats the same way as other garden transplants. If you are ordering online, the plants will be shipped in a bunch or bundle in early spring. You will need to order early as they usually sell out.
- Onion Sets are small onion bulbs that were started from seed in the previous season and then forced to go dormant and placed in storage until the following spring. Onion sets are often sold by the pound in early spring, either loose or in packages. While sets can be more expensive than seeds, they are easier to plant and faster to grow, maturing in 60 to 80 days. You may end up with a few duds or onions that bolt or go to seed prematurely. It also may be difficult to know what type of onion you are growing. Most often, the variety is limited to generic yellow, orange, or white.
Whether you are starting onions from seed, transplants, or sets, here are all the steps you need to know to grow your own onions.
When to Grow Onions
Onions can be planted in early spring as soon as your soil is workable or about 4 to 6 weeks before your last spring frost date (You can look yours up here by zip code: PlantMaps.com).
If you live in a colder region with a short growing season, onion seeds should be started indoors 8 to 10 weeks before your last frost date and then transplant hardened-off seedlings to the garden.
Onions are the first crop on my seed-starting schedule. I like to start onion seeds in February to give them plenty of time to grow into healthy transplants. You can learn how to make a seed starting schedule for your growing area at this article: How to Make a Seed Starting and Planting Schedule.
Onion sets can be planted outdoors in early spring when temperatures are cool but not cold. Plant as early as 4 to 6 weeks before your area’s last spring frost date. As cold-hardy vegetables, onions can withstand light frosts, with mid-March to mid-April being an ideal time to plant sets in most regions.
Best Planting Location
When selecting the best place to grow your onion crop, choose a sunny location with loose, well-drained soil with a pH of between 6.0 and 6.8. Onion bulb size is directly correlated to the amount of sun each plant receives, so sunny locations will produce bigger bulbs. Likewise, densely packed, heavy clay soil will inhibit bulb growth, so opt for looser, sandy soil when available.
Also, when selecting an area for your onions, pick one where no alliums, such as onions, garlic, chives, and leeks, have grown in at least 3 years. This will ensure that the soil has had sufficient time to replenish its nutrient levels and reduce the risk of disease or infection from previous seasons. Learn more about crop rotation and how it helps maintain healthy soil.
Before planting your onions, enrich your soil with several inches of compost or rich, organic matter, mixing your compost well into the top few inches of your garden soil. Prepping your beds this way will improve soil structure and ensure that your developing onions have access to the vitamins and nutrients they need to grow.
How to Start Onion Seeds Indoors
Because of their long growing season, if you intend to grow onions from seeds, it is often best to start seeds indoors in early spring, approximately 8 to 10 weeks before your last frost date (look yours up here: PlantMaps.com).
Start with fresh seeds, and follow this tutorial for the step-by-step details: How to Start Onion Seeds Indoors.

How to Transplant Seedlings
Onion seedlings are ready to transplant when they are about the size of a pencil and 5 inches tall. Since bundled onion seedlings are dormant, you can transplant them without hardening them off first.
However, if you purchased onion seedlings in flats from a plant nursery or started seeds indoors under lights, you will need to harden them off, so they adjust to the outdoor environment. Follow the steps detailed in this article: How to Harden Off Seedlings.
After your seedlings have adapted to the outdoors, they are ready to plant in the garden.
First, get your garden bed ready for planting. If the weather is dry, water the garden bed the day before you transplant. You can trim the onion leaves to 2 to 3 inches for easier transplanting and tidier-looking plants.
Remove the seedlings from the container, carefully tease the roots apart, and plant one at a time, so the roots don’t dry out.
Plant about 1 to 2 inches deep, ensuring that roots are well covered. Space the seedlings 4 to 6 inches apart, depending on the variety (check the seed package for recommended spacing). I use a fork or small tool to transplant onion seedlings. I pull the soil forward, place the onion seedling in the hole, and gently push back the soil.

Once the seedlings are transplanted, water the bed gently by hand or use a gentle sprinkle with a hose. Keep the soil moist until the plants become established, and then reduce waterings to encourage the roots to grow deep.
How to Plant Onion Sets
Onions grown from sets will reach maturity in about half the time as onions grown from seed, making sets an excellent option for gardeners in colder climates.
When buying onion sets, choose smaller bulbs that look healthy, and feel firm, with tight skins. Avoid onion sets that are shriveled or moldy. Also, skip the larger bulbs because these are more likely to bolt or go to seed instead of growing into onions.
Similar to transplanting onion seedlings, onion sets are planted outdoors in early spring when the ground is workable, and the soil temperature is around 45˚F.
After preparing the garden bed, plant onion sets about 1 inch deep and 4 to 6 inches apart in rows 12 inches apart. Water well and keep the soil evenly moist until the plants become established.

Direct Sowing Seeds
If you live in a mild area, you can directly sow seeds in the garden in early spring or fall and grow onions through the winter.
In early spring, direct sow seeds as soon as the soil can be worked. Scatter seeds in a band in your prepped garden beds, loosely cover them with 1/4-inch of soil, and water in well. The seeds will germinate once the soil temperature warms to 50˚F and above, so don’t worry if your seeds don’t sprout immediately.
As seedlings germinate and grow, thin the plants, allowing about 2 inches of space between the plants. Onions should be thinned once more as they grow, allowing for 4 to 6 inches of spacing for proper bulb formation.
For a head start on next year’s onions, onion seeds can also be directly sown outdoors in late summer, approximately four to six weeks before the first frost of autumn. While onions sown in autumn will go dormant in the winter, they will perk back up in springtime, resulting in an onion crop ready for harvesting in spring to early summer.
How to Care for Onions
Onions are a hardy vegetable and relatively easy to maintain once the plants become established. Here are a few key steps to get the most out of your onion patch.
Watering
Because onions have shallow roots, they benefit from thorough, deep, and consistent watering, encouraging bulbs to grow larger and sweeter. Therefore, onions should be watered well when the top inch of soil feels dry to the touch, taking particular care to water when temperatures are warm to help prevent the plants from bolting or going to seed. Stop watering once the tops flop over, which means the onions have matured and are ready to harvest.
Mulching the Soil
Once the plants become established, add a 3 to 4-inch layer of organic mulch to help hold in moisture and prevent weed growth. Spread shredded leaves, weed-free straw, or pine needles on the bed, leaving several inches around the stems. Learn more about using organic mulch in your vegetable garden. Learn more about How Organic Mulch Helps Your Garden.
Keeping Up with the Weeds
Keep your onion beds well-weeded throughout the growing season to prevent competition for valuable nutrients in the soil. While mulching helps cut down on weeds, be sure to pull any that manage to sprout. You can learn more about weed management in this article: How to Control Weeds Naturally.
Fertilizing
As heavy feeders, onions benefit from regular fertilizing throughout the growing season. Choose a nitrogen-rich organic fertilizer, such as urea, kelp or fishmeal, and apply it following the manufacturer’s instructions every few weeks for bigger, tastier bulbs. When your onions begin to mature and push themselves above the soil, regular fertilizing should cease.
Managing Pests and Diseases
Knowing the potential pests and diseases that can affect your crop is important. Pests and diseases can damage the onion plants and reduce their yield and quality. Here are some common pests and diseases to watch for and some troubleshooting tips.
Common pests include bulb mites, cutworms, leaf miners, onion maggots, and onion thrips. While a severe infestation will ruin the crop, most pests that feed on the leaves won’t kill the plants, but they may destroy some of the foliage and spread fungal diseases. You can use row covers to prevent the pests from finding your plants. If you do see signs of damage, remove the affected leaves.
The most common diseases that affect onions include botrytis, downy mildew, pink root, purple blotch, and white rot. Once infected, the disease will kill your onions. Destroy any infected plants and avoid planting alliums in that garden bed for at least 2 years.
To help prevent fungal diseases, improve airflow by adequately spacing the plants, controlling weeds, and growing in healthy soil that drains well in full sun to partial shade.
How to Harvest and Preserve Onions
Onions can be harvested at any size as needed for meals, with smaller, immature ones (known as spring onions) being ready for harvest after just a few weeks of growing. Here are several ways to preserve your onions:
How to Cure and Store Onions
Let the bulbs grow and mature fully for the onions you plan to store. Onions are finished growing when the bulbs are well formed, and the leaves begin to turn yellow and fall over.

To harvest and cure your onions:
- Wait until a hot, dry day and carefully pull up bulbs so as not to damage delicate flesh and cause bruising.
- Dust off as much soil as possible, and then lay out your onions to cure with their leaves attached.
- Ensure proper airflow and check that your onions aren’t touching.
- You can learn more in this article: How to Harvest, Cure, and Store Onions.
During the curing process, the roots will shrivel up, and the leaves will die back, sealing off the tops and bottoms of your onion bulbs and reducing the chance of rot. Additionally, the skins will tighten and form a protective barrier for improved storage capability.

After your onions have cured, trim the leaves, shake off excess soil taking care not to remove the onions’ papery skin, and then store your onions in a cool, dry location.
As a general rule of thumb, sweet onions don’t store as well as less sweet varieties. Additionally, if any onions produced a flower stalk during the growing season, they won’t last in storage and should be eaten immediately.
Under the proper conditions, most onions can store well for 2 to 3 months, while storage onions can last up to 6 months when properly cured and stored in a cool area or root cellar.
Dehydrating Onions
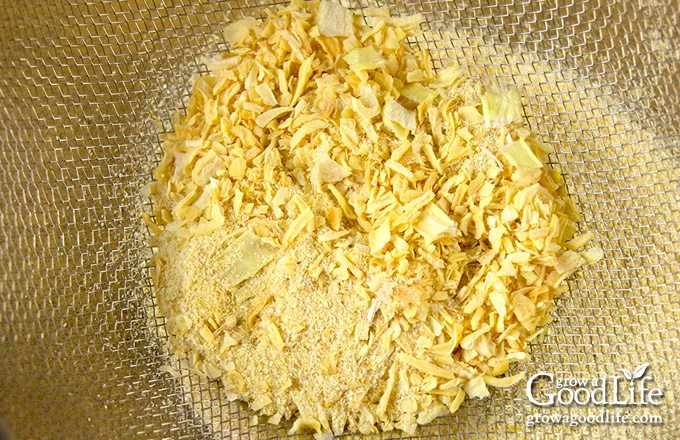
If you had a particularly abundant harvest, or if your onions start to get soft or sprout while in storage, dehydrating onions is an efficient way to extend the shelf life of the bulbs. Learn How to Dehydrate Onions for Food Storage in this article.
Dehydrated onions can be stored in pieces or broken down into onion flakes and onion powder with a food processor, high-quality blender, spice grinder, or coffee grinder.
Canning Onions
A lot of the onions I grow are used to add flavor to canning recipes, such as:
- Seasoned Tomato Sauce
- Zucchini Relish
- Bread and Butter Pickles
- Zesty Salsa
- Tomatillo Salsa Verde
- Cucumber Relish
- New England Piccalilli
- Pickled Red Onions
Freezing Onions
Onions can also be chopped and frozen. Frozen onions have a soft texture, but the flavor is all there. Peel the onions, trim the root and ends, and slice or chop into pieces. Spread the onions in a single layer on parchment-lined trays, and freeze until solid. Then pack the frozen onions into freezer containers. This helps prevent the pieces from sticking together and will allow you to grab a handful when needed for meals.
—
I hope this guide encourages you to grow onions this year. Growing your own onions at home is incredibly simple and rewarding, from planting seeds in springtime to harvesting your onions in autumn for winter storage.
In addition, you will be able to cultivate a surprising array of different onions varieties that you would never be able to find in the produce section of your grocery store.
This year, why not try growing several different types of onions, sweet, white, red, or yellow, to see which onions you prefer and which grow best in your garden? Whatever you choose, you will surely find success growing these easy and tasty bulbs.
Good planning is key to a successful vegetable garden
Whether you are new to growing your own food or have been growing a vegetable garden for years, you will benefit from some planning each year. You will find everything you need to organize and plan your vegetable garden in my PDF eBook, Grow a Good Life Guide to Planning Your Vegetable Garden.

I just bury the roots when I transplant my onions. Will they do better if I bury them deeper? Also can you trim the tops without hurting them?
Karen, Regarding transplanting onions, as long as you keep the plants watered well to prevent the roots from drying out, they should be fine. Since the top of the soil tends to be warmer and dries out quicker, burying the onions several inches deep helps to ensure moisture retention and protects the roots. As for trimming the tops of the onions, I generally don’t recommend it. The tops play a crucial role in photosynthesis, allowing the onion to generate energy and grow. Trimming the tops can hinder this process and may negatively affect the overall growth and development of the onions. It’s best to leave the tops intact for optimal results.
Great article! Growing onions is a fantastic way to have a fresh and healthy supply of this versatile vegetable right in your own backyard. The step-by-step instructions provided in this article are clear and easy to follow, making it a great resource for both experienced and novice gardeners.
I particularly appreciated the tips on selecting the right type of onion for your garden and the advice on when to plant and how to care for them. The detailed information on soil preparation and watering requirements was also very helpful.
I’ve grown onions before, but I learned a few new things from this article that I will definitely be putting into practice this year. I especially liked the idea of using onion sets, which I haven’t tried before, and I can’t wait to see the results.
Thank you for sharing your knowledge and expertise in onion gardening. This article is a great resource for anyone who wants to grow their own onions and enjoy the satisfaction of harvesting fresh, homegrown produce.