Simple Seed Germination Test
This post may contain affiliate links, which means that I may receive a commission if you make a purchase using these links. As an Amazon Associate I earn from qualifying purchases.
Do you have old seeds from last year and wonder if they are still good? Try this easy seed germination test to find out if they are viable. See how to test your old seeds so you don’t waste time and effort sowing seeds that won’t grow.
As I eagerly wait for spring, and the stores begin to roll out their spring gardening and seed starting supplies, I find myself drawn to the seed displays. Before I know it, I usually have a few packages in my hands to purchase. I often end up with duplicate packages of seeds in my seed box.
How Long Will Seeds Last?
Luckily, depending on how the seeds are stored, most seeds can last several seasons or more. Seeds do lose potency over time and will have a decreased germination rate the older they are. Some seeds like onions and parsnips are not likely to sprout a second year. Even if they do germinate, they may not have the vigor to produce healthy plants like when they were new. When in doubt, it is best to purchase fresh seeds rather than jeopardize your crop’s success.
The seed viability list below will give you a general idea how long vegetable seeds will last:
- 1 Year: Leeks, onions, parsnips, and scallions
- 2-3 Years: Arugula, beans, carrots, celeriac, celery, corn, eggplant, lettuce, okra, peas, peppers, and spinach
- 3-4 Years: Artichokes, beets, broccoli, Brussels sprouts, cabbage, cauliflower, collards, kale, kohlrabi, mustard, pumpkin, radish, rutabagas, summer squash, Swiss chard, and winter squash
- 5-6 Years: Cucumbers, melons, tomatoes, turnips, and watermelons
Use this chart just as a guideline though. I have experienced onion seeds still sprouting after three years and lettuce seeds only lasting over one year. It all depends on the quality of seeds and how they are stored.
How to Store Seeds
Seeds will last longer if they are stored in a cool, dry, and dark location. Ideal temperatures are between 40 and 50 degrees F. I place my seeds in zipper bags and store them in plastic shoebox totes in a dim corner of the basement away from the furnace. If rodents are a problem, you can store seed packets in sealed glass jars.
How to Germinate a Seed
Seeds are dormant or inactive until conditions are right for germination. For a seed to sprout, it needs water, oxygen, and warmth. Some seeds also need light. The process of germination begins once a seed is exposed to the proper conditions. First, it absorbs moisture and oxygen, which triggers the embryo to grow and the seed coat to break down. Once this happens, the seed can draw in larger amounts of water and oxygen to grow roots, or radicles, followed by the shoot or plumule that contains the leaves and stem.
How to Do a Seed Viability Test
If you have older seeds, you may wonder if they are still good. Instead of taking a gamble, sowing the seeds, and waiting to see whether they will sprout, you can test them to see if they are viable using a seed germination test. To test seeds, we are going to germinate seeds in a paper towel, providing the environment it requires to sprout, including moisture, air, and warmth. Follow these steps to test your seeds to see if they are viable:
Step 1: Gather Your Supplies
For each type of seed you are testing, you will need plain paper towels cut in half, plastic zipper bags, a bowl of water, a marking pen, and seeds to test.
Step 2: Germinate Seeds in a Paper Towel
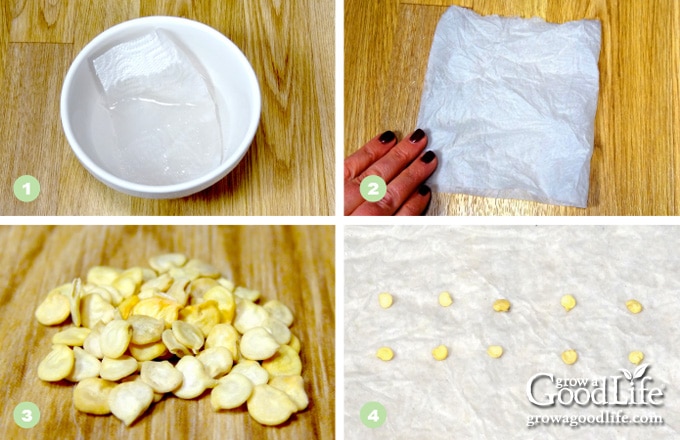
- Moisten a paper towel by dipping it into the bowl of water and squeezing out the excess moisture. The paper towel should be damp, but not dripping wet.
- Spread the damp paper towel out on a clean surface and fold in half.
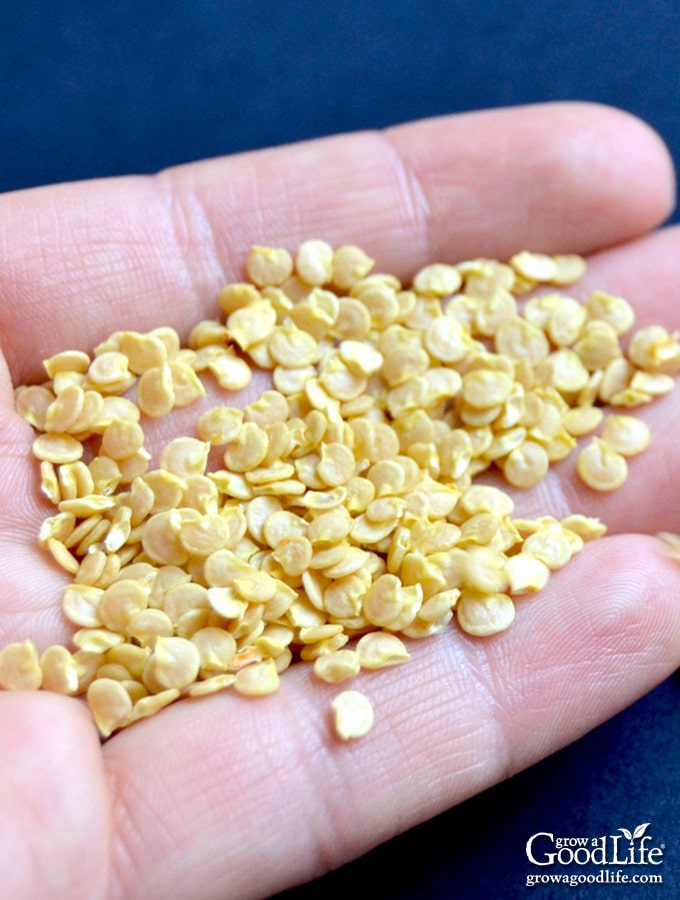
- Select a minimum of ten seeds from the pack you are testing.
- Spread the seeds out on one-half of the towel, so they are not touching.
Step 3: Package Up the Seeds
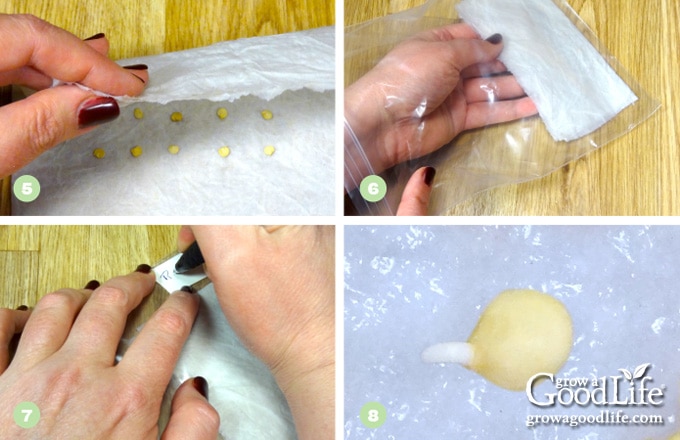
- Fold the damp paper towel in half sandwiching the seeds between the two layers. Press down gently to make sure seeds come in contact with the moist paper towel.
- Place the paper towel and seeds in a plastic bag and seal it to keep it from drying out.
- Mark the bag with the date and variety of seed. Place the zipper bag in a warm place away from direct sunlight. Most seeds germinate in temperatures between 70 and 75 degrees F.
- Every three days, check to see if the seeds have sprouted. Re-moisten the paper towel if it dries out.
Step 4: Assess the Seed Germination Percentage
The estimated number of days for germination will be noted on the seed packet. After the predicted germination period, count the seeds that successfully sprouted and calculate the percentage that germinated out of the total tested. Example: if 9 out of 10 seeds sprout, you have 90% germination rate. These are good seeds that should grow healthy plants.
If the germination is greater than five sprouted seeds (50% percent) I will use the seeds knowing that I will have to pre-sprout the seeds or sow a little heavier to make up for the low germination rates.
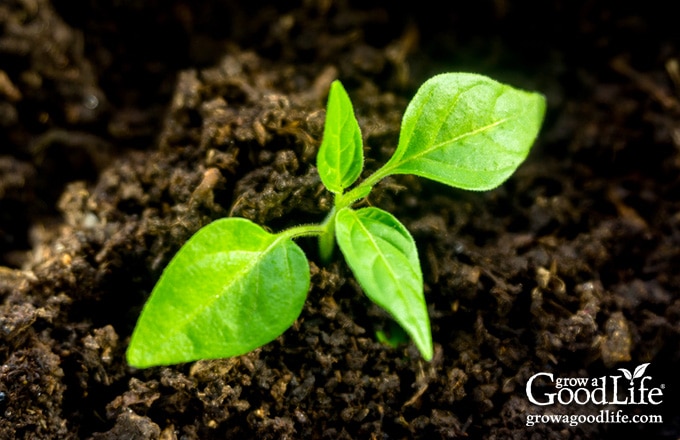
I take the test further by planting the seeds that germinate so I can observe the seedlings as they grow. Poor quality seeds will either die quickly or produce weak, abnormal seedlings. If the plants are slow to grow or not healthy looking, I will throw them out and buy a fresh package. I want my seedlings to have the best shot at success.
After this simple, quick test, you will know if you need to buy new seed because the leftover seed will not sprout, or if you need to plant heavier to make up for the reduced viability.
Now that you have tested your seeds, you are ready to make a seed list and plan your garden.
You May Also Like:
- Tips for Buying Seeds for your Vegetable Garden
- How to Make a Seed Starting and Planting Schedule
- 10 Steps to Starting Seedlings Indoors
Good planning is key to a successful vegetable garden
Whether you are new to growing your own food or have been growing a vegetable garden for years, you will benefit from some planning each year. You will find everything you need to organize and plan your vegetable garden in my PDF eBook, Grow a Good Life Guide to Planning Your Vegetable Garden.

hi i just want to ask you could i plant flower annual seeds this way
thanks
mary monaghan
Mary, Yes, you can.
Thanks for this excellent information. I will try this method on some seeds I have had for awhile.
I come from a long family history of planting great big gardens also my great grandparents migrated from Durant, Oklahoma to California. They were fruit pickers. When my mom and her cousins were younger our G.G’s would go from California to Oregon Washington back to California picking fruit taking all the kids with them to help. The orchards was our home and the canal banks were our highways. Weird as this may sound it was my great grandma’s first love. We were a great big family and always somewhat lived together or not far from each other. Our gardens growing up were farely big and not none of it went to waist. However now I am 38 and living on my own with my husband and disabled mother in law in Utah and am attempting to grow my own garden this year. See I was younger so I played around in our family garden and picked the veggies when they were not ready getting yelled at so I never really had to pay attention my older cousins were the ones that did the work, I played. So you can see where this is headed I know how but I don’t know how!!!. So long story short….all your tips are really helping me to grow my very own…..Your tips are great and very helpful….
Thank You
Camee, Thank you for your comment. It made my day to hear your story of growing up with a large family who gardened. I did the same when I was a child. I played around the garden while my family worked. So I don’t feel I knew much when I started gardening on my own. I read and learned as I went along. I am still learning over 30 years later.